How To Refinish Your Hardwood Floors: Sandpaper and Wood Scrapers
We continue our ongoing series which details just what you need to know if you want to refinish your hardwood floors. This week we're covering everything you need to know about sandpaper and wood scrapers.
Establishing a Grit-Sanding Sequence
Okay, so, you’ve got all of the necessary tools to begin the job. Now what?
Well, now we must establish a grit-sanding sequence that will work best on your floors. We must also determine how many areas you will not be able to reach with the sanding equipment, and how to make sure we are properly equipped to handle those areas.
A key factor to note when starting a project is that we must make sure we start with the correct level of aggressiveness when it comes to our sandpaper. For instance, on some projects, 50 grit may be too dull to start with, however, on other projects 50 grit may be perfect.
This is something I can’t really tell you or educate you on unless I see your floors in person. Every floor is very different. This is where the wisdom that I've built over the years helps. If the floor has NOT been waxed and is in fairly okay condition you should be able to easily start with a 50 grit paper on the edger and belt sander.
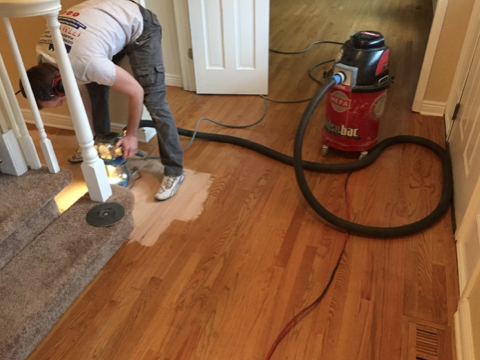
To show you an example, this is a project we recently did; on this project, we also started with 50 grit on both the big machine and the edger.
As you can tell, this floor has got it all as far as wear and imperfection go - scratches and drum marks all over the place. Drum marks are what we call those lines running perpendicular to the rest of the floor. This is caused by improper use of the belt sanding machine.
What Sanding Grit Do I Finish With?
So, we have our starting grit established. What’s next? Well, we must determine our grit sequencing on what grits we will sand with after the 50, and also what grits we will finish with. For this, I have attached this helpful chart in order to help us understand better what a proper grit jump would be, and what an improper grit jump would be.
From this chart, you can tell that if we start with 50 grit we could skip 60, and then sand a second pass with 80 grit on both machines, skip 100 and go to fine sanding on the buffer machine with 120 grit. However, if your floors are really rough you may want to start even lower, let’s say 36 grit.
If you need to start with 36 you’ll have to then go to 50 and finish the process just like we described above. You cannot grit skip from 36 straight to 80, although some professionals may be able to do so because of certain drum pressure settings on their machines and other factors.
It is never recommended for a novice to try and grit skip throughout the sanding sequence. This can cause a variety of issues, the main ones simply being that you will have large scratches and lines running through the entirety of your floor because the 80 grit will not sand out 36 grit marks that the lower grit has left behind.
How to Sand in Tighter Spaces
So we have our sandpaper selection established for the big sanding machine, edger, and buffer. We will sand on both the big machine and edger with 50 grit, and then 80. We will then buff the floor with 120 grit for our final sanding pass.
However, we still have that handheld Random Orbit sander; what do we do with that? We will need to use that to take out edger scratches that the edger machine will leave behind, even after the 80 grit pass. For this, we will need 80 grit for the handheld RO sander. We must also touch base on how much flooring you may not be able to reach with your sanders, which greatly depends on what areas you are sanding.
If you are sanding the hardwood floors in a simple square room, then the only spots that you will not reach are the corners. However, if you are also sanding hardwood flooring in kitchen areas or bathrooms, you may have quite a bit of flooring that you cannot reach behind the sink and under the cabinets.
For this, we will need either a wood scraper or a multi-tool with a triangular head and sandpaper. I’d recommend the multi-tool as it is less physical labor.
Multi-tool with triangular head piece
Hardwood Flooring Scraper


