CHICAGO HARDWOOD FLOORING BLOG
Tips and tricks for all your hardwood flooring needs by a local flooring company in Chicago.

Eco-Friendly Hardwood Flooring Options for Your Home
Eco Friendly flooring options are important for a modern home. Find out some great tips and advice on how to choose the best eco friendly flooring for your home remodeling project today.
Well hey there fellow homeowner. My name is Patrick and I have a question for you. Are you dreaming of a home that echoes sustainability without compromising on style? Look no further than this blog post! These beautiful and environmentally conscious flooring choices not only elevate your space but also contribute to a healthier planet. Let's explore five tips to help guide you towards making the best eco-conscious decisions for your home.

Species Selection for Sustainability
🌳 Tip 1: Choose Wisely, Choose Sustainably 🌳
When opting for hardwood floors, consider choosing sustainable wood species. Look for certifications like FSC (Forest Stewardship Council) that ensure responsible forestry practices. Some popular sustainable woof floor species choices are: Oak, Hickory, and Maple. Any of these wood species will make your floors a statement of environmental responsibility. If you need some more help in choosing the right species of wood, check out my other blog post here!
Finishes Matter: Go for Non-Toxic Options
🍃 Tip 2: Beauty Without Harm 🍃
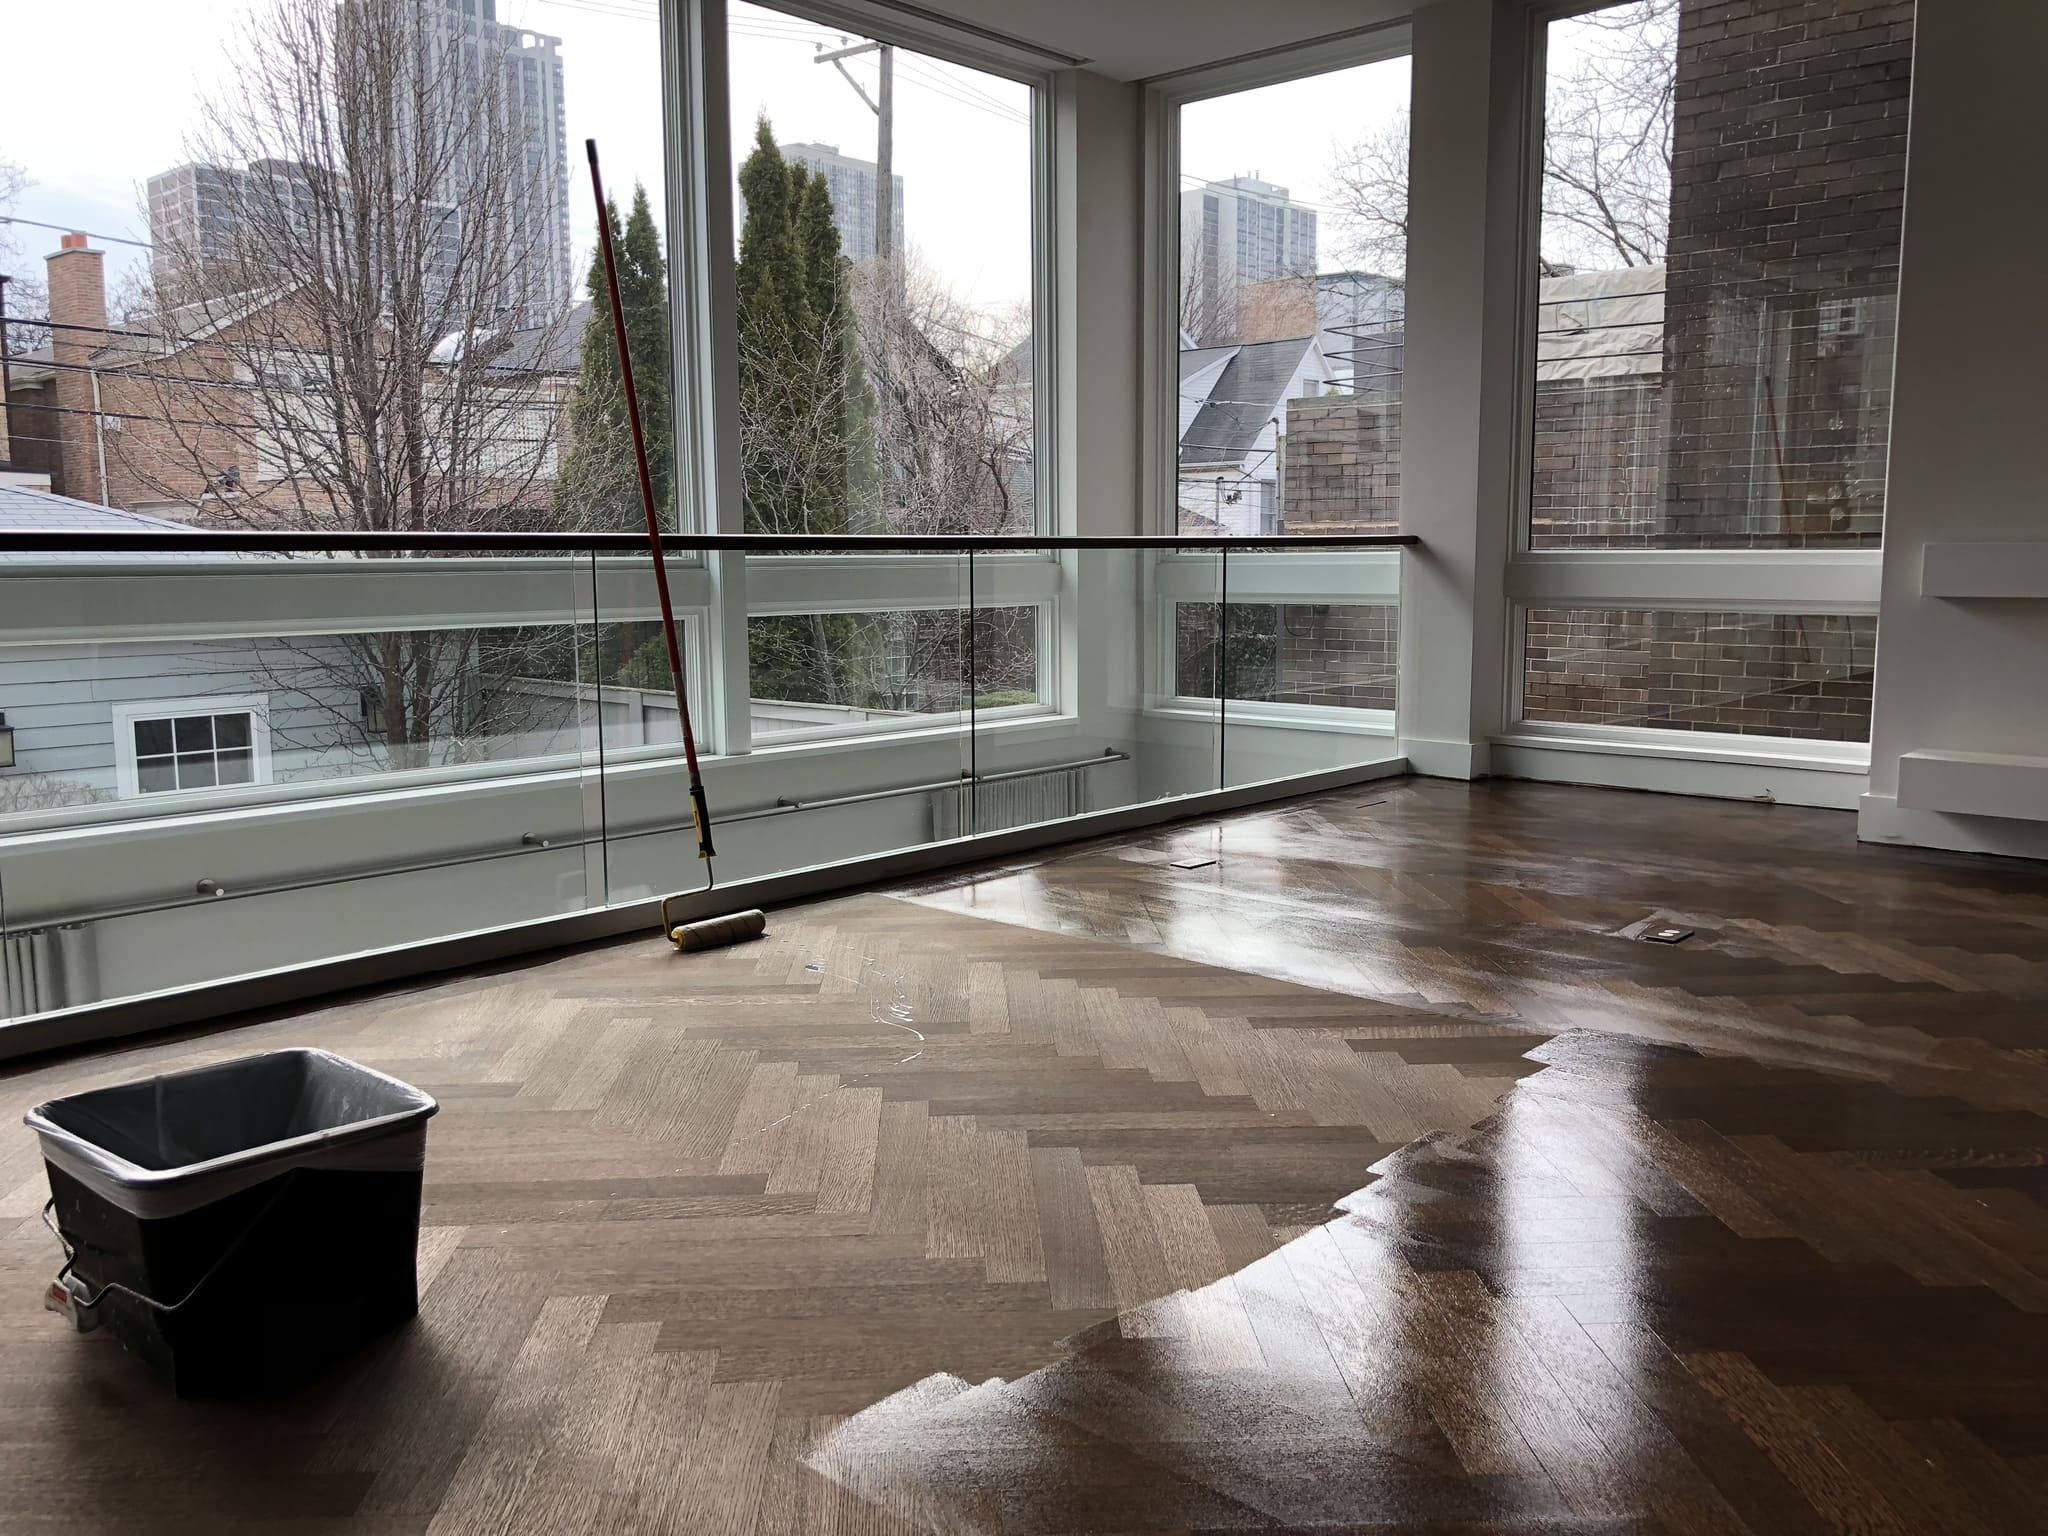
Eco-friendly flooring extends beyond the wood itself. You must be sure to always select finishes that are low-VOC or water-based to minimize indoor air pollution. Not only do these finishes contribute to a healthier living space, but they also bring out the natural beauty of the wood, ensuring your floors are both stunning and safe. Two wonderful finishes we use that are also Eco friendly are Loba (a water-based finish) and Rubio Monocoat (an eco friendly hardwax oil).

Applying Rubio Monocoat With a Trowel
Engineered Hardwood for Sustainability
🔨 Tip 3: The Strength of Engineered Solutions 🔨
Consider engineered hardwood for an eco-conscious alternative. It utilizes less solid wood, incorporating layers of sustainable materials, making it a durable, stable, and environmentally friendly choice. This innovation allows you to enjoy the elegance of hardwood without compromising on responsible resourcing. The only downside of this type of flooring compared to a solid site finished floor, is the beveled edges. Sometimes these bevels can catch and trap a lot of dirt in them, so also keep this in mind when considering this type of flooring.
Recycled Wood: A Second Life for Your Floors
♻️ Tip 4: Embrace the Past, Redefine the Present ♻️
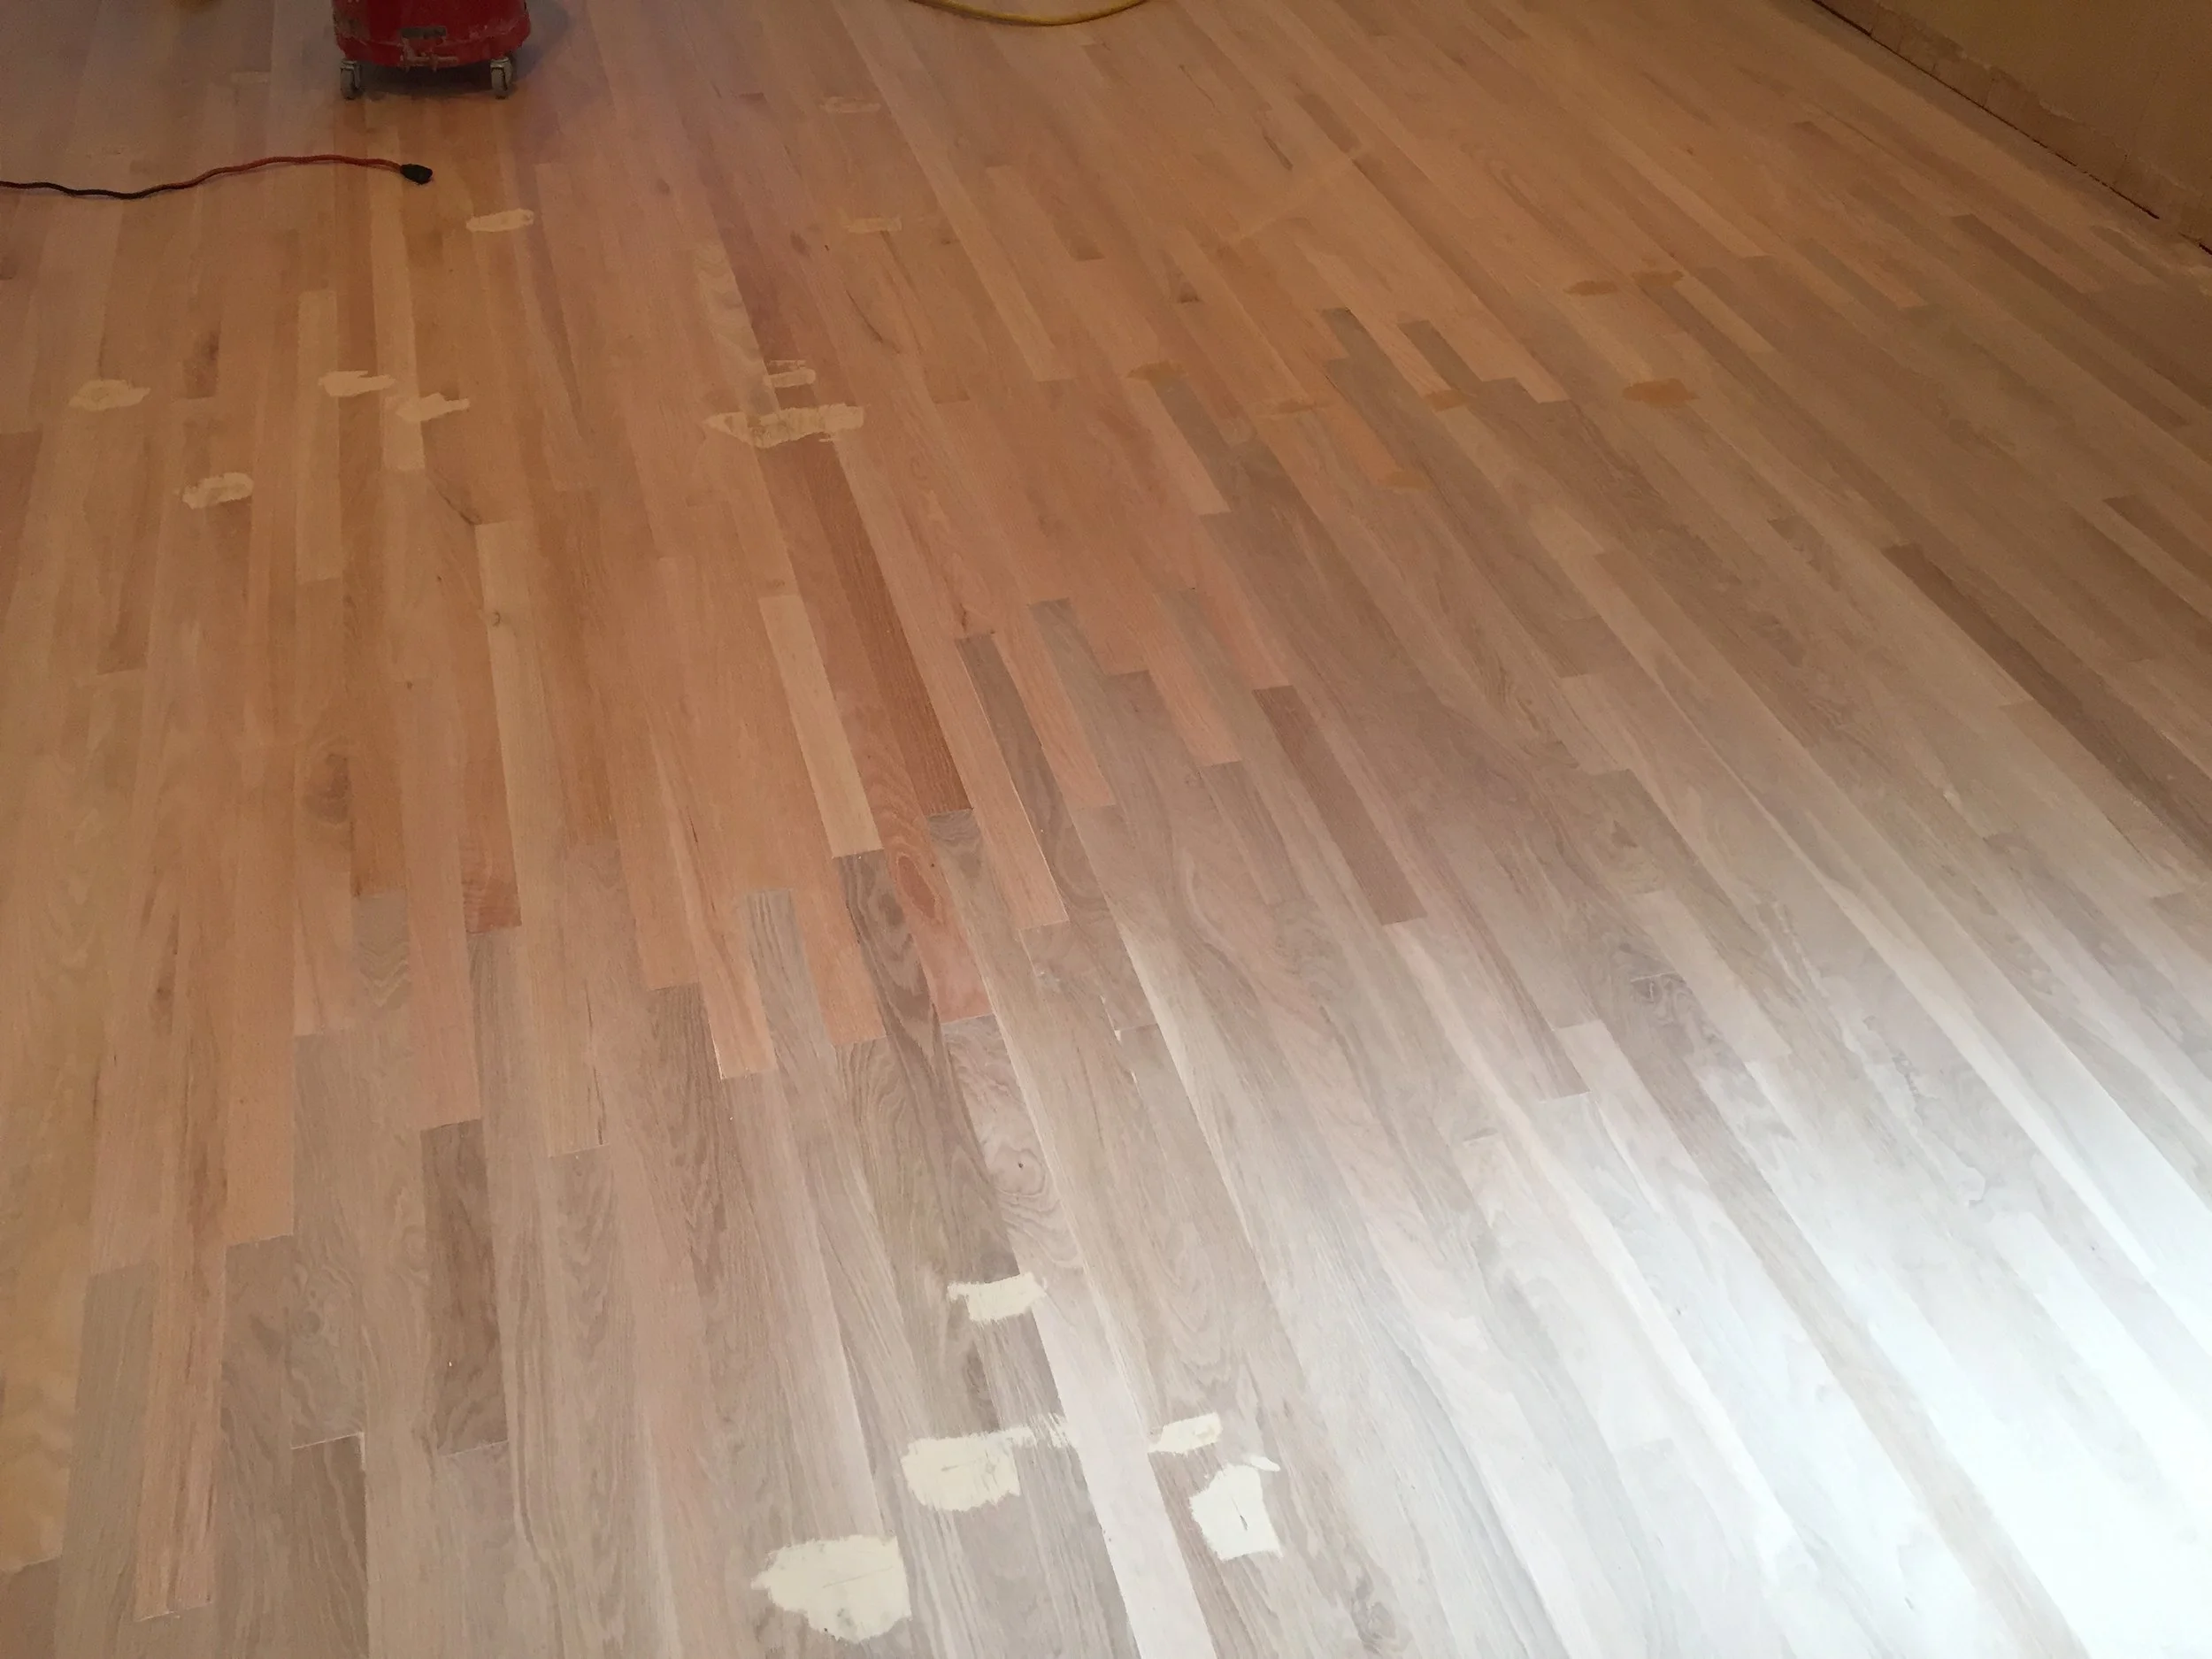
Give your old wood a new purpose by opting to refinish the floors that you currently have inside of your home. Many old floors can be fully salvaged through refinishing. These old refinished planks bring history and character into your home while reducing the demand for new timber. It's not just a floor; it's a story beneath your feet.

Floor Sanding in Progress
Local Sourcing and Installation Expertise
🌏 Tip 5: Think Global, Source Local 🌏
Reducing your carbon footprint is a crucial step in creating an eco-friendly home. Choose a local supplier to minimize transportation emissions, and don't forget to hire experienced professionals for installation. Their expertise ensures that your beautiful, sustainable floors are laid with precision, enhancing both longevity and aesthetics.
Conclusion: Let’s Transform Your Home!
Ready to make the leap to eco-friendly hardwood floors? Our team is here to guide you through the process, from choosing the perfect wood to ensuring a flawless installation. Together, let's create a home that not only captivates but also cares for our planet. Contact us today to begin your journey towards a greener, more stylish space!

Patrick's Quick Guide to Selecting Your Ideal Hardwood Flooring
There's a lot to consider when it comes to picking out the right hardwood flooring species for your home. Join us as we dive into the specific characteristics that make each species stand out from the crowd.
Well hey there fellow homeowner! My name is Patrick, and I'm thrilled to be guiding you through the fascinating journey of choosing the perfect hardwood flooring for your home. Selecting the right flooring can seem overwhelming with so many beautiful options out there. That's why I've put together this quick but detailed guide to help you navigate these choices with confidence and ease. So, grab a cup of coffee and let's get into this wonderful world of hardwood flooring!
Understanding Hardwood Flooring

Installing a White Oak hardwood floor mid-process
As a passionate advocate for the timeless beauty of hardwood floors, I believe in the transformative power they hold. They're not just floors; they're a canvas for your life's memories. In this post, I'll explain what makes hardwood an outstanding choice, delve into its benefits, and show you the main wood choices that are available for a new hardwood floor.
Choosing the Right Hardwood Flooring Species
Each species of hardwood flooring has its own unique story, texture, and character. Let me walk you through some of my favorites, and the main options I’d recommend considering for your own home:
Oak: Classic Elegance

Close up of a raw Red Oak floor after just freshly being sanded with the Lagler Trio
Oak is a personal favorite of mine for its versatility and strength. Its grain patterns range from subtle to bold, making every Oak floor uniquely charming. Ideal for both contemporary and classic interiors, it's as resilient as it is beautiful, perfect for any area of your home. Oak also has incredible sanding and staining qualities. This wood looks beautiful whether you finish it naturally, or apply a stain to it.
Keep in mind, that with this wood, you have another subset of options to choose from. If you choose Oak for your home as most people do, you will still be left with the choice of deciding whether you’d like Red Oak floors or White Oak floors. I’ve got a blog post that can help you figure out exactly which type of Oak you need right here!
Maple: Light & Modern

Maple hardwood floor finished with Loba Invisible
For those who love a clean, modern look, Maple is a top contender. Its smooth grain and light color bring a bright and airy feel to any room. Don't be fooled by its delicate appearance; Maple is incredibly durable, standing up well to the daily hustle and bustle of most homes. Maple is by far harder and more durable than Oak.
Another key point to consider about Maple, is that it does NOT stain well. Sure, you can apply stain to Maple, and we have many times before. But, it is a very unique look that most homeowners do not care for. Maple can appear to be “blotchy” when stained, so if you are leaning in this direction, please take the time to research exactly how your Maple will look after the stain color you choose.

Fully stained & finished Maple floor (I chose a stained Maple picture so you can see the “blotchy” that everyone describes)
Brazilian Cherry: Bold and Exotic
Freshly finished Brazilian Cherry hardwood floor, finished with Loba Supra 2k
If you're looking to make a statement, look no further than Brazilian Cherry. Its deep, rich hues and intricate grain patterns are absolutely mesmerizing. Perfect for creating a warm, inviting atmosphere, it's as sturdy as it is striking. This wood is extremely tough & durable, it will hold up perfectly to any occasion.
The main drawback of this wood, however, is that it is very RED. The longer that the floor sits after being finished, whether it be with a water or oil based finish, this wood floor species will continue to turn a deeper and deeper red color.
Walnut: Timeless Sophistication

Preparing a Walnut floor for the final coat of floor finish
There's something undeniably luxurious about Walnut. Its rich, dark tones and swirling grain patterns add elegance and depth to any space. It's a superb choice for those seeking sophistication and durability in equal measure.
Usually, this wood tends to be a bit softer than the other ones that I listed here today. Walnut is still plenty durable, just simply not as hard as some of the others. The trade off for the higher price and softer floor, though, is a floor that will surely be a conversation started for anybody that enters your home. This wood looks very unique, very high end, and is very difficult to source in large quantities.
Other Considerations for First-Time Buyers
At the end of the day, choosing the right hardwood flooring species involves considering various factors such as durability, aesthetics, and personal preferences. Oak offers classic elegance and versatility, while Maple provides a modern and clean look. Brazilian Cherry brings exotic charm, and Walnut delivers timeless appeal. By understanding the characteristics of each hardwood flooring species, you can make an informed decision that aligns with your home, budget, and lifestyle.
Conclusion: Making Your Decision
Take your time, explore samples, and consider factors like durability, maintenance, and color compatibility with your existing decor. Ultimately, the perfect hardwood flooring species will not only enhance the beauty of your home but also provide long-lasting comfort and value.
If you ever have questions or need some advice, feel free to reach out. I'm here to help you find that perfect hardwood flooring that you'll love for years to come.

Removing Floor Glue: A Step-by-Step Guide for Safe and Effective Removal
A step-by-step guide on how to safely and effectively remove floor glue, with a list of necessary tools and recommended glue remover products. The post also emphasizes the importance of proper glue removal and offers tips for maintaining the newly cleaned floor.
The Importance of Proper Floor Glue Removal
Proper floor glue removal is important for a few reasons. First and foremost, it ensures that the surface is clean and ready for new flooring installation or refinishing. Any remaining glue residue can interfere with the new flooring or finish adhesion, leading to potential issues down the road.
Also, removing floor glue can improve the appearance of the surface, as the leftover adhesive can create an uneven or discolored appearance. Proper removal also helps to maintain the integrity of the subfloor, as failing to remove all of the adhesives can weaken the surface and compromise its stability over time. Therefore, taking the time and effort to remove floor glue properly can save you time, money, and some big headaches in the long run.
Safely and Effectively Removing Floor Glue
Safely and effectively removing floor glue involves several steps, including preparing the area, choosing the right tools and products, and following a systematic process for removing the glue. First, it's important to prepare the area by removing any furniture or fixtures and covering nearby surfaces to prevent damage.
Next, the right tools and products should be chosen, such as a floor scraper, heat gun, and a quality glue remover for floors. The process typically involves applying the glue remover, allowing it to penetrate the glue, and then using a floor scraper to remove the softened glue.
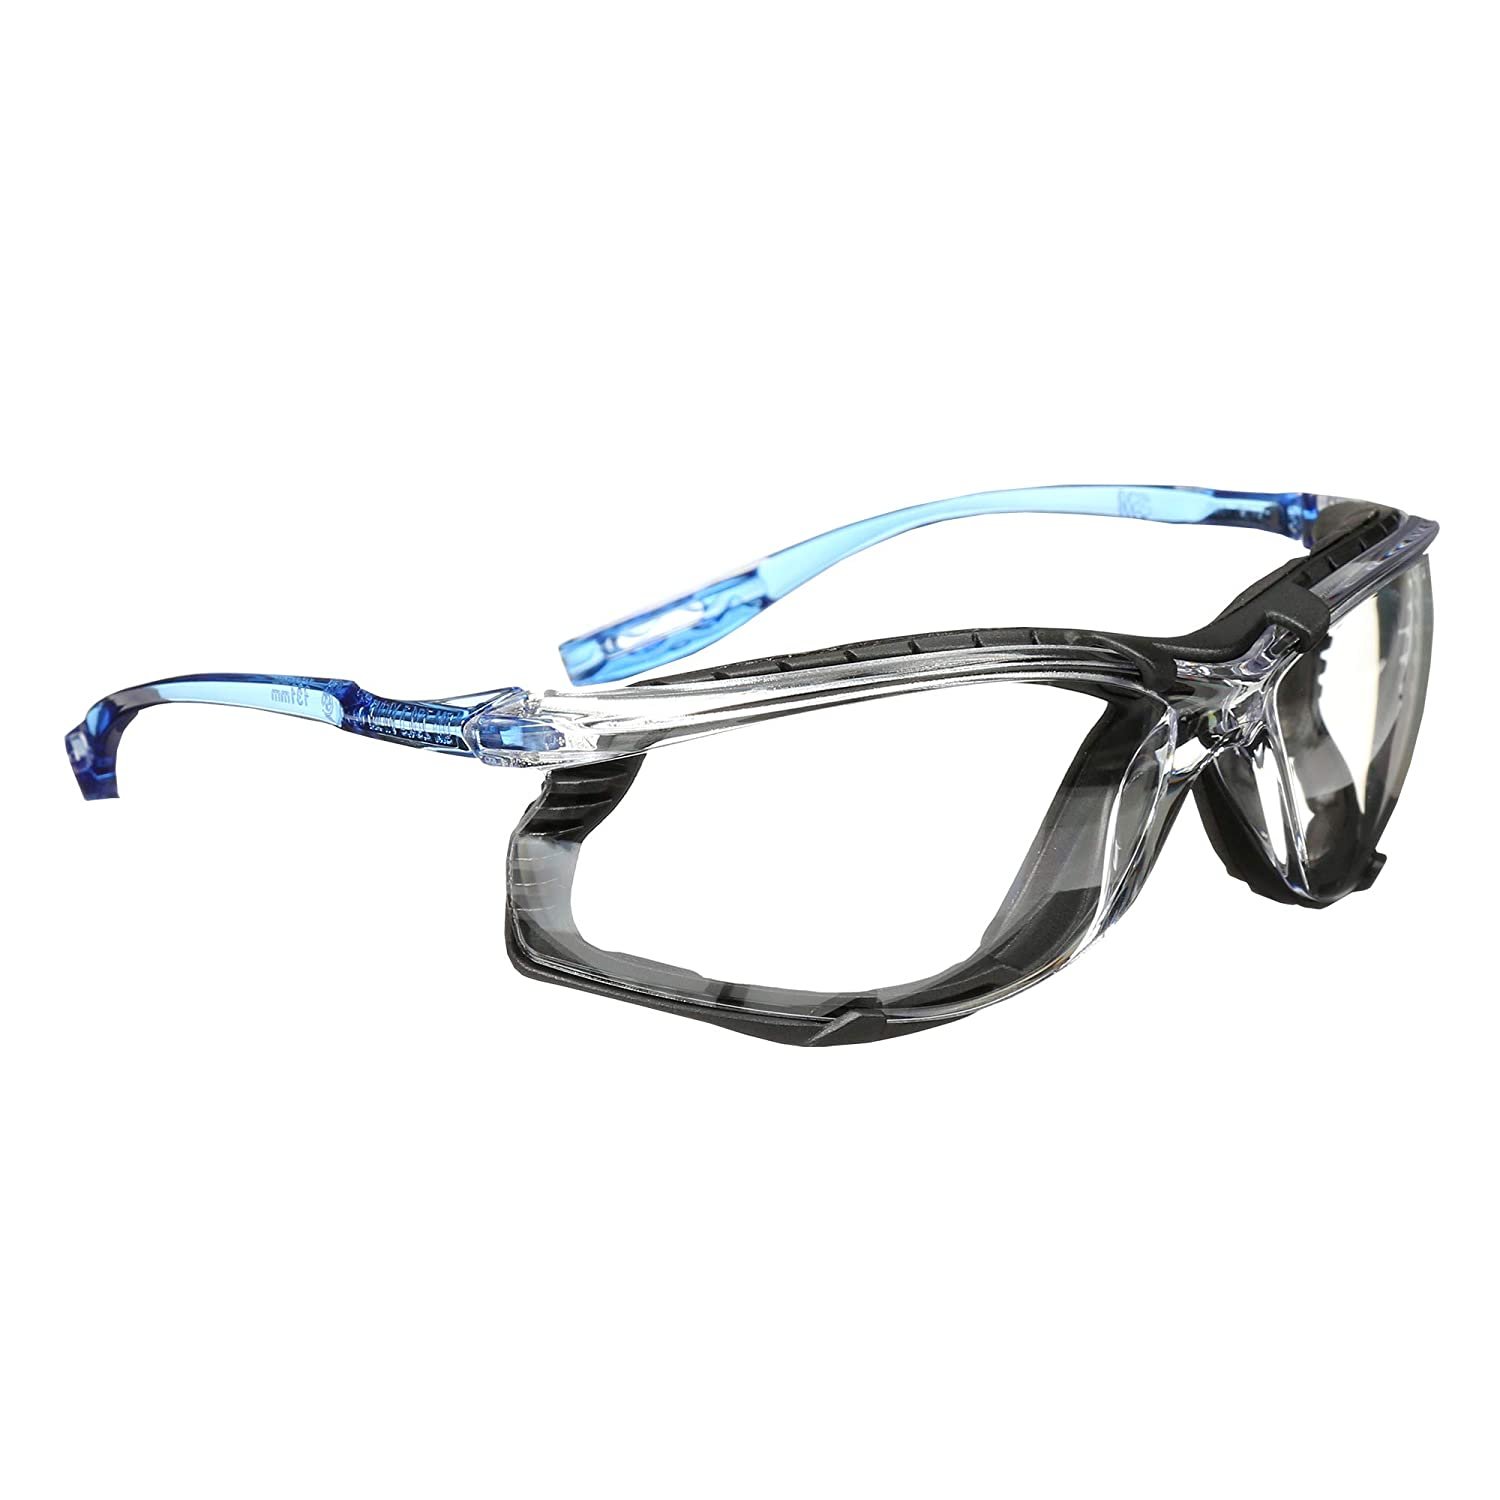
The process may need to be repeated multiple times until all the glue is removed. Proper ventilation and safety gear, such as gloves and goggles, are also important during the removal process.
Gather the Necessary Tools and Materials
Tools Needed for Removing Floor Glue
It’s a good idea to have a vacuum cleaner or broom and dustpan on hand to clean up any debris. The specific tools required may vary depending on the type of floor glue being removed and the condition of the surface beneath it.
Here's an explanation of each tool and its purpose for safely and effectively removing floor glue:
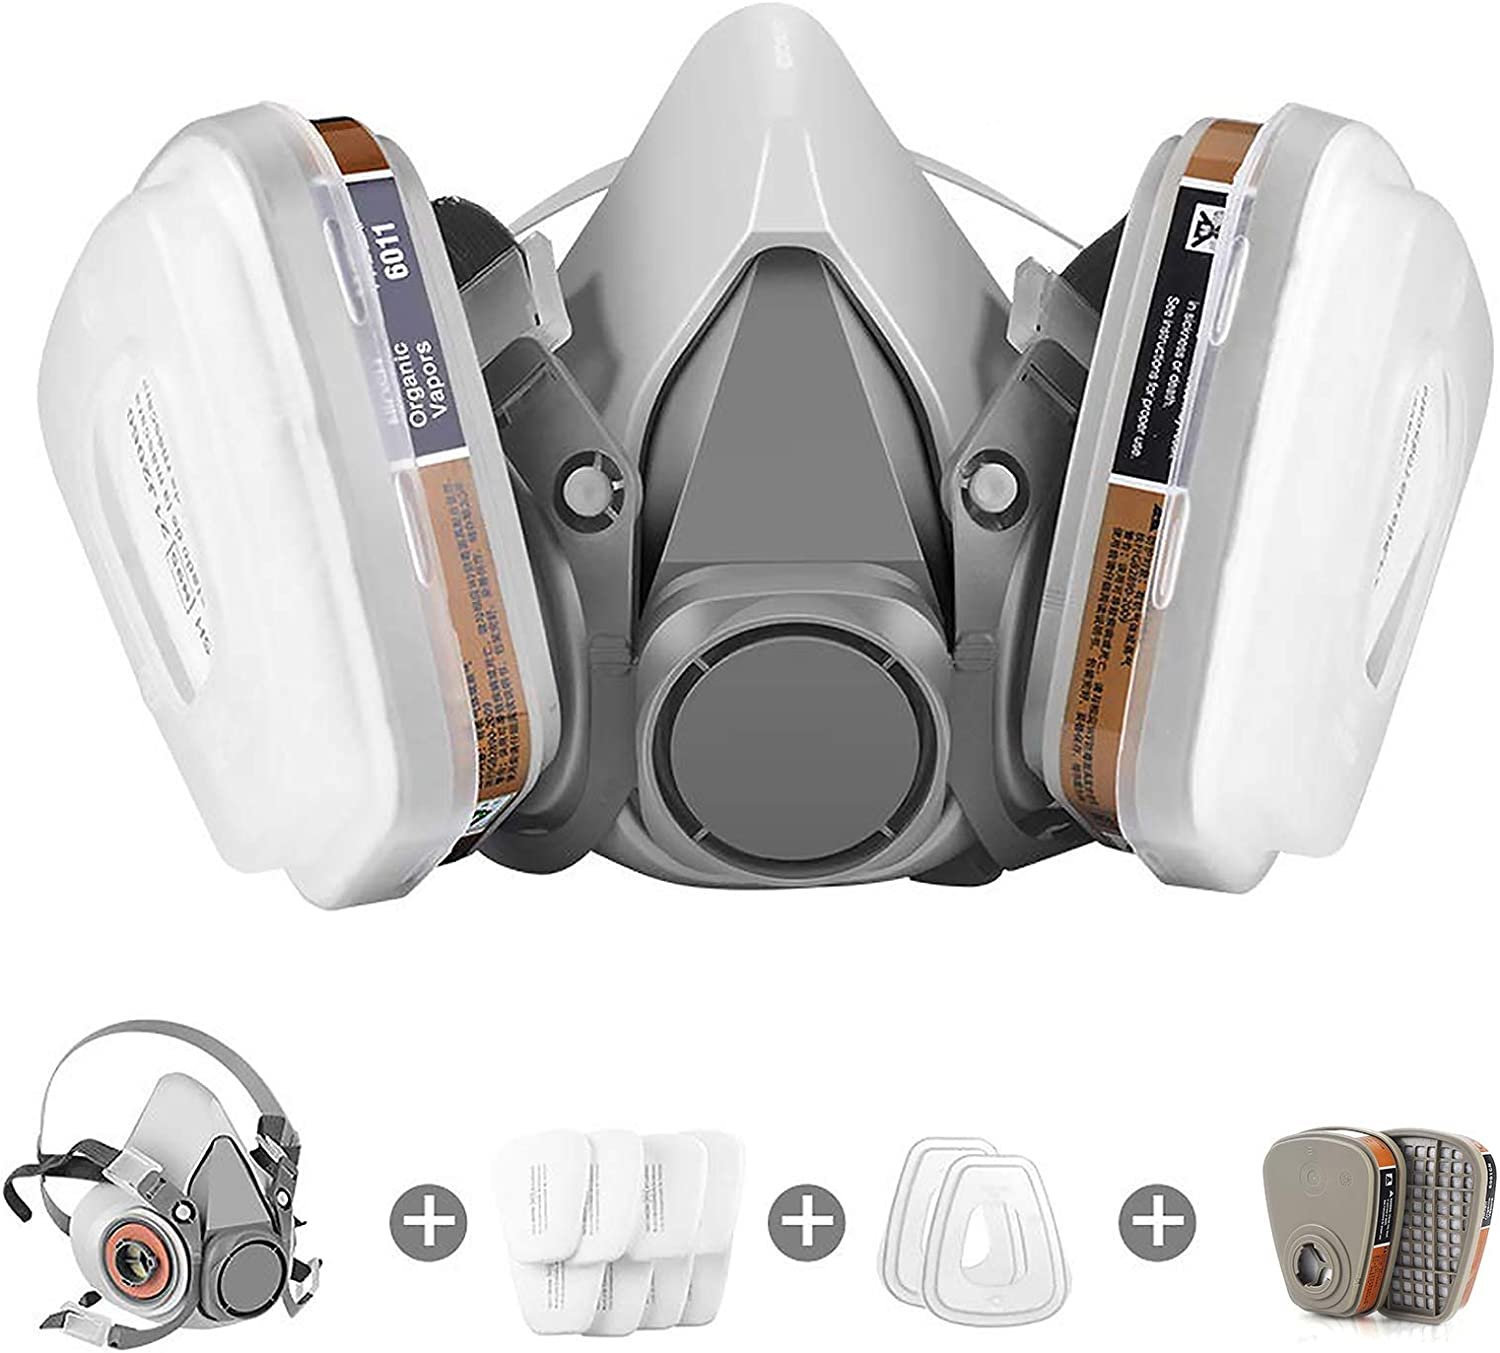
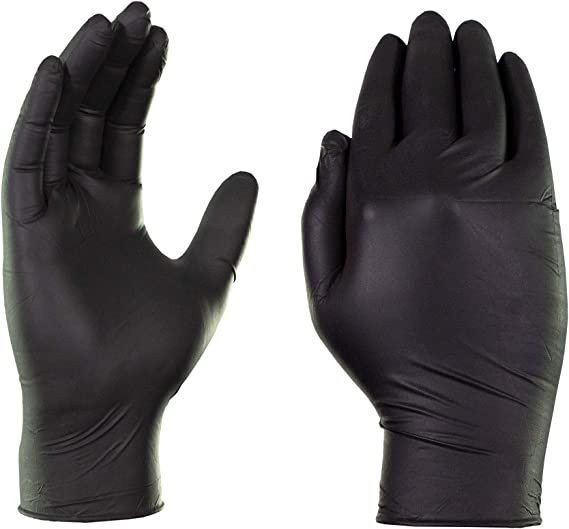
Protective Gear - Before starting the process, put on some protective gear such as gloves, safety glasses, and a respirator mask to prevent skin irritation, eye damage, and respiratory problems.
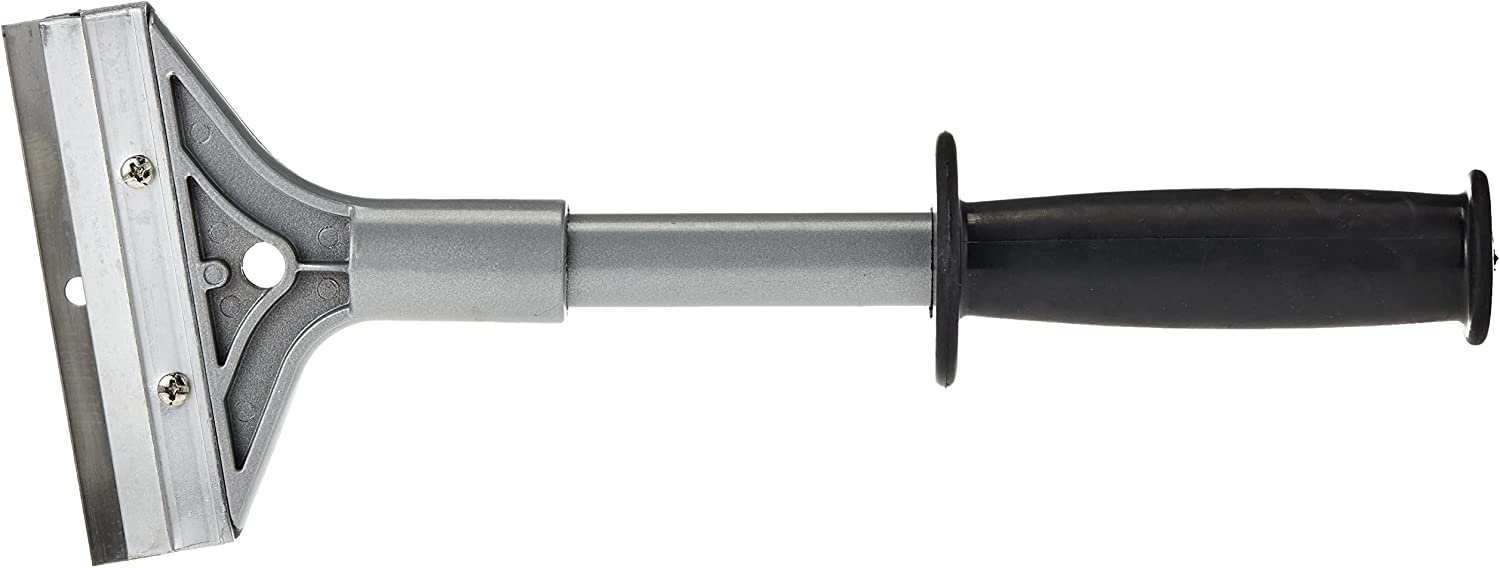
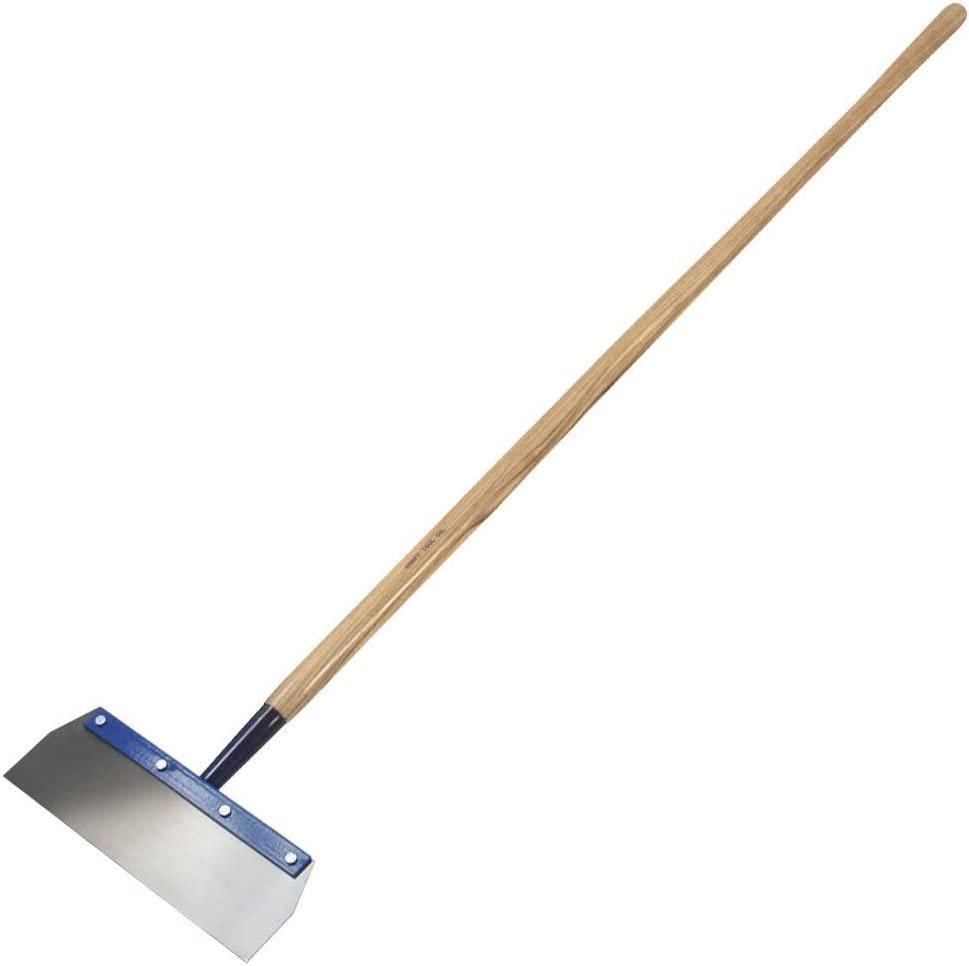
Floor Scraper - A floor scraper is used to remove the top layer of glue and any debris from the surface of the floor. It's important to choose the right kind of scraper blade based on the floor material and glue type.
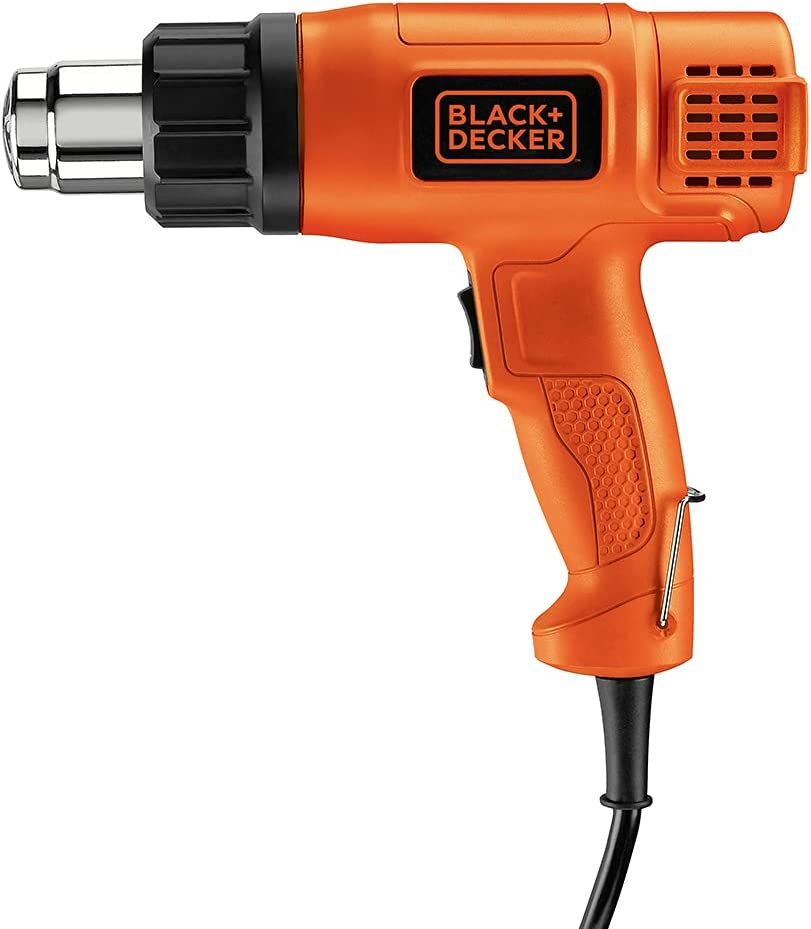
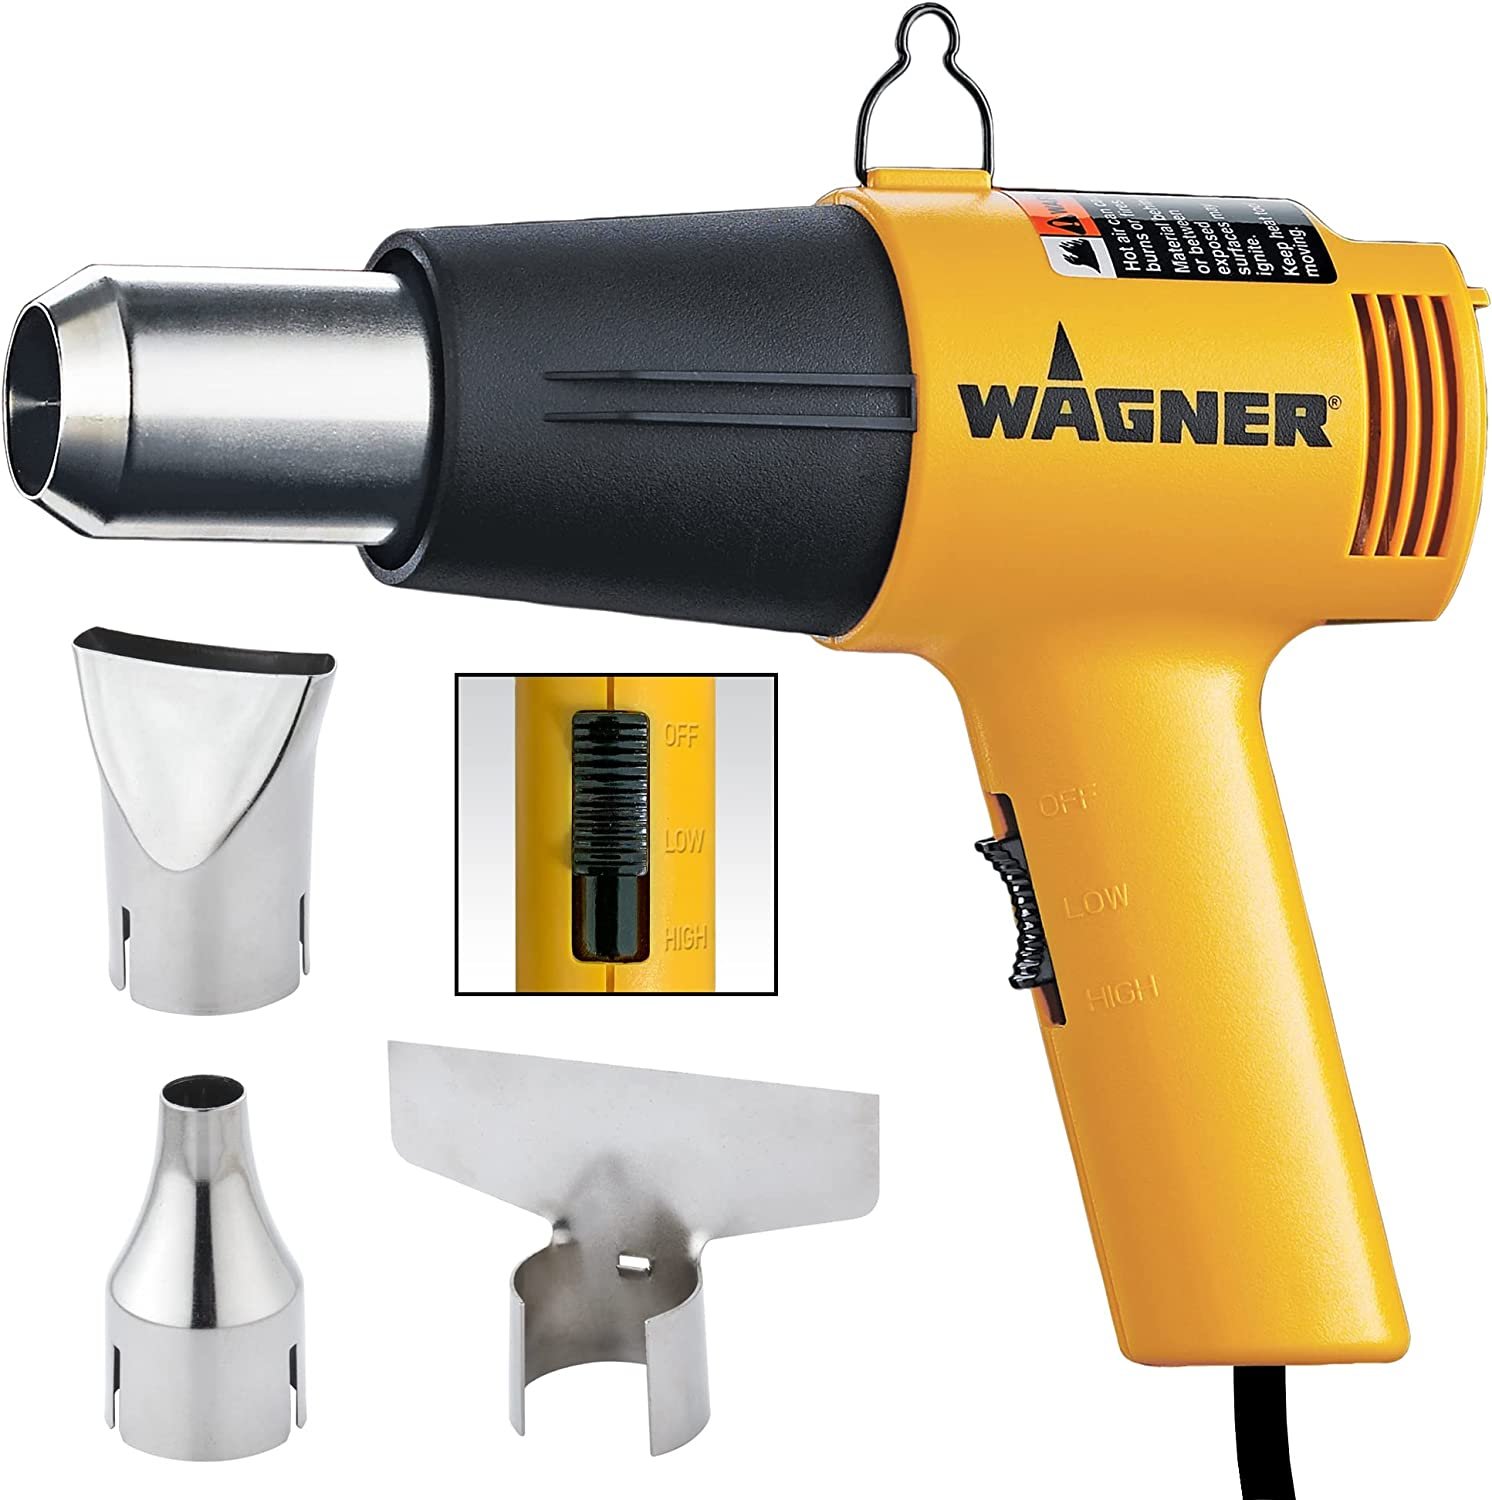
Heat Gun - A heat gun softens the glue, making it easier to scrape off. It's especially useful for removing stubborn and thick layers of glue.
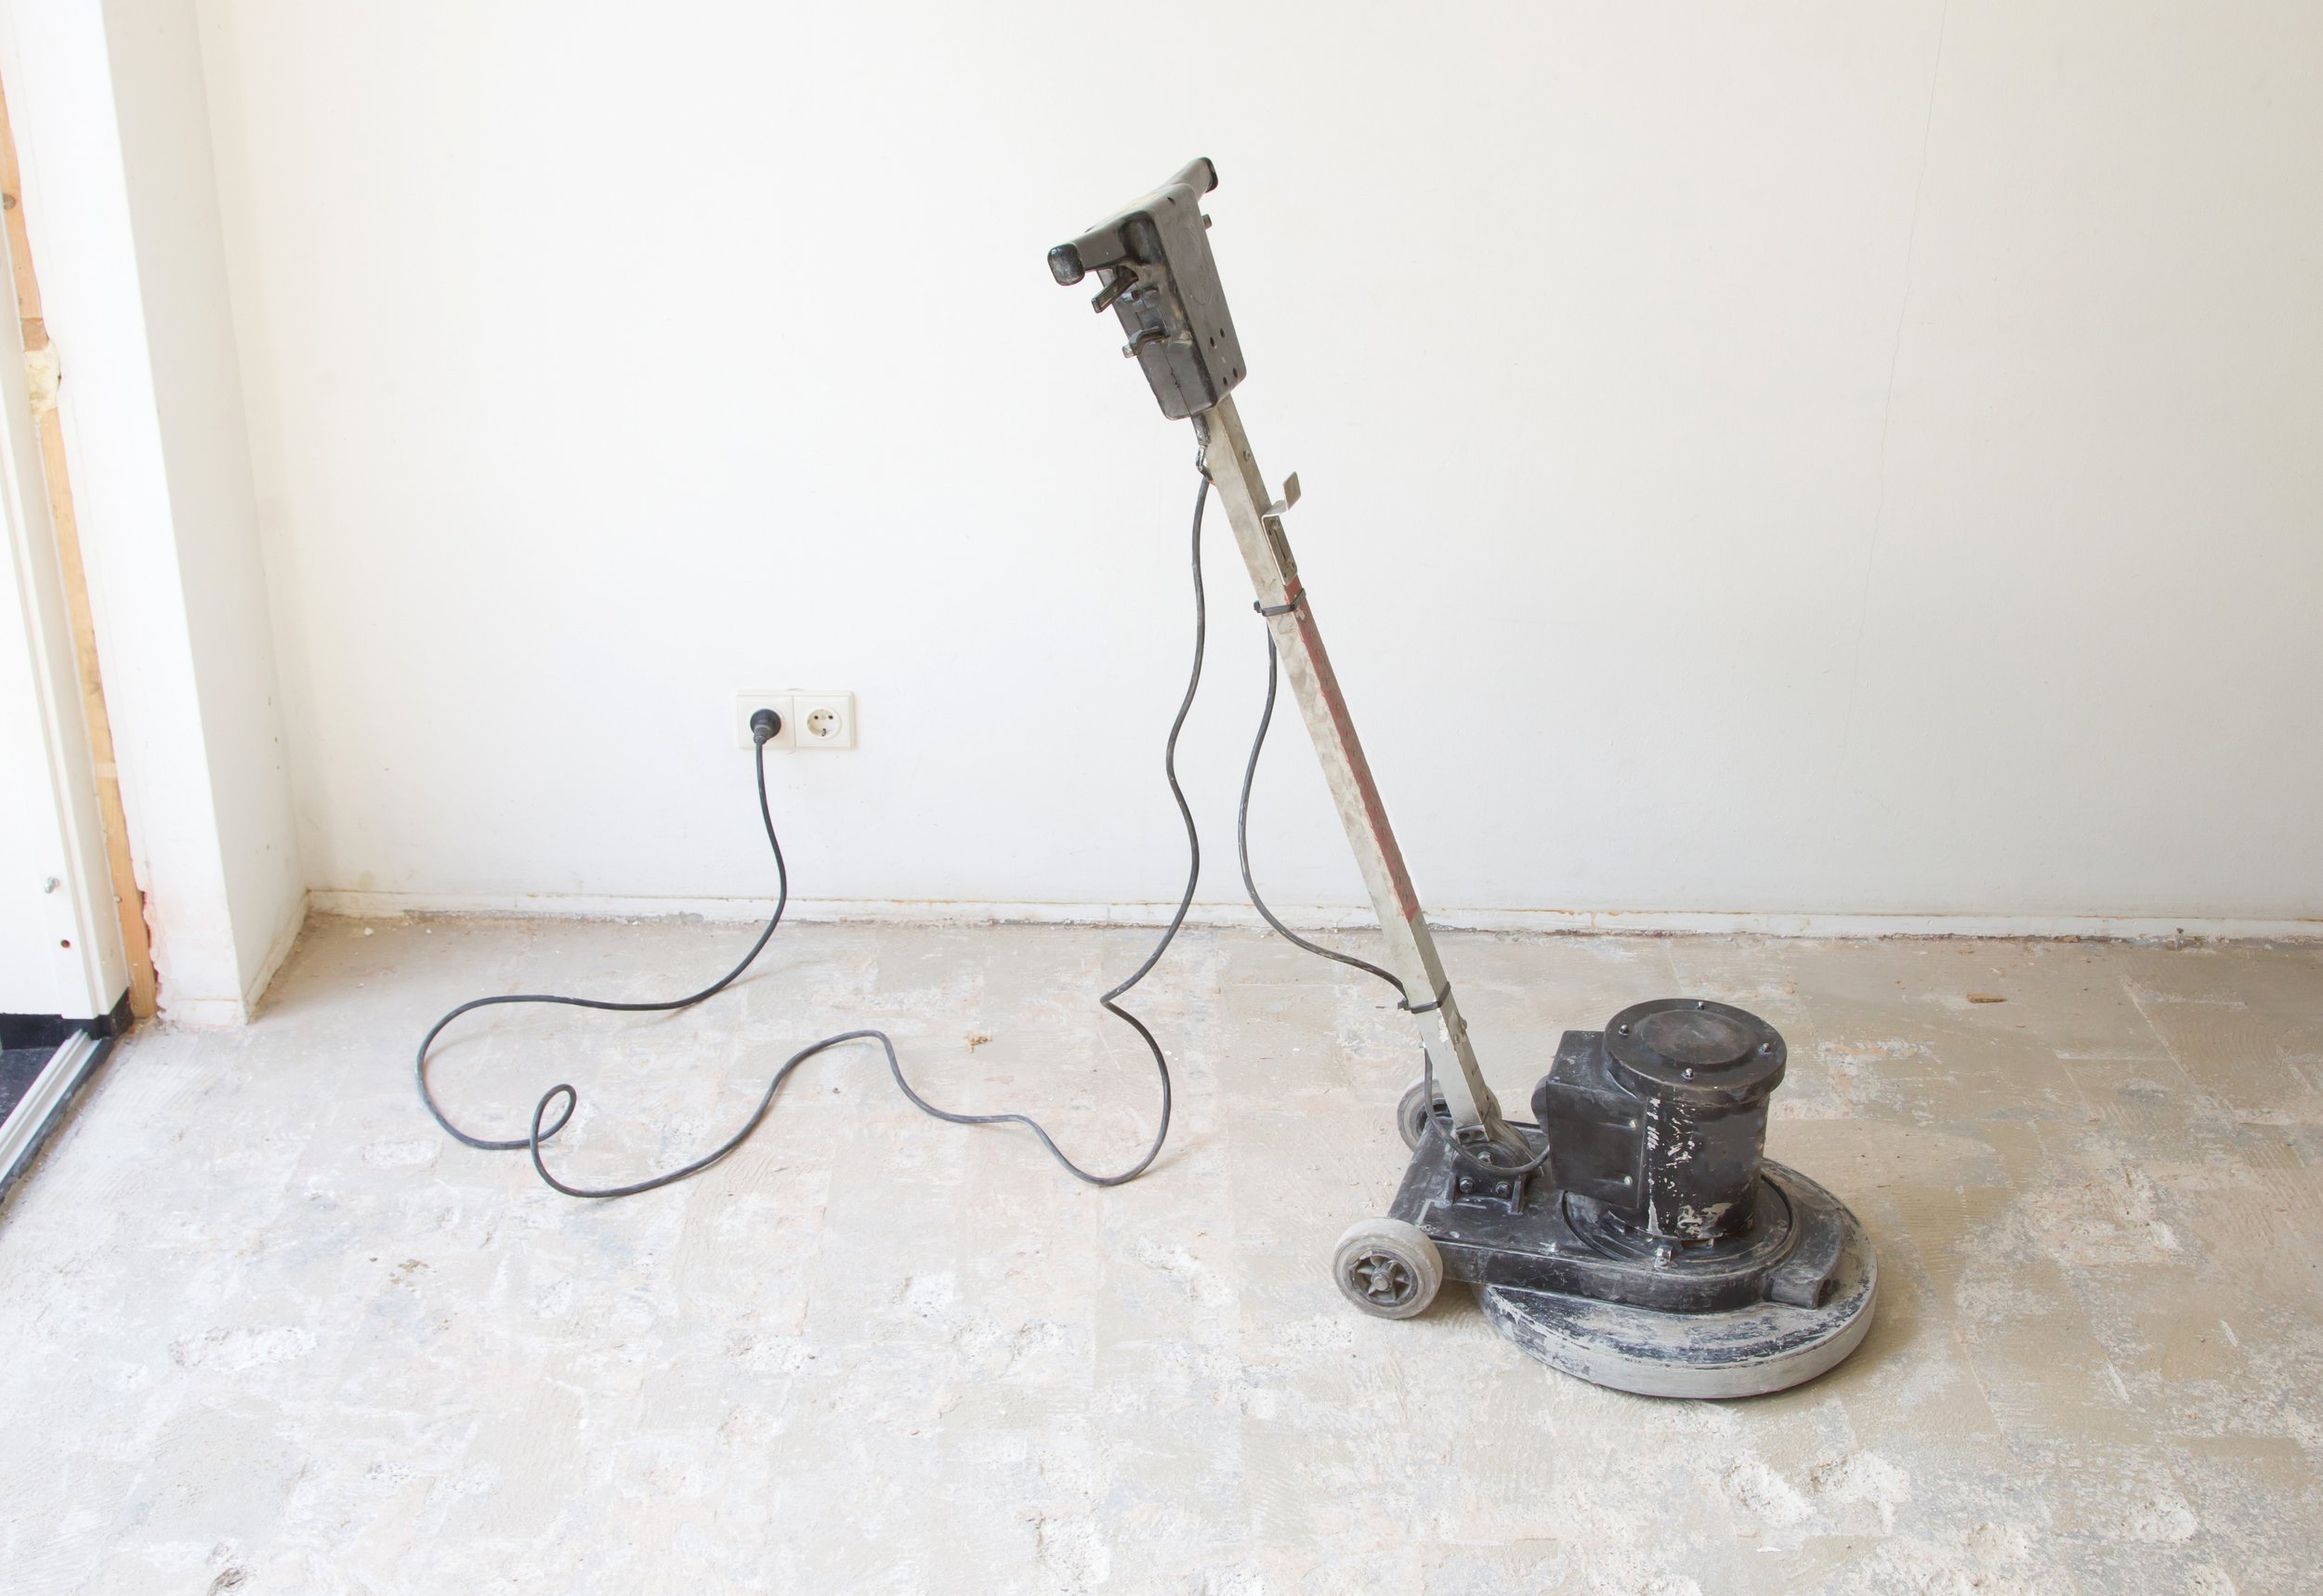
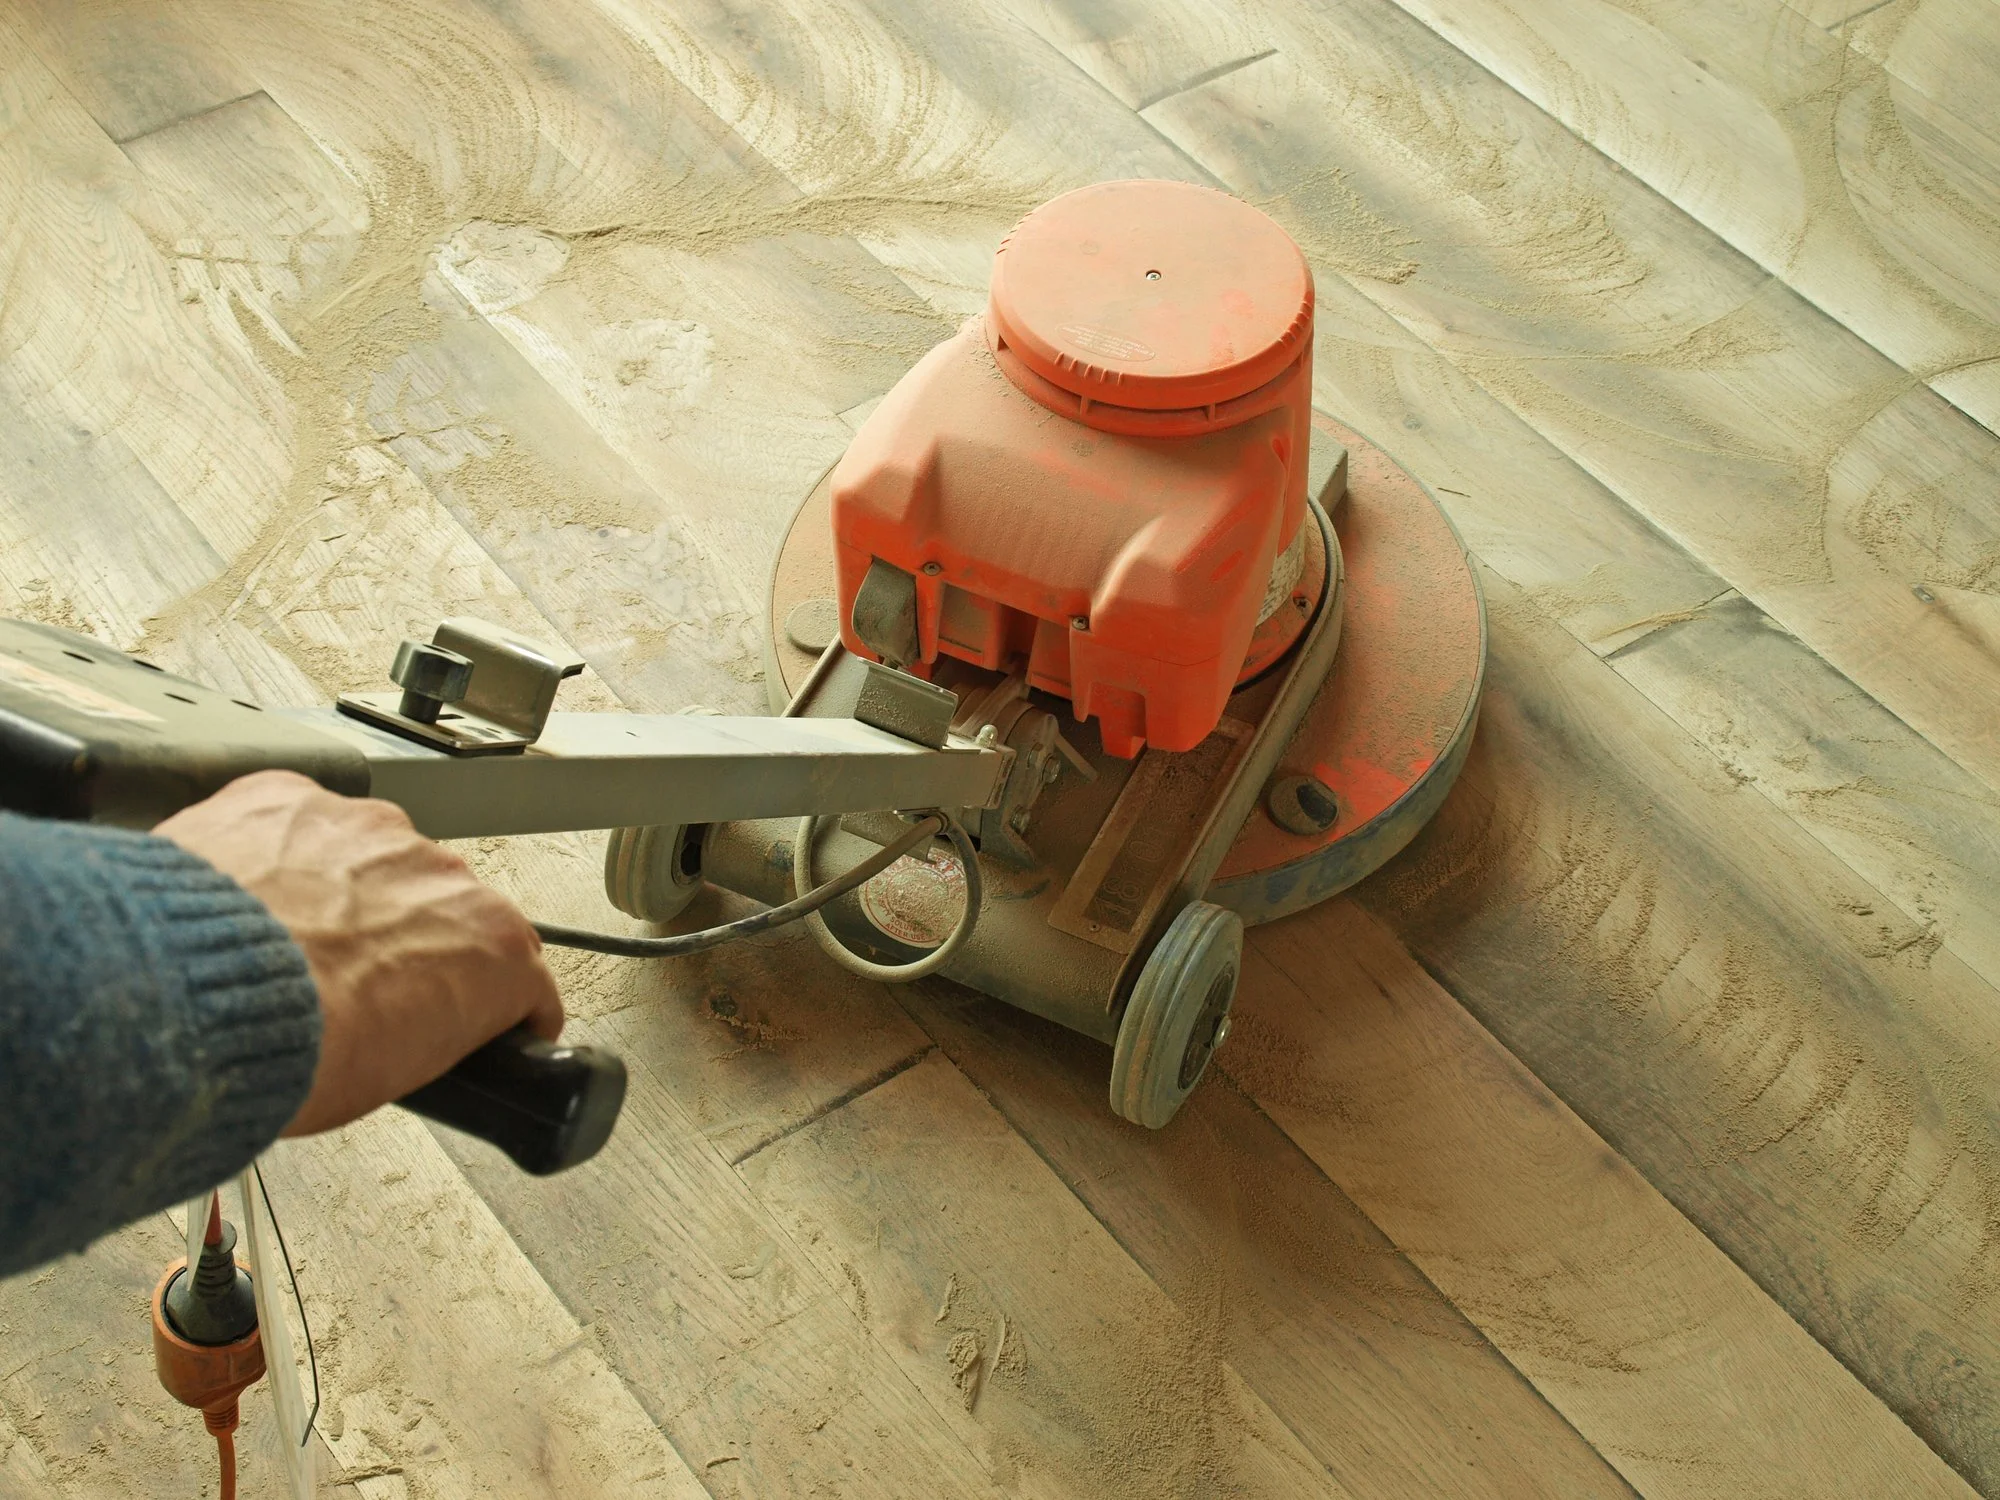
Floor Buffer - A floor buffer with a sanding or scrubbing pad can be used to remove any remaining residue or glue that's stuck on the surface after scraping and heating.
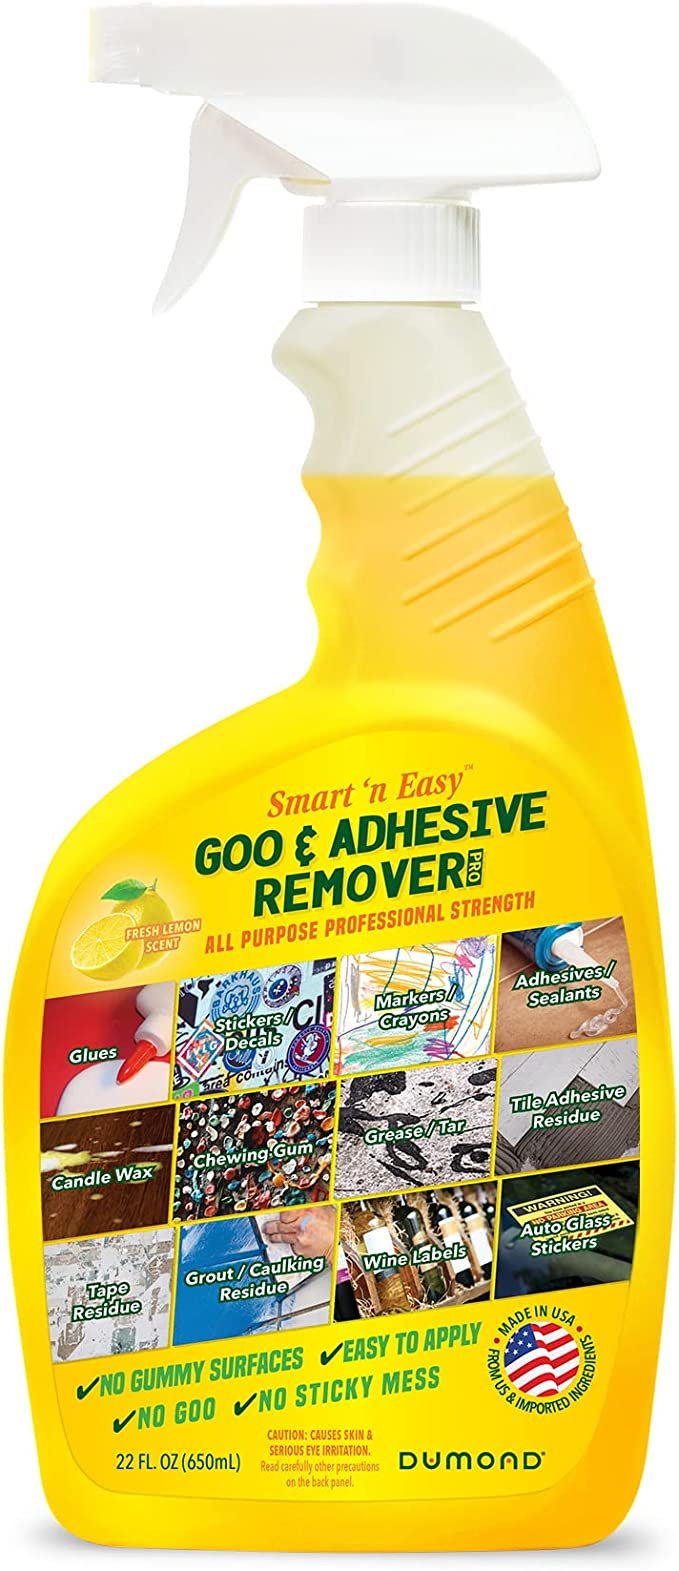
Glue Remover for Floors - If other methods fail, a glue remover for floors can be used to break up the glue. However, it's important to use it in a well-ventilated area and follow the manufacturer's instructions to avoid any damage to the floor or health hazards.
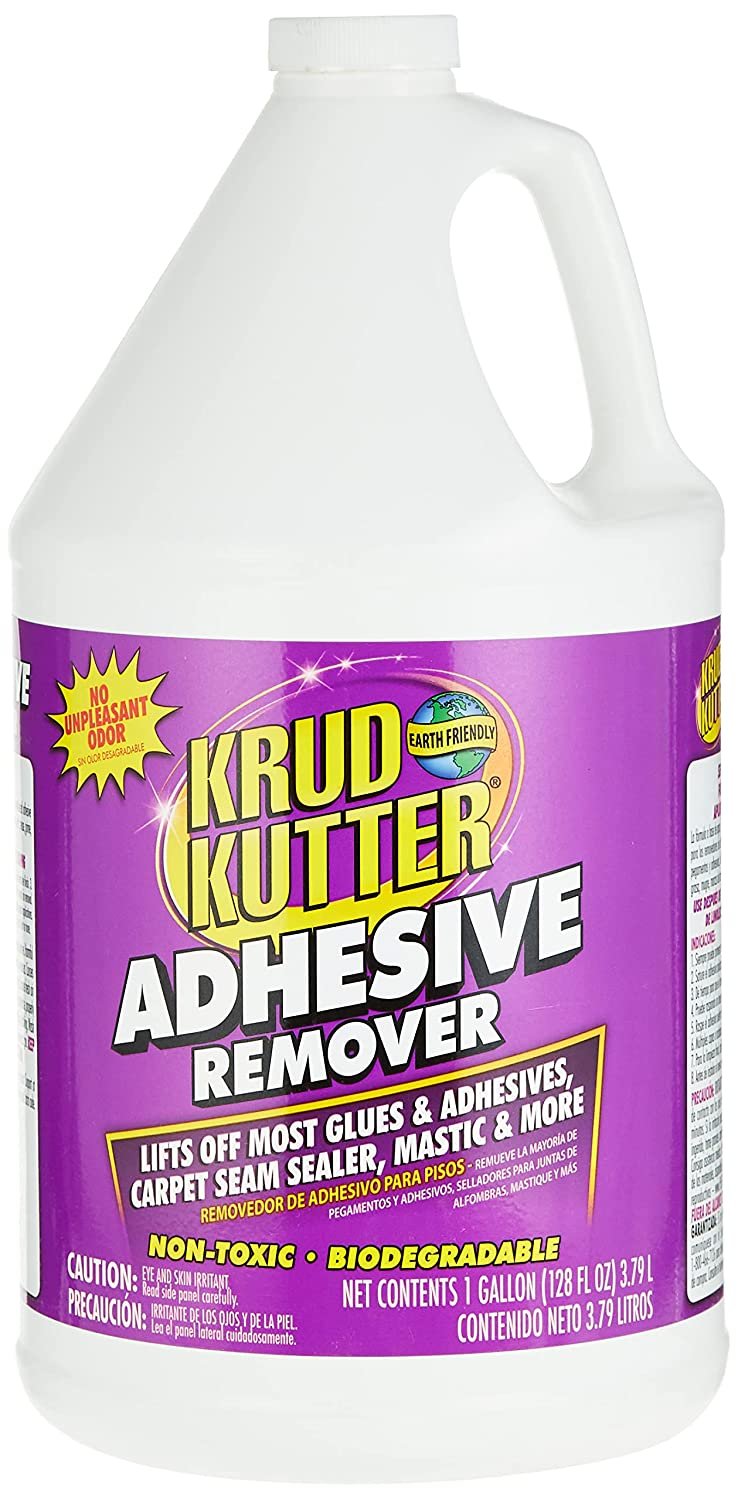

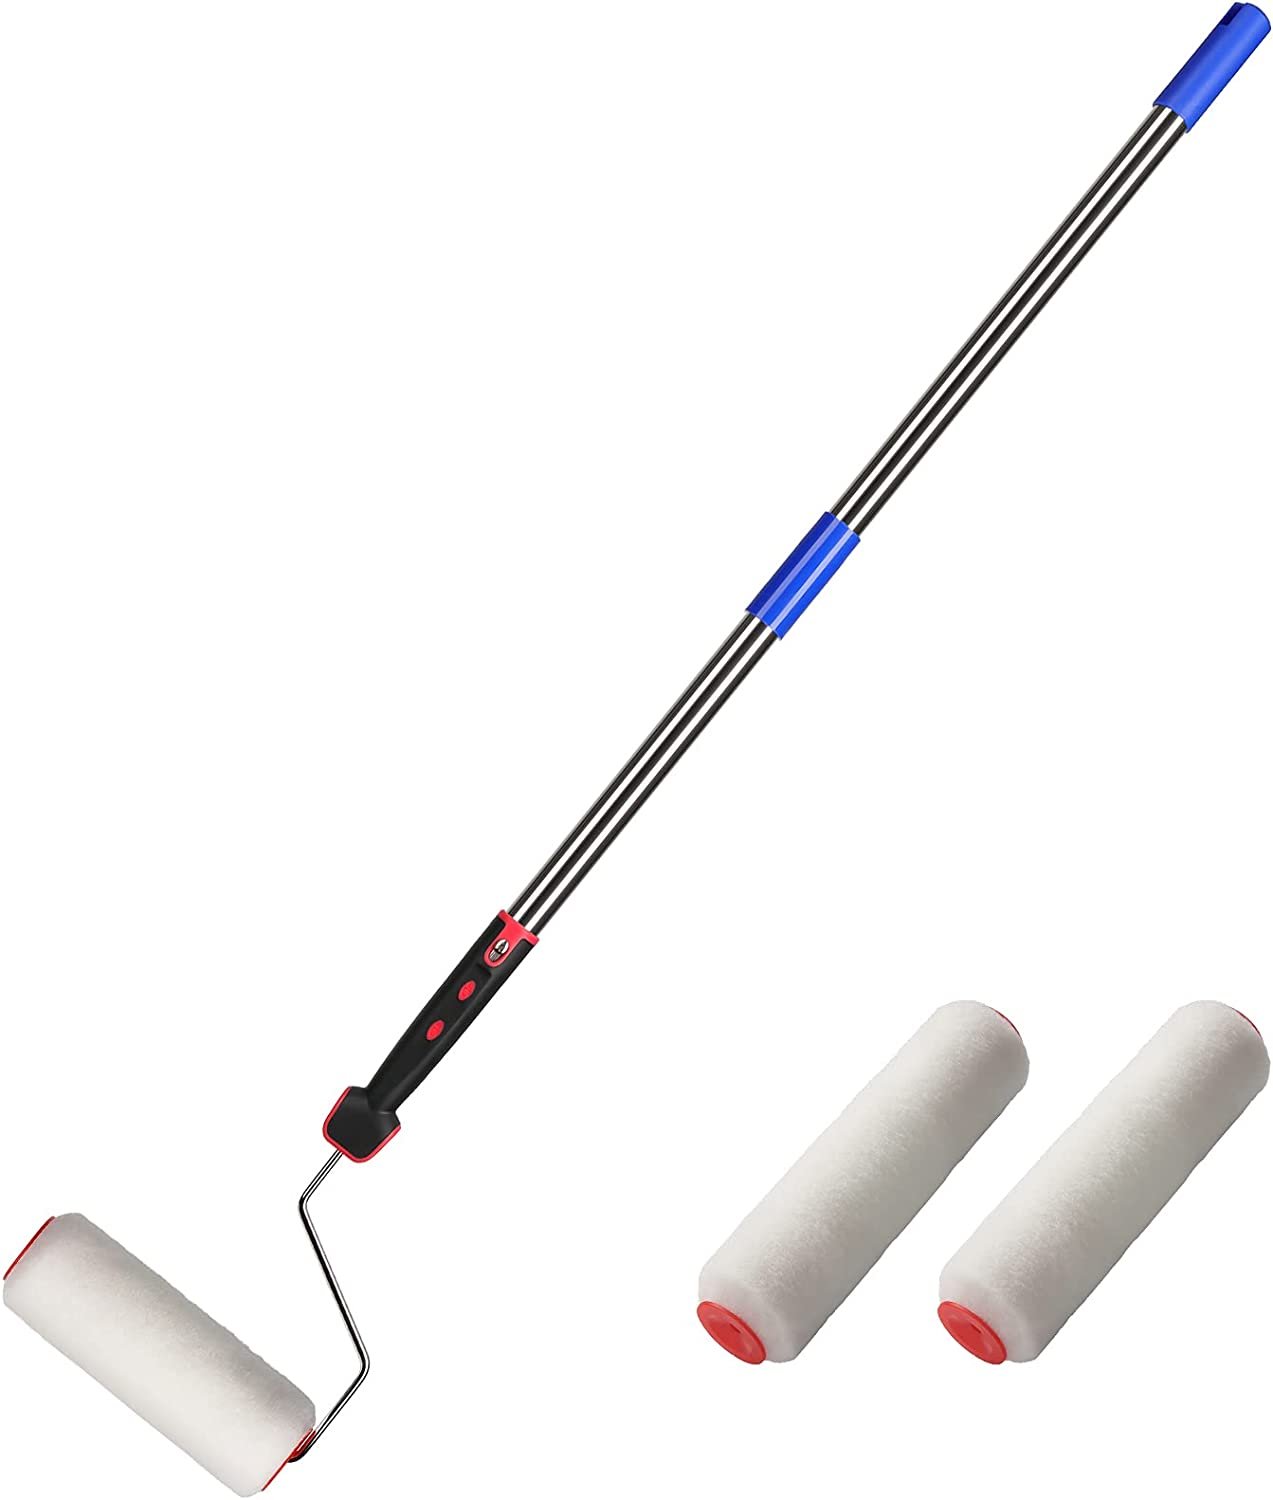
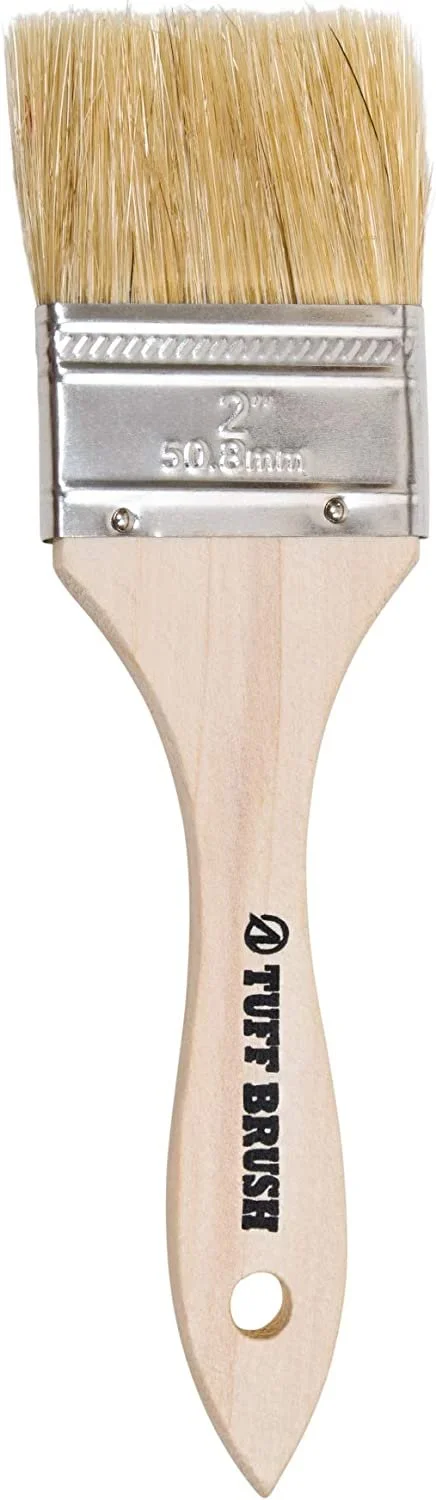
Applicator - If you end up needing to use a glue remover for floors, you’ll need a roller, paintbrush, or sprayer to apply it with.
Recommended Glue Remover for Floors and Where to Purchase It
When it comes to removing floor glue, there are many different products available on the market. One of the most effective and highly recommended options is a glue remover specifically designed for floors.
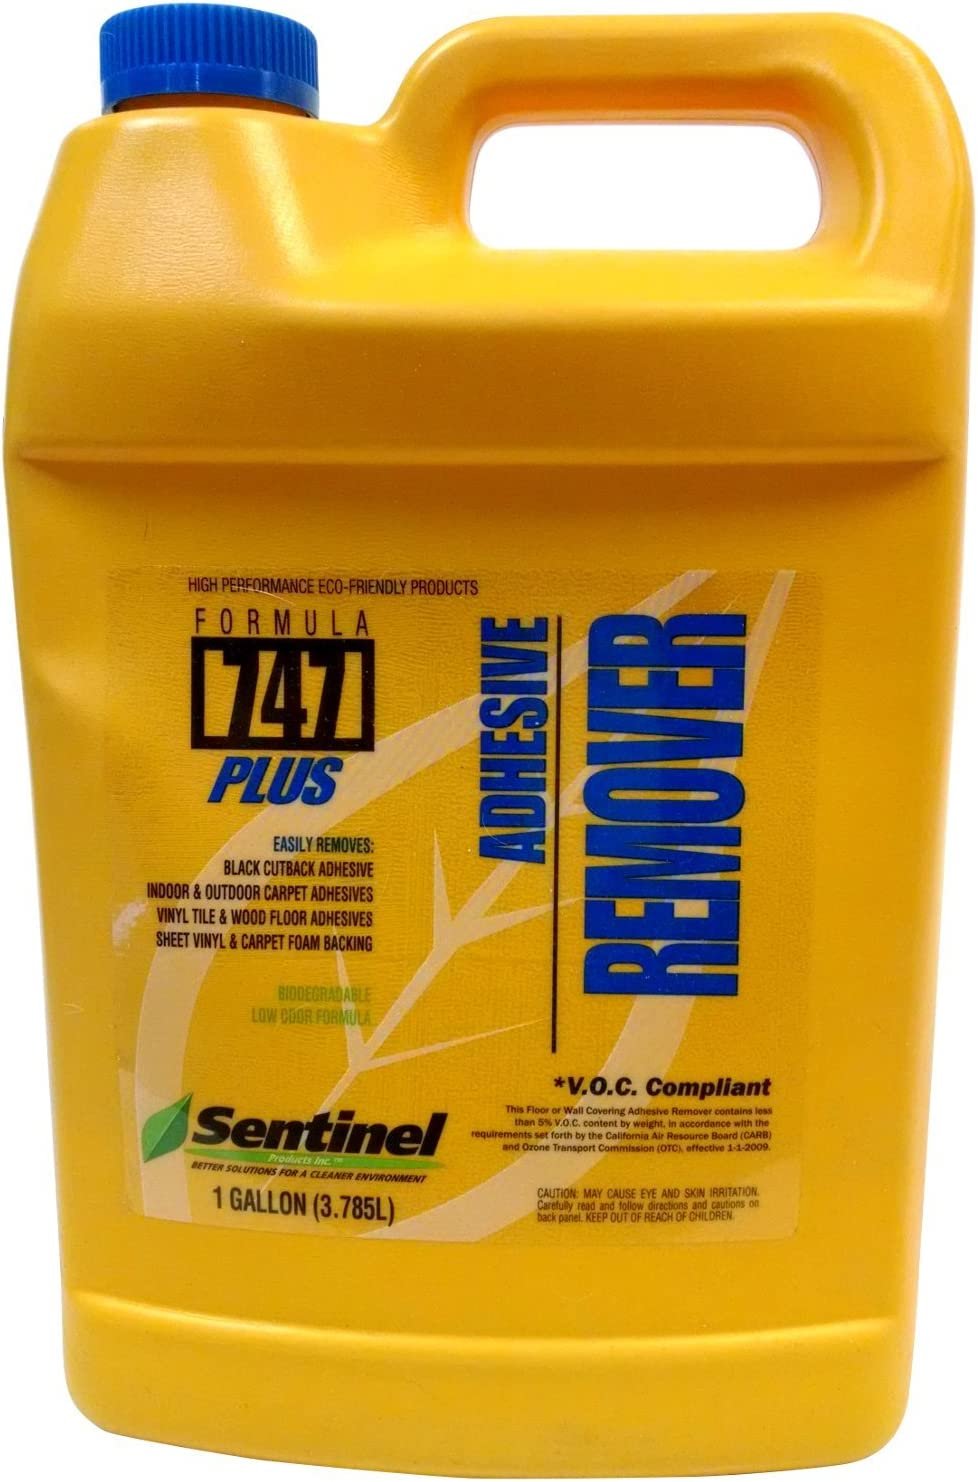
We recommend Sentinel Formula 747 Plus. This powerful glue remover is designed to safely and effectively remove a wide range of adhesives, including carpet glue, vinyl glue, and tile adhesive.
It's also environmentally friendly and safe for use in homes with children and pets. Sentinel Formula 747 Plus can be purchased at most home improvement stores or online retailers such as Amazon or Home Depot.
Prepare the Work Area
Clear the Room of Furniture and Other Obstacles
To prepare the work area for removing floor glue, the first step is to clear the room of all obstacles and furniture. This will make it easier to move around and ensure that the entire floor surface can be accessed.
Cover the Surrounding Areas With Protective Materials
Be sure to cover any surrounding areas with protective materials. This includes furniture (the furniture you can’t move), baseboards, walls, and any other surfaces that could be damaged by the glue remover or other tools used during the process. The best way to protect these surfaces is by using drop cloths or plastic sheeting.
Ensure that the protective materials are taped securely in place to prevent any shifting or movement during the glue removal process.
Ventilate the Area to Reduce Fumes
In order to reduce the fumes and odors that can be harmful to your health, proper ventilation is critical when removing floor glue. Before starting the removal process, open windows and doors to allow fresh air to circulate through the room.
Got a fan? Use it to increase the airflow. It's also recommended to wear a respirator or mask specifically designed for fume protection. Taking these precautions will make the process much safer and more comfortable.
Begin the Glue Removal Process
Applying the Glue Remover to the Floor
After the room is well-ventilated and all safety precautions are taken, apply the glue remover to the floor using a paintbrush, roller, or sprayer, depending on the type and size of the area. Make sure to apply the glue remover evenly and generously, covering the entire surface.
Follow the manufacturer's instructions for the application process, as some removers may require more or less time to penetrate the adhesive, depending on the type of glue used.
Allowing the Glue Remover for Floors to Soak In
Once you’ve applied the glue remover to the floor, it's important to allow it to soak in for a specified period of time. This can vary depending on the type and strength of the remover being used, as well as the type of glue and the amount of residue left on the floor.
It's important to follow the instructions provided by the manufacturer to ensure that the remover is given enough time to work effectively. This step allows the glue remover to break down the adhesive properties of the glue, making it easier to remove from the floor.
Scraping the Glue Off the Floor
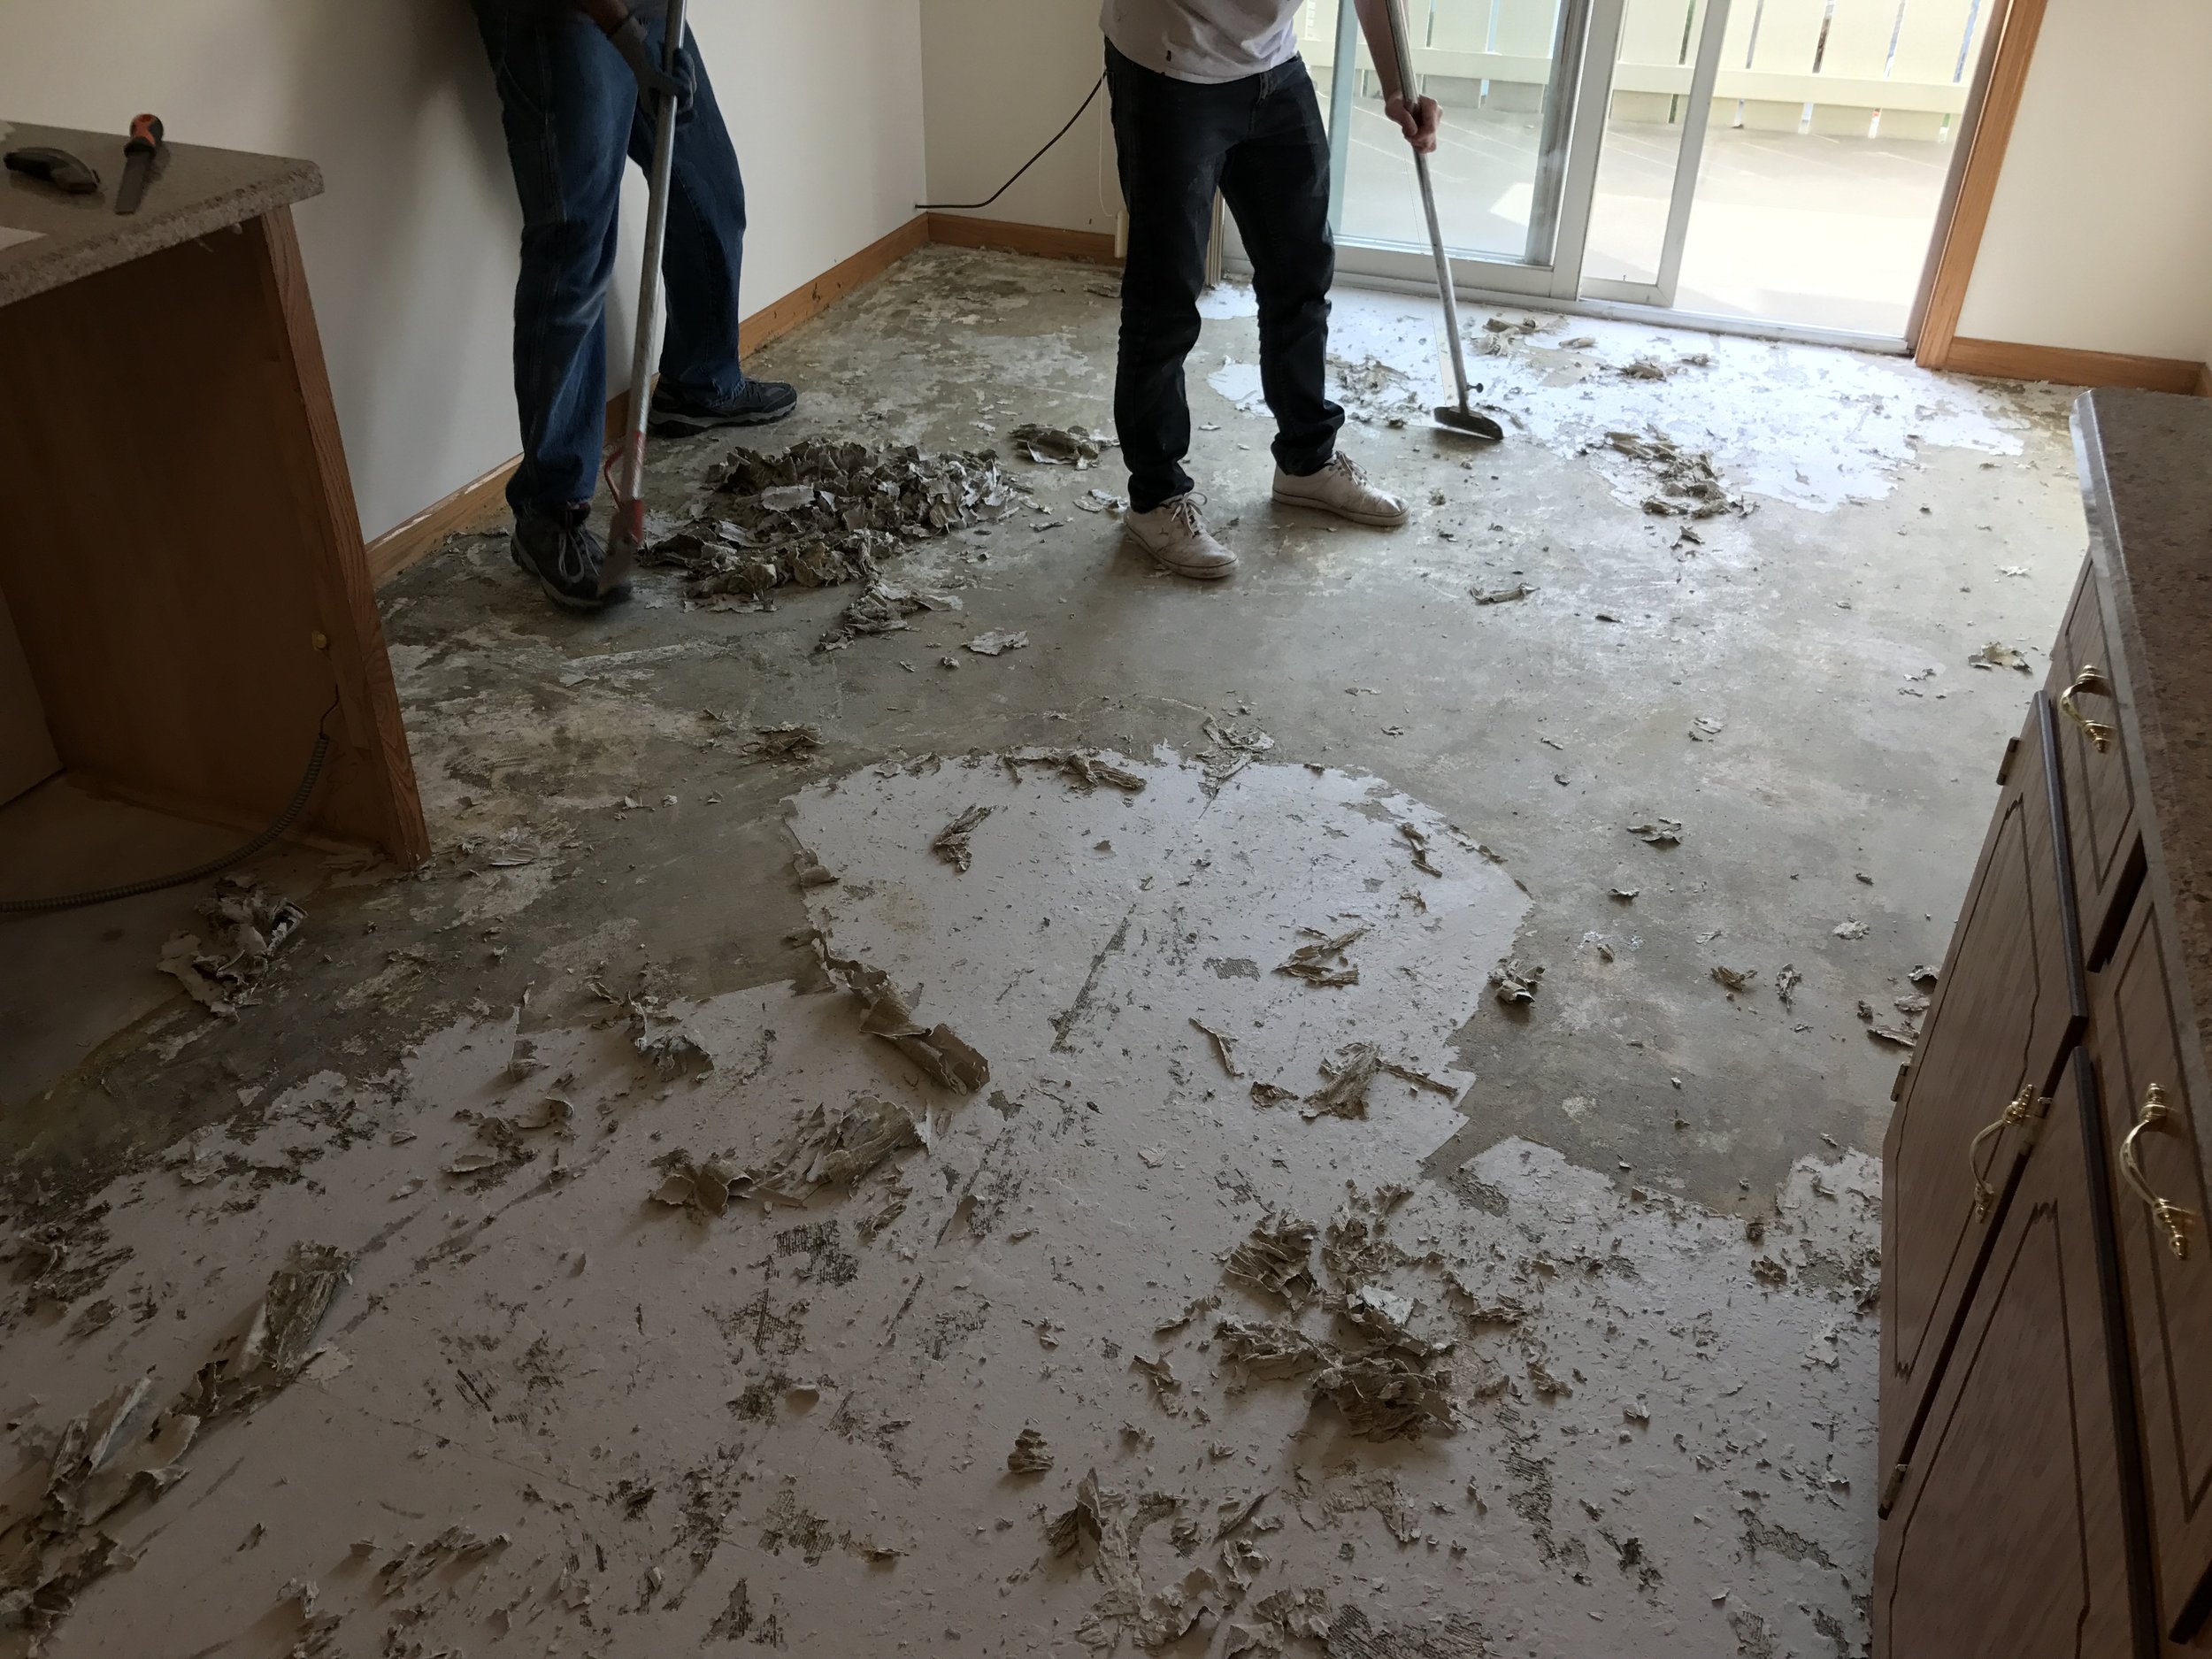
Once the glue remover has soaked into the floor for the recommended time, it's time to start scraping the glue off the surface. Use a scraper tool to gently remove the glue from the floor. Be sure to use a light touch to avoid damaging the floor, especially if using a razor blade scraper.
Work in small sections to ensure that the glue is completely removed before moving on to the next area.
Repeating the Process as Necessary
During the glue removal process, it is important to repeat the application of the remover as necessary. This will ensure that all glue is fully removed from the floor. If the glue is being stubborn or it’s in hard-to-reach areas, the glue remover for flooring should be applied again and left to soak in for a longer period of time.
Additionally, multiple rounds of scraping may be necessary to remove all of the glue. It’s important to be patient during this process and take the time to remove all of the glue thoroughly.
Clean Up and Disposal
Cleaning the Work Area to Remove any Residue
After removing the floor glue, it’s essential to clean the work area thoroughly to get rid of any residual materials. This step will ensure that there is no leftover glue, which can interfere with the installation of new flooring. Begin by sweeping or vacuuming the entire floor to get rid of dust and debris.
Then wipe the surface with a damp cloth to remove any remaining glue residue. Be sure to dispose of the cloth and any other materials used for cleaning properly. Finally, inspect the area carefully to ensure that there is no debris or residue left on the floor, especially if you’ll be installing new flooring on top of it.
Properly Disposing of the Glue and Other Materials
Once you’ve removed all of the floor glue, residue, dust, and debris, it’s important to dispose of the glue and other materials properly. This helps to avoid any damage to the environment and ensures safety in the work area. The glue and other materials should be placed in a sealable bag or container and labeled as hazardous waste.
Depending on the amount and type of glue, it may be necessary to dispose of it at a hazardous waste facility. It’s important to research the local regulations and guidelines for the proper disposal of hazardous waste to avoid any penalties or fines. By disposing of the glue and materials properly, you can complete the job safely and responsibly.
Tips for Maintaining the Newly Cleaned Floor
After removing the floor glue, it's important to properly maintain the newly cleaned floor. Here are some tips to keep your floors looking great:
Regular cleaning: Vacuum or sweep regularly to keep dust and dirt from accumulating on the floor. Use a damp mop with mild soap and water to remove any stains or spills.
Avoid harsh chemicals: Avoid using harsh chemicals or abrasive cleaners on your newly cleaned floors. They can damage the finish and cause discoloration.
Use rugs and mats: Place rugs and mats in high-traffic areas to prevent wear and tear on the floor. Be sure to use rugs with non-slip backing to prevent slips and falls.
By following these tips, you can help maintain the cleanliness and appearance of your newly cleaned floors.
Conclusion: Recapping the Steps Involved in Safely and Effectively Removing Floor Glue
In summary, to safely and effectively remove floor glue, the following steps should be followed:
Gather the necessary tools, including a floor scraper, heat gun, gloves, safety goggles, applicator, and a respirator mask.
Select a recommended glue remover for floors and purchase it from a hardware store or online.
Prepare the work area by clearing the room of furniture and other obstacles, covering surrounding areas with protective materials, and ventilating the area to reduce fumes.
Apply the glue remover to the floor, allowing it to soak in for the recommended amount of time.
Scrape the glue off the floor using a floor scraper, repeating the process as necessary until all glue has been removed.
Properly dispose of the glue and other materials, and clean the work area to remove any residue.
After the glue has been removed, take steps to maintain the newly cleaned floor, such as regular cleaning and avoiding exposure to moisture.
Final Thoughts on Proper Floor Glue Removal
Proper floor glue removal is a crucial part of any flooring project. Failing to remove old adhesives can lead to a range of issues, including uneven flooring, poor adhesion of new materials, and unsightly residues that can detract from the overall look of the space.
By following the steps outlined in this guide, you can safely and effectively remove old floor glue, ensuring that your new flooring materials adhere properly and look their best. Remember to take your time, work carefully, and use the right tools and materials for the job to achieve the best possible results.
Need help with your next flooring project? Contact Plus Hardwood Flooring today for a free estimate!

The Pros and Cons of Stained Floors
Staining hardwood floors can give them a unique and beautiful look, but it also has its own set of pros and cons. Learn about the advantages and disadvantages of staining hardwood floors and how to decide if it's the right choice for you.
Installing hardwood floors in your home can be a great decision, but whether you install them yourself or buy a home that already has hardwood floors, that’s just the tip of the iceberg.
There is an awful lot that goes into preparing, treating, and finishing floors and every choice you make along the way can seriously affect the finished product. Nowhere is that truer than when it comes to staining.
While staining your hardwood can add warmth and depth to the floor and enhance the overall look of the room, if the process is not handled properly it can also have major unwanted results.
Before you proceed with staining, then, it’s crucial that you understand the pros and cons involved with this vital step.
What Exactly Is Staining?
This may seem like a very obvious notion, but you’d be surprised how many people actually confuse staining with finishing, and that can be a vital mistake as they are two very different processes. While finish is designed as a final, clear coat that simply adds a protective covering to your hardwood, stain actually colors the floor, enhancing or sometimes entirely changing the color of the wood.
Think of it as similar to painting a wall, with one crucial difference…if you wind up choosing the wrong color of paint it can be easily corrected. If something goes wrong with staining, however, you’ll have to re-sand the entire floor and start over again, which can be a time-consuming and frustrating process.
Once you understand the difference, you’ll need to be very careful about choosing your stain. There are a wide variety of colors to choose from and the one you select will depend on a number of factors, including the type of wood, the amount of light in the room, and the overall design.
Pros of Staining a Wood Floor
Though a lot can go wrong if the staining process isn’t handled properly, when it is done right there are plenty of ways that it can enhance a room. Color, warmth, shine and depth can all be enhanced with the right choice of stain and the correct application. Done correctly, your finished room can have the stunning, natural look that you see in home décor magazines.
Some specific benefits of staining can include the following:
Achieving the elegance of dark wood – most natural wood is light in color, but with a rich, deep stain applied, you can get the drama of dark wood. This is a look that is very popular in magazines today and one that can be a major selling point in the real estate market.
Copying the look of a certain wood type – even if you can’t afford more expensive types of wood or if you buy a home with one type of wood but want the look of another, staining can give you that option. Staining a lighter wood with a rich cherry can help give it the depth and dimension of natural cherry.
Some lighter woods, like oak, aren’t very flexible making it difficult to achieve elaborate designs like a herringbone or lattice, but with stain, you can use a more flexible wood to get the pattern you like and then achieve the look of oak with the choice of stain.
·Accentuating the natural beauty of wood – perhaps the biggest advantage of staining is its ability to bring out the natural patina and accentuate the grain, giving a warmer, cozier feel to your room through the richness of wood flooring.
Cons of Staining a Wood Floor
Of course, as with any choice you make, there are some very distinct drawbacks to staining as well. Understanding what can possibly go wrong with the process can help you to avoid potentially costly mistakes down the road.
Here are some of the cons to staining that any homeowner should be aware of before they proceed:
Accentuates sanding marks – Sanding is a necessary step in order to prepare your hardwood to accept stain, but when done incorrectly it can leave a series of scratches and gouges in the wood.
When stain is then applied to that wood surface, the pigment in the stain seeps into all of those fine marks, showing up darker in those areas and making them stand out even more. The result can be a murky and busy overall look.
Not all woods are meant to be stained – There are certain types of wood, including maple, birch, and pine, that don’t take well to stain. These woods are very tight-grained, meaning there are very few openings into which the stain pigment can settle and provide coverage.
At the same time, pine and other coniferous woods also contain sap, which will actively resist stain. Staining these types of woods can result in areas of beading where the stain is repelled, making for a messy look.
Tendency for “bleedback” – Unlike paint, stain cannot be corrected or darkened by applying more layers. No matter what type of wood you choose, it can only absorb a certain amount of stain. Once it reaches its limit if you continue to apply the stain it will simply rise back up to the surface, resulting in what is known as “bleedback”.
The same effect can happen if you go over a layer of stain with a layer of finish that is not compatible. In either instance, you’ll be left with unsightly pockets of beading and spotting that will mar the overall look of your floor.
Staining is a very time-consuming process – one of the biggest drawbacks to staining, and one that is very often overlooked by homeowners is the sheer amount of time the process can take.
If a stain coat is not completely dry it won’t be able to accept a layer of finish and if the stain and finish do not bond the finish can smudge and even peel off entirely. The only recourse will be to sand the floor again and start over.
In order to dry thoroughly stain requires a minimum of 48 hours in the ideal conditions of heat, humidity and air movement. Since it can be difficult to achieve those ideals in most cases, you’re more likely to need at least 72 hours for your stain to dry.
Even the slightest variation in temperature, humidity and air movement can have a drastic effect on the ability of your stain to dry properly. Once the stain is dried, then you’ll need to apply a finish coat and wait for that to dry as well, all of which can mean up to a week or more for the entire process to be completed.
Staining vs. Clear Coating
When it comes to achieving the perfect look for your hardwood floors, staining isn’t the only option. If you want a more natural, rustic look that emphasizes the inherent grain and pattern of the wood, you could always opt for a clear coat finish. Unlike staining, clear coating doesn’t add any pigment but simply enhances the existing look of the floor.
This can have its advantages, most notably that it allows for greater reflection of light, which can help to add depth and a feeling of size to smaller rooms. This is particularly noticeable in rooms with a lot of windows that allow for more light.
Another advantage of clear coating is that unstained floors can provide an effective accent to darker wood accessories such as trim and furnishings. This interplay of various shades of wood can add extraordinary depth to a room which many designers find particularly appealing.
What’s the Bottom Line?
Whether you are installing new floors or working with existing hardwood, staining is an extremely important part of the process and one that should be approached with great care.
When done properly it can enhance and reflect the beauty of the wood and help to pull together the overall design of the room, but even the slightest misstep in this process can cost a considerable amount in time, effort and money.
Before you decide to stain your wood floors, it’s important to understand everything that is involved in the process and get expert input so that you can be sure you are making the right choice and getting the final result that you’re looking for.
With the right choice, either stain or clear coat, you can enjoy all of the many benefits that a beautiful hardwood floor can bring to your home.

White Oak vs. Red Oak: The Flooring Facts
White Oak and Red Oak are two of the most popular hardwood flooring options, but they have different characteristics and properties. Learn about the differences and decide which one is the best fit for your home.
Hey everyone, it's Patrick here kicking off yet another little flooring blog fiesta! Today, I had a brilliant lightbulb moment – I dove into the treasure trove of your favorite blog posts throughout the years, and guess what? This one's been a superstar! So, hold on to your flooring samples because I've jazzed it up with fresh facts, snazzy information, and some pro insights from yours truly. Let's embark on this journey together and dive into the fascinating world of hardwood flooring. Cheers to an upgraded and oh-so-2023-24 blog post – hope you're ready for a flooring adventure like never before! 🚀
White Oak vs Red Oak The Flooring Facts Decoded and updated
When it comes to choosing a hardwood floor, many people immediately think of oak. It’s a good choice as oak is one of the most durable types of woods as well as one of the most readily available. With the right installation and finish, oak can provide you a beautiful floor that can last more than 100 years. However, the age-old debate between white oak and red oak continues to perplex homeowners. Both types of oak flooring boast their unique features, making them desirable choices for various settings. But how do you decide which one is best suited for your needs? In this blog post, we will unveil the key differences between white oak and red oak flooring, guiding you through aspects such as color variations, grain patterns, hardness, water resistance, and cost. By the end of this, I anticipate that you will possess the knowledge needed to make an informed decision when choosing the ideal flooring for your home.
Key Takeaways
White oak and red oak flooring have distinct characteristics in terms of color, grain pattern, hardness, and water resistance.
White oak is harder than red oak, with slightly higher levels of coloring differences. Both require finishes for added protection.
Consider factors such as cost, design preference, and appropriate finishes when selecting between white oak or red oak flooring to ensure long-term flooring durability in your own home.
Where does oak come from, and what is it?
As a homegrown wood forested throughout the U.S., oak is considered more environmentally friendly as it has a much lower carbon footprint than more exotic woods. What is less well-known about oak is that there are actually two distinct types of oak flooring that you can install in your home: white oak and red oak.
While most instinctively choose White Oak, it may be worth your while to consider Red Oak, which can often be a more affordable and attractive option. Pricing usually plays a significant role in the decision-making process for homeowners when deciding between these two woods. It goes without saying that usually, you can find a better deal on these flooring products by visiting distributors and big box stores in person. However, I have pasted some Amazon links here to help you find some better flooring products online for those living in more rural areas.
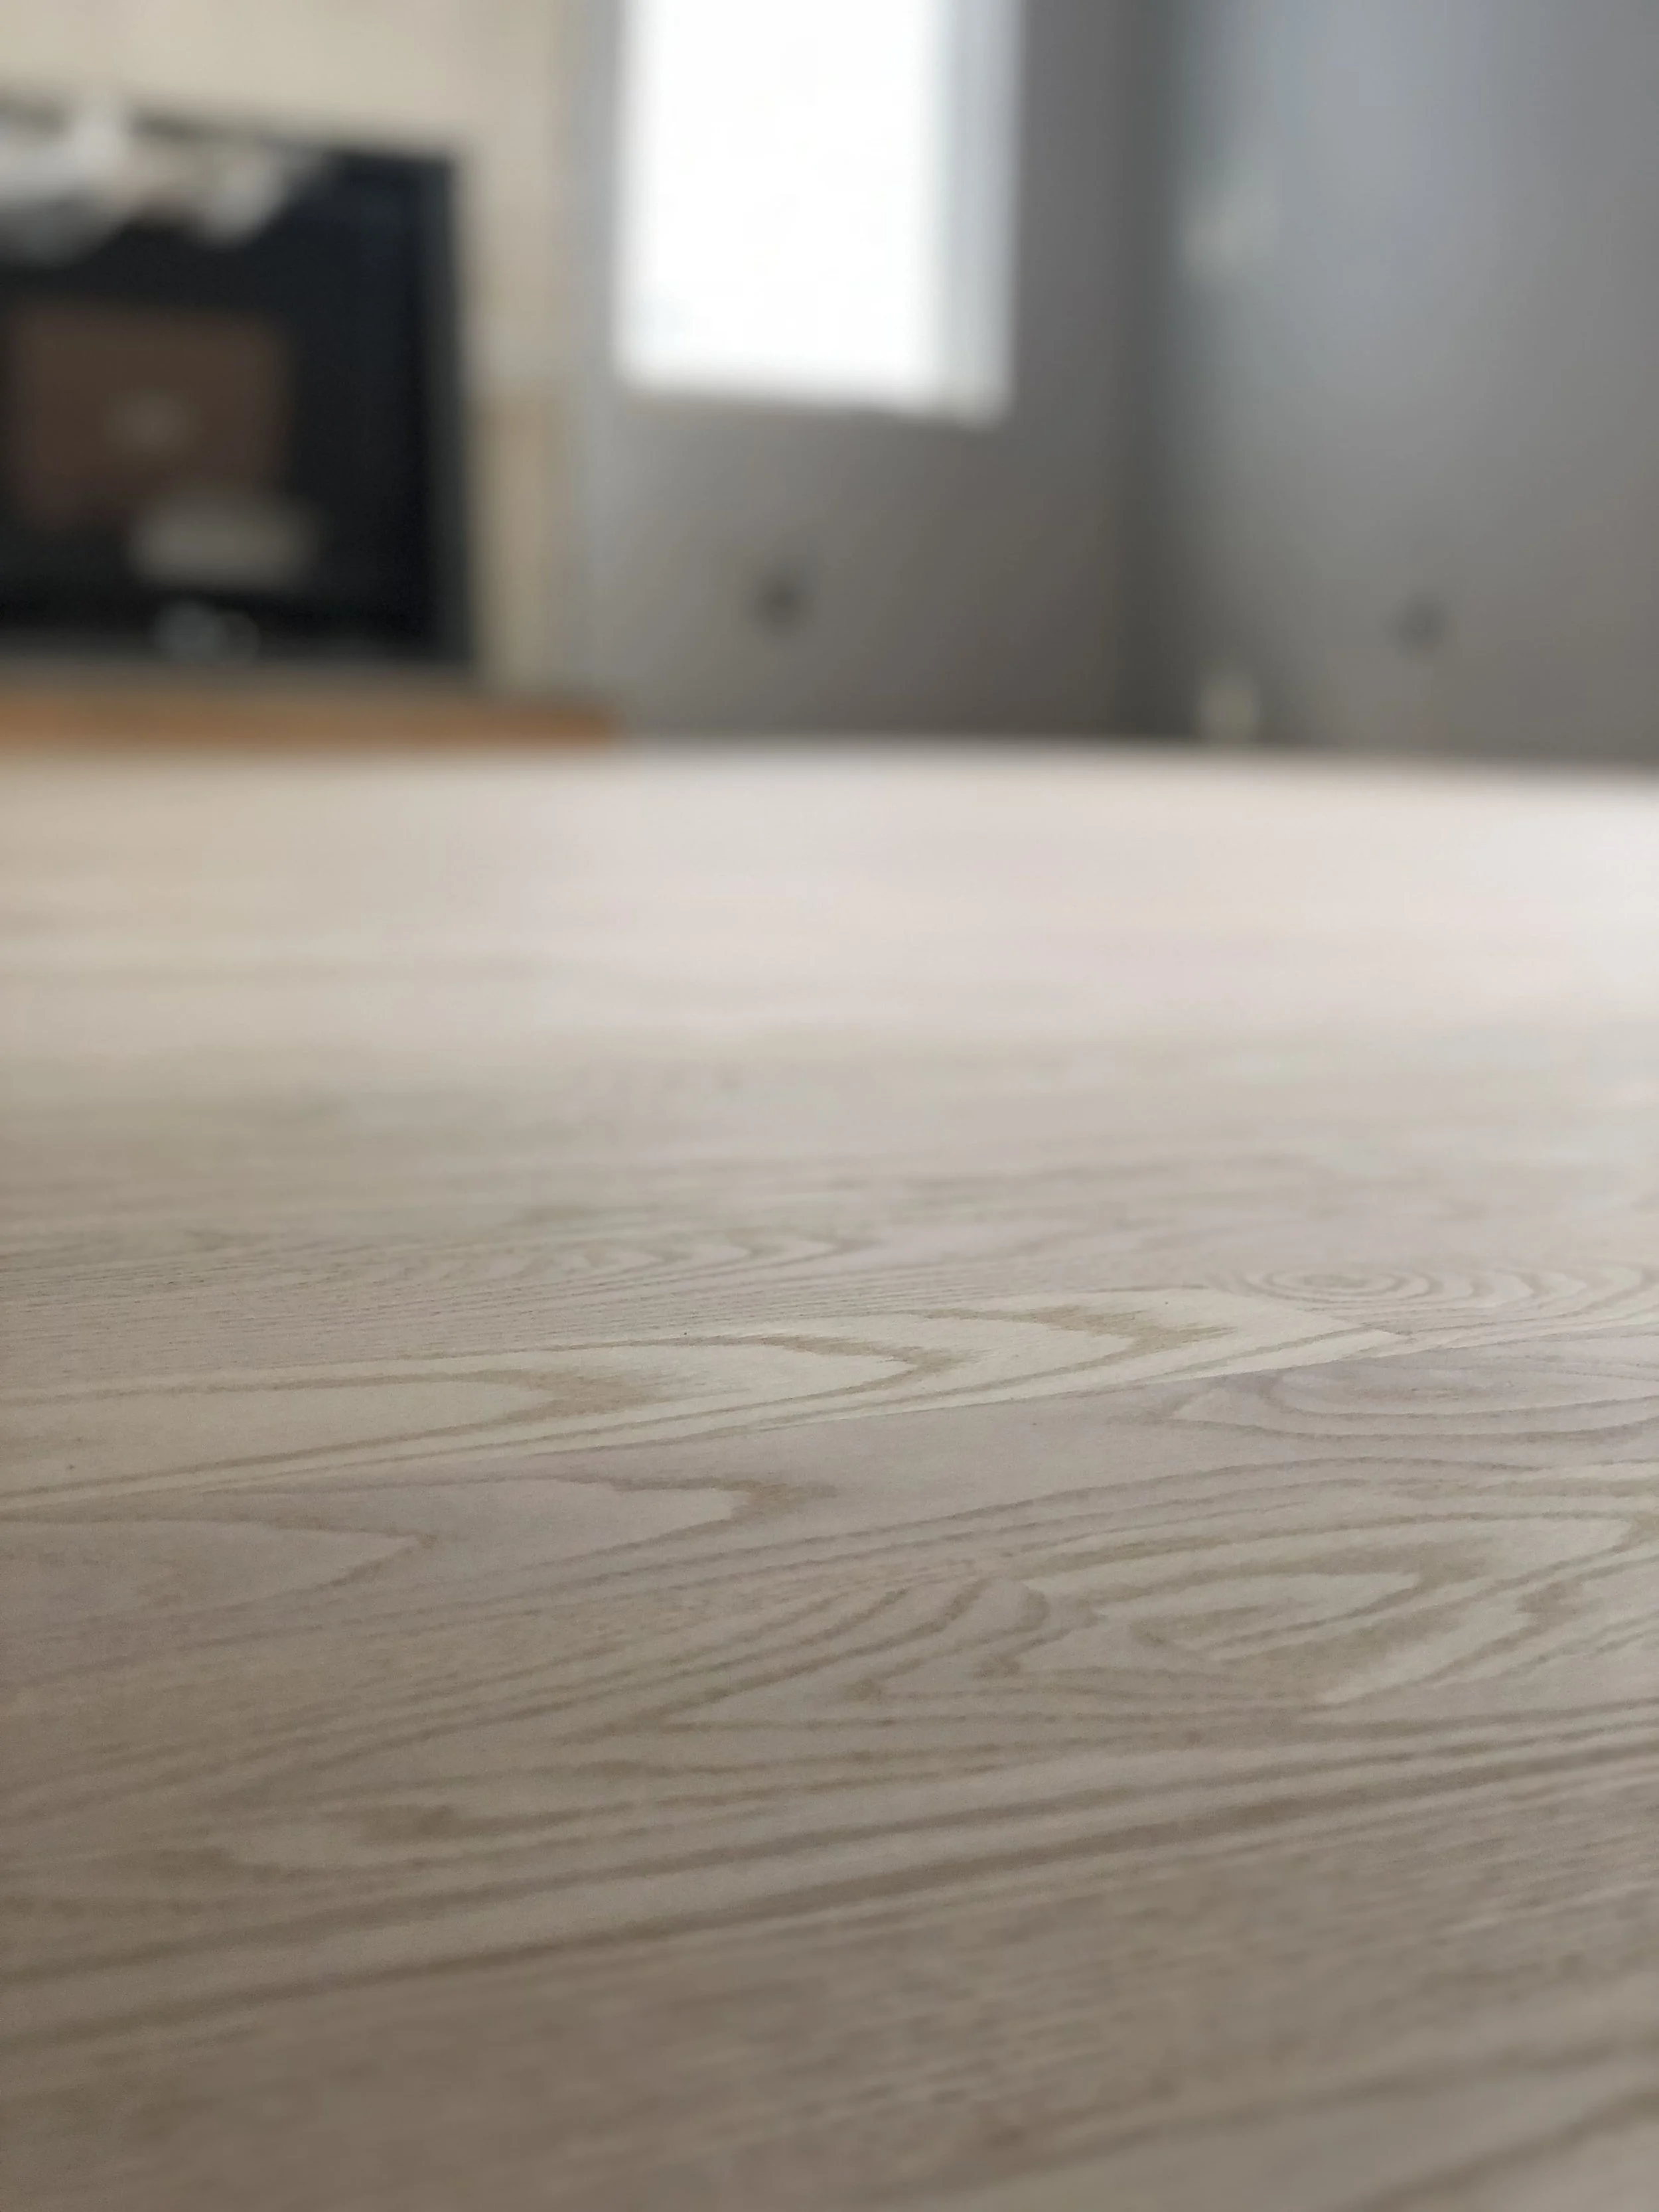
Completely raw, unfinished Red Oak flooring
Unveiling the Characteristics of White Oak and Red Oak Flooring
White oak and red oak are the two species of oak wood commonly used in hardwood flooring. While they share some similarities, the main distinct differences between the two of them are in:
Color
Grain pattern
Hardness
Moisture susceptibility
Both types of oak flooring bring unique charm and character to your living space, we should examine these characteristics more thoroughly to better comprehend their individual attributes.
Color Variations in White Oak and Red Oak
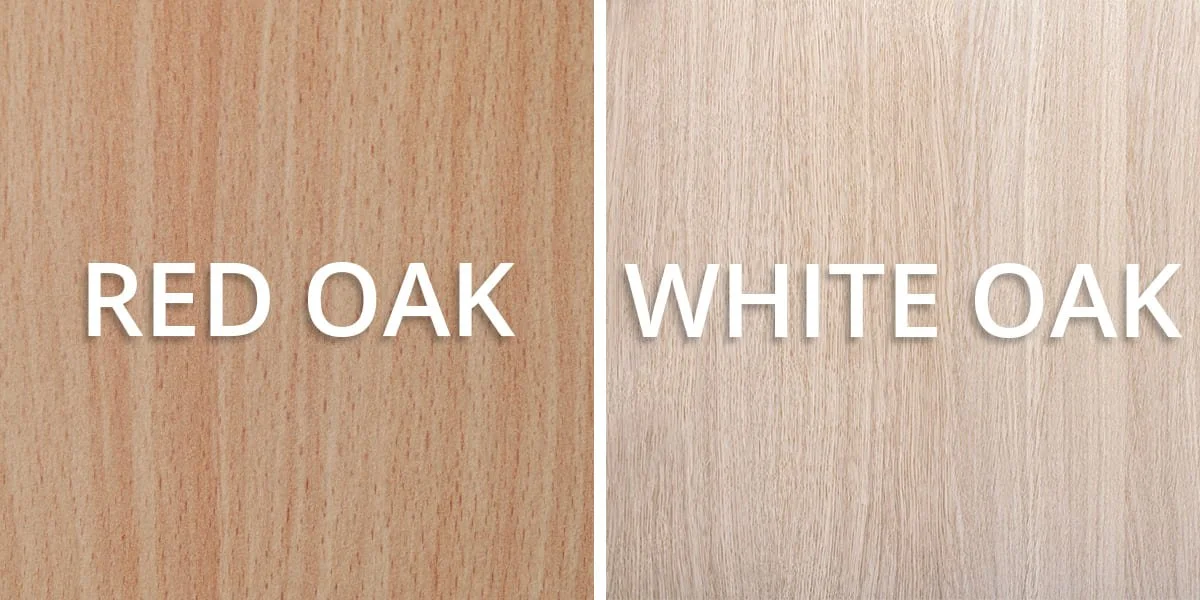
Color differences between White Oak and Red Oak Flooring
One of the most noticeable differences between white oak and red oak flooring lies in their color variations. White oak flooring exudes hues of medium brown and tan, while red oak boasts tints and subtleties of red and pink. Both types of oak flooring accept stains well, but their staining capabilities differ. Red oak tends to turn a more distinct reddish shade when stained. White oak, on the other hand, generally darkens to a brown hue.
Despite their initial difference in color, as you apply stain to them that difference is diminished. In fact, with any stain darker than medium brown, the difference is almost indistinguishable unless side by side. This can be an important factor when you consider overall pricing, as it may not be necessary to pay the extra amount for white oak when you can easily get the same effect with red oak for less money.
No matter what oak you are choosing to go with, I highly recommend finishing the floors with a very natural and light appearance. This will better show off the wood that you have, and the lighter color will also make your space seem much bigger as well. A natural finish can further enhance the hue of each type of oak. However, a dark stain can have wonderful benefits too. A dark stain color can help blend the red & white oak together if you are stuck in a situation with two varying wood species inside of the same home. When finishing with a light appearance, the red oak will become more pink or reddish, while the white oak with tighter grain lines will darken and become more honey-blonde. However, if stained, the differences become more minimal the darker that the color gets. This flexibility allows you to experiment with finishes and stains to achieve your desired look and match the existing color palette of your home.
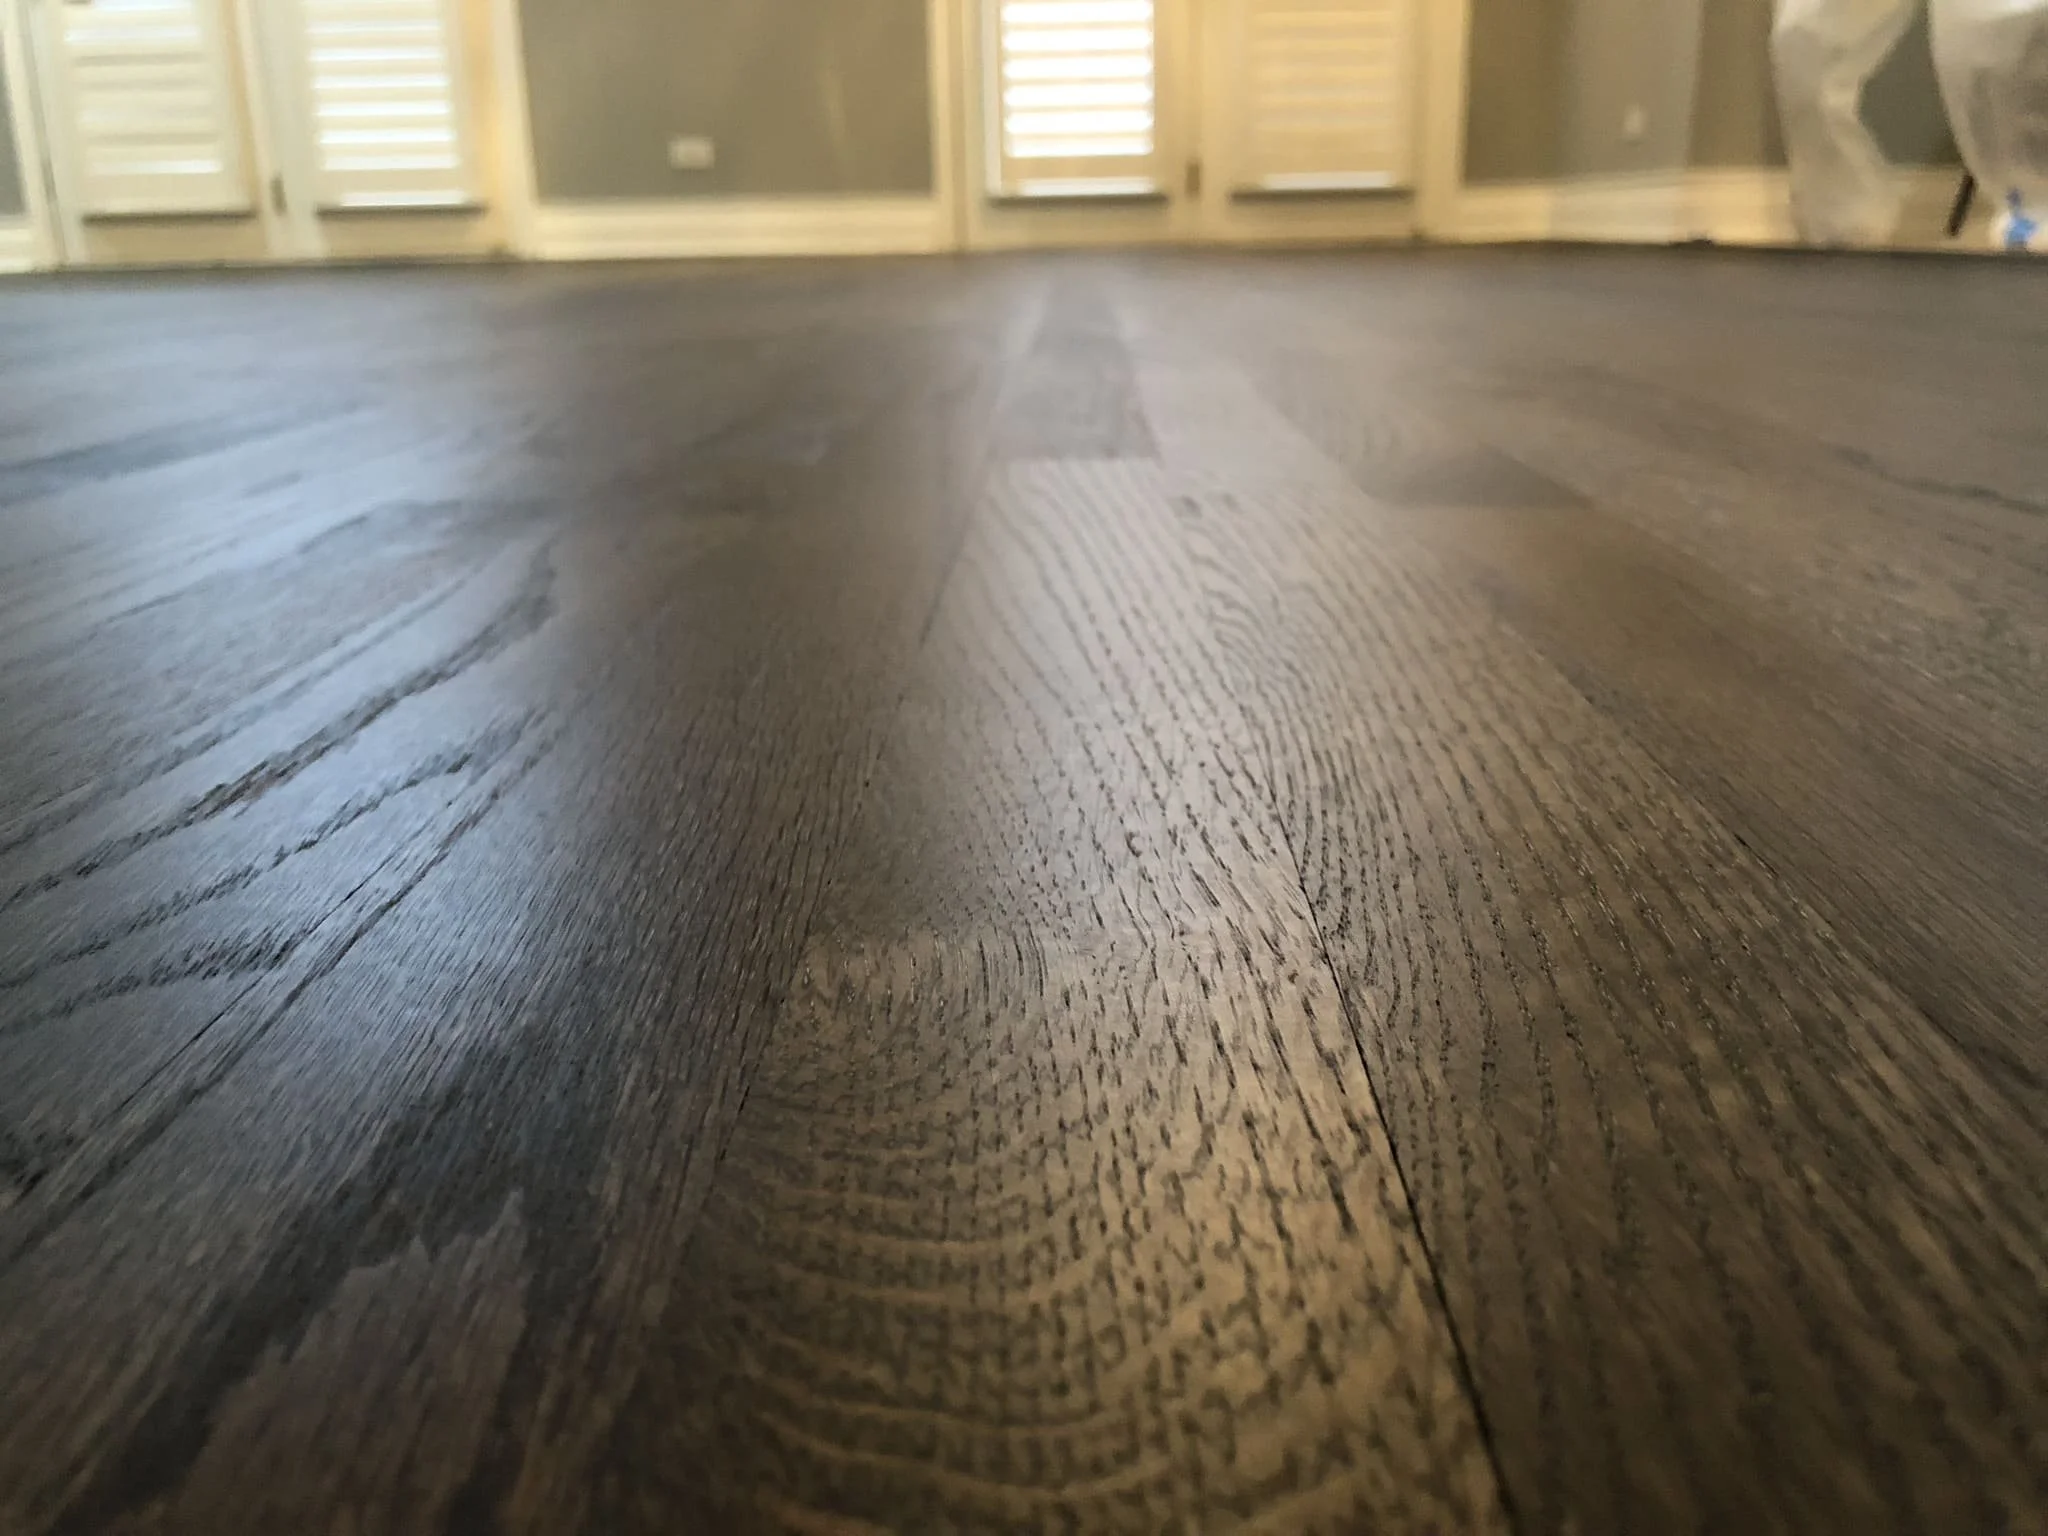
Mixed species flooring that includes red & white oak. Stained a very dark Ebony color & finished with Loba Invisible.
Grain Patterns: A Close Look
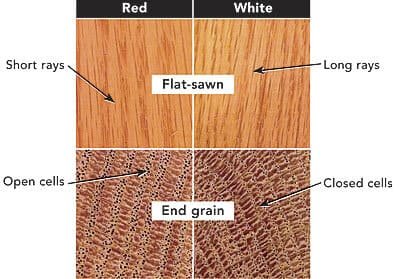
The other factor that can visibly distinguish one flooring from another is the grain pattern of the wood. While both are obviously oak, there is a definite difference between the look of White Oak and Red Oak based on the graining.
White oak exhibits a more consistent grain pattern with delicate color variations.
Red oak showcases a more pronounced grain pattern with darker hues in certain regions.
Rays, the small dark lines present in the tighter grain pattern of oak flooring, provide it with a unique character.
The cut of wood is an important choice when considering a floor made of red oak or white oak. Standard select & better red oak and white oak floors come with a mixture of plain sawn, rift-sawn, and quartersawn boards. Rift and quartersawn oak floors exhibit a distinct appearance, which many customers specifically request. While both red oak and white oak floors can be rift and quartersawn, it is more common in white oak floors.

Rift & Quartersawn White Oak floor, fully finished with Loba Invisible
As you can see, when perfectly quartersawn, the grain pattern of red & white oak flooring differs. White oak has more discernible rays and looks more uniform, while red oak’s grain has more variations, swirls, deviations, and can sometimes look uneven in appearance. Grain patterns not only contribute to the visual appeal of your flooring but also impact its durability and resistance to wear and tear.
Hardness Comparison: Janka Ratings Revealed

The Janka scale is a measure of the hardness of wood and is utilized to compare the hardness of different species of wood. White oak has a hardness rating of 1360, while red oak has a rating of 1290, making white oak generally considered harder than red oak. This difference in hardness translates to a higher resistance to wear and tear for white oak flooring, contributing to its durability. Mainly, this harness difference helps combat against DENTS in your hardwood flooring.
So far, when comparing red oak vs white oak, there are several advantages to white oak:
It has a higher hardness rating, making it more resilient and resistant to wear and tear.
This makes it a better choice for high-traffic areas of your home.
Its tighter grain makes it less prone to wear and tear.
However, because of this tight grain, it is also more prone to splintering, and as we’ve mentioned the white oak is more expensive.
The hardness and durability of each option should be taken into account when making a choice between these two different wood types. Here’s a quick recap of factors to consider:
White oak may be slightly harder and more resistant to wear and tear, but because of this tight graining, it can have more splintering in the finished product.
Consider the desired appearance of the flooring. Do you want a dark floor? Then don’t waste money on White Oak. Do you want a natural floor? Or perhaps a rift and quartersawn floor? Then definitely consider the white oak flooring.
Take your budget into consideration.
It’s important to weigh these factors against each other to make the best choice for your own personal needs.

Red oak flooring refinished using a nice light stain, in order to mimic the look of white oak.
Mixing and Matching: Can You Combine White Oak and Red Oak Floors?
If you’re adding wood flooring to a home that already has wood touches, including stair treads and banisters, you’ll want to find something that is a good match so that all of your wood has a unified look. Although the idea of combining white oak and red oak floors in one project might be appealing, keep in mind that they are not interchangeable. The color difference between the two types of wood floors is noticeable when they are side by side, making it difficult to achieve a cohesive look. In very small situations, the color difference between the two types of wood floors is less noticeable if they are stained a very dark color.
Funny enough, years ago when I was still young and starting out, I documented a project where the homeowner purchased their own materials. Unfortunately, they purchased incorrect wood before hiring us. They purchased white oak flooring for their red oak flooring project. Because it was a flip home, and the timeframe was a huge issue, the homeowner had us install, sand, and finish the floors anyway. So, I’ve got some pictures for you of what a color difference between red and white oak might look like that I think will be very helpful. Before a dark stain, and after a dark stain.
This is a white oak floor tied into a red oak floor. As you can see, the red oak is on the top and the white oak is on the bottom. The difference should be VERY clear when raw.

This is the same exact floor from the same exact angle after being fully finished with a dark stain. Pretty hard to tell, huh?
Now, after taking a look at these two pictures, it raises an interesting question. Considering a dark stain, would you still opt for white oak, even with a $3+ per square foot difference in price? It's essential to navigate through various perspectives, and sometimes, the advice from contractors & designers may not align perfectly with the desired outcome or budget. I've come across numerous projects where there was a strong preference for white oak from the interior designer, only to discover later that the final finishing color was ebony...facepalm. It emphasizes the importance of clear communication and understanding individual preferences in the floor decision-making process.
It’s also worth remembering that Red Oak is much more frequently used for surfaces like stair treads and handrails so if you’re trying to match existing wood and you have to guess, you’ll probably want to go with red oak. If you have a stair project coming up and are looking for material, these stair treads are actually insanely well-priced. They’re great too because they have a nice, new, square nosing piece. Instead of the very commonly rounded over piece which looks way more traditional.
Water Resistance: Which Oak Stands Strong?

When installing a hardwood floor in your home, the potential for water damage is always a concern. As a closed-grain wood, White Oak tends to be more resistant to water damage, which is why it is often used for boat building.
Despite the differences in water resistance between white oak and red oak flooring, it is essential to note that neither type of oak can resist water damage entirely. The finish on top of the floors is crucial for water resistance, as it provides an additional layer of defense against water and other liquids. Some options for finishes include:
Water-based finishes: These offer better spill resistance to water and chemicals.
Oil-based finishes: These also provide good spill resistance.
Hardwax oil finishes: These can be more susceptible to spills and water due to a thinner film layer on top.
If high levels of water and moisture are a huge concern, consider a quartersawn floor, whether it be red or white oak. A quartersawn floor has much tighter graining, as we discussed before, which actually makes it considerably more stable in climates with higher heat & moisture levels. Whether you install a red oak quartersawn floor or a white oak quartersawn floor, the fact that it is quartersawn will make a massive difference in stability and resistance to movement\moisture.
Evaluating the water resistance of your oak flooring involves considering not only the inherent water resistance of white oak or red oak, but also the significant role of finishes in protecting against moisture damage. Properly finished and maintained oak floors can provide a beautiful and durable addition to your home, regardless of the specific type of oak chosen.
Cost Analysis: White Oak vs Red Oak Flooring
Well, here we are. The big question and the main section that most of you are probably here for. In addition to their distinct characteristics, white oak and red oak flooring also differ in cost. White oak is typically more expensive than red oak, with the average cost per square foot for white oak flooring ranging from $5.00 to $12.00 depending on where you are located and depending on the exact type of floor you want. This higher price point can be attributed to factors such as white oak’s current trendiness and its status as a designer favorite.
Red oak, on the other hand, is a more budget-friendly option given the current prices. Red oak usually does not exceed past $4-8 dollars per square foot depending on the exact type of flooring you want and where you are located. As a result, homeowners working within a tighter budget may find red oak flooring to be a more feasible choice. However, it’s crucial to consider the long-term value of your flooring investment, as factors such as durability and water resistance can impact the overall cost-effectiveness of each option.
It is important to balance your budgetary constraints with your desired aesthetic, durability, and other factors when considering the costs of white oak and red oak flooring. While white oak may be more expensive upfront, its higher hardness rating and water resistance can contribute to a longer-lasting and more resilient floor, potentially saving you money on repairs and replacements in the long run. However, it’s important not to blow your entire budget on just the flooring material. You must remember to properly balance things as the sanding and finishing products are a HUGE cost factor that will contribute to your project budget as well.
Making the Right Choice: recapping the proper Factors to Consider
Choosing between white oak and red oak flooring involves a careful evaluation of various factors, including:
Color
Grain pattern
Hardness
Style
Cost
Your personal preference and the desired aesthetic for your living space will play a crucial role in determining which type of oak flooring is best suited for your needs.
For instance, if you prefer a more consistent grain pattern with delicate color variations, white oak may be the better choice. On the other hand, if you find the pronounced grain pattern and reddish hues of red oak more appealing, or the price, then red oak flooring may be the ideal option for your home. Arguably, if water resistance and durability are top priorities, then white oak’s higher hardness rating and water resistance may make it a more attractive choice, even for a higher price point.
The choice between white oak and red oak flooring hinges on a balance of factors such as budget, desired appearance, and specific requirements for your living environment. By carefully considering each aspect, you can make a well-informed decision and invest in oak flooring that will not only enhance the beauty of your home but also provide a durable and long-lasting surface for years to come.
Tips for Maintaining Your Oak Floors
Appropriate maintenance is vital for preserving the longevity and beauty of your oak floors, whether you opt for white oak or red oak flooring. To keep your floors looking their best, it’s essential to follow proper cleaning practices and use recommended products.
Primarily, steer clear of using harsh chemicals or abrasive cleaners on your hardwood floors, as these can harm the finish. Instead, use only water-based floor cleaning products, such as Bona hardwood floor cleaner and Loba hardwood floor cleaner, or a homemade solution of vinegar and water. Be sure to avoid products that contain wax, as well as products like Murphy’s soap and oil or mop and glow, which can leave a residue on the floor and cause big issues in the long run.
Beyond using appropriate cleaning products, maintaining a regular cleaning regimen that includes frequent sweeping and vacuuming to eliminate dirt and debris from your floors is important. Placing mats and rugs in high-traffic areas can also help protect your oak floors from damage. By following these maintenance tips, you can preserve the beauty and durability of your oak flooring for years to come.
Conclusion
Well if you’ve made it this far, kudos to you for making it to the finish line! Big thanks for sticking with me through this oak-tastic journey. In a nutshell, deciding between white oak and red oak flooring is like choosing the perfect dance partner – it all depends on the music! Factors like color, grain, hardness, water resistance, style, and cost all strut their stuff on this parquet dance floor.
So, here's the grand finale: by shimmying through these considerations and tuning into your personal rhythm, you're set to make a flooring decision that's not just a choice but a dazzling performance. Whether you're team white oak or red oak, the backstage secret is proper maintenance – keeping that dance floor in tip-top shape for an encore performance.
Before the curtains close, I want to express my heartfelt gratitude for your unwavering support over the past 12 years. It hasn’t been easy finding time to put quality posts like this together while also running my actual flooring business. But, you’ve all been here, always reading and supporting anything that I put out. For that, I thank you greatly. Here's to more exciting blog posts and flooring adventures in the future. And guess what? I've got a brand-new post hot off the press this year, spilling the tea on whether you should stay put during the polyurethane finish drying process. Spoiler alert: it's a must-read! Thanks again, and keep rocking those floors, my friends!

Rough sanding a mixed species floor that includes red oak and white oak.
Frequently Asked Questions
Is red oak or white oak better for flooring?
White Oak has a slightly higher Janka hardness rating compared to Red Oak, making it the better option for flooring in terms of resistance to dents and scratches.
What are the disadvantages of white oak flooring?
White oak flooring can suffer from splintering and cracking if not properly maintained due to its very tight graining, but its stylish look and durability make it a great choice for many homes.
What are the advantages of red oak flooring?
Red oak flooring is an industry benchmark due to its easy stainability, ease of sanding, and unique wide-grain pattern. It can easily be finished and stained without blotching and sanded with a pad or block. It is also considerably less expensive than white oak.
What is the visual difference between red and white oak?
Red oak has pink undertones, whereas white oak has more tan and brown tones. White oak is usually darker in color than red oak.
Can I combine white oak and red oak floors in a single project?
Combining white and red oak floors in a single project is possible, but never really recommended unless it is an emergency. Caution must be taken when selecting finishes and stains to make the colors complement each other. Very dark colors are required if mixing the two species of wood together.

Water Based Finish vs Oil Based Finish: Myths and Comparisons
Water-based finish and oil-based finish are two popular options for hardwood flooring but have different characteristics and properties. Learn about the myths, comparisons and decide which one is the best fit for your home.
Most homeowners agree that nothing can beat the rich, warm look of hardwood floors. In order to achieve that look, and more importantly to preserve it through years of use, it is necessary to apply a layer of polyurethane finish.
While the basic purpose of polyurethane finish is to protect your floor, that doesn’t mean all finishes are created equal. There are two distinct types of finish, oil-based and water-based, and there are some distinct differences between the two that you’ll want to take into consideration before you choose a finish for your floors.
Drying Time
No matter which type of finish you choose it will be necessary to apply several coats in order to provide the right amount of protection for your hardwood flooring. This is a crucial point to bear in mind because the most significant difference between an oil-based and a water-based finish is drying time.
Since water-based finishes are thinner, they tend to dry much faster and therefore you can apply several coats in one day. You’ll also be able to walk on the floor within about 4-6 hours after the final coat is applied, which means that you could be using the room again in the same day.
Compare that with thicker oil-based finishes that generally take at least 12 hours for each single layer to dry and require 24 hours of wait time after application of the final layer before you can walk on them. That means the room being worked on will not be usable for several days, which can be a major headache for homeowners.
Common Myth: Taking longer to dry means your floor will have better, stronger protection.
While oil-based finishes can certainly provide plenty of protection that doesn’t mean that water-based finishes are less effective. Water-based finishes may dry faster but they still provide a barrier to deflect scratches and dents and keep your floors looking beautiful for years to come
Smell
When most people think about applying a finish to hardwood floor the first thing that comes to mind is the strong smell. Unfortunately, there’s no way to completely avoid the pungent odor that is characteristic of polyurethane finish, but it can be mitigated to some degree by using a water-based finish. In fact, most water-based finishes have very little smell, making them safer to apply and safer for your family to live with.
When applying the much stronger-smelling oil-based finishes, you’ll need to use a respirator and you’ll find that the smell remains on your clothes for hours afterward.
It is highly recommended that you and your family leave the house for the duration of the finishing process and that you remove your pets from the home as well. With water-based finishes, there is no need to use a respirator and it is perfectly safe for your family and your pets to remain in the house.
Of course, the real safety issue here is not just the smell, it’s the fact that flooring finishes contain VOCs (volatile organic compounds), which are emitted into the environment and can cause a number of health issues.
In general, water-based finishes contain fewer VOCs than oil-based finishes, which makes them more attractive to consumers who are worried about being environmentally friendly.
Common Myth: Fewer VOCs make water-based finishes the obvious environmentally friendly choice.
While having fewer VOCs is certainly a selling point, it doesn’t necessarily mean that water-based finishes are the clear choice for the environment since they don’t last as long as oil-based finishes and will therefore need to be re-applied more frequently. Depending on the wear your floor gets, this could negate any benefit you’re getting from the lower VOC content.
Thickness/Hardness
Since a finish is applied in order to protect the wood underneath, the thickness of that protective layer is certainly an important point to consider. Not surprisingly, the thickness of the finish layer varies depending on how many layers of finish are applied.
As water-based finishes are thinner, more layers may be required in order to achieve the desired level of protection. This will depend on the area being finished and what the traffic patterns are. In rooms that see a lot of traffic, a heavier finish will provide extra protection.
Common Myth: Since it’s thicker, an oil-based finish provides more protection.
Since the extra thickness of an oil-based finish helps to prevent surface scratching, that makes it a good choice for high-traffic areas but it doesn’t mean that it will protect against all damage. While they may be thicker, oil-based finishes are also softer than water-based, which means they are more susceptible to denting.
In a room where heavy pieces of furniture are used and moved, a water-based finish may actually be the better choice.
Cost
Let’s face it, for any homeowner on a budget cost is going to be a primary concern and it is one of the areas where oil-based and water-based finishes differ dramatically. Simply put, water-based finishes are significantly more expensive than oil-based.
You can pay as much as $0.50 to $1.00 more per square foot for a water-based finish than you would for an oil-based finish. When you also consider the fact that water-based finish wears out more quickly and will need to be re-applied more often, you can see how your costs could go up even more.
Common Myth: Paying more means you’re getting a better end result.
While in most cases, paying more usually means getting a higher quality product this isn’t always the case for flooring finishes. There are many very good quality oil-based finishes that can give you the look you want for much less. If you’re on a tight budget you’ll want to carefully consider all of your options and make the choice that works best for you.
Look
When it comes to flooring finishes perhaps the biggest deciding factor is the end look. You don’t want to go to the expense and effort of installing hardwood flooring only to end up with a less-than-ideal final product. The final look is also where oil-based and water-based finishes differ the most.
Oil-based finish has an amber, or yellowish, color while water-based finishes are clear. Obviously, since they don’t have any color of their own, water-based finishes won’t add any extra color to your flooring.
That means the beautiful natural look of the wood will able to shine through for the duration of the floor’s life. In comparison, oil-based finishes will darken over time, causing the floor to look darker and heavier.
Common Myth: Oil-based finish produces a richer, warmer, more attractive look on all types of flooring.
While an oil-based finish can help to enhance the look of many types of hardwood floors, it doesn’t necessarily produce the best final look for all types of flooring. Since it tends to get yellower over time, it is not recommended for woods that are lighter in color, including gray-stained, white-stained, or white-washed flooring.
Also, lighter woods like Maple and woods with a naturally yellow tint of their own such as Ash, Pine, or Fir, usually do better with a clearer water finish that won’t take away from their natural look. With harder woods like Oak, an oil-based finish is the better choice as the addition of the amber tint can help to produce a warm, rich look.
Bottom Line
As you can see, a good case can be made for either an oil-based or water-based finish. Both are perfectly legitimate choices and each one has its pros and cons. The finish you choose for your flooring will depend on the type of wood you use, the area where you’re using it, and the overall look you are trying to achieve.
There is no doubt that hardwood flooring can be a significant investment so you should carefully consider your options before you choose a finish. That way you can protect and enjoy your beautiful floor for years to come.
Cleaning and Maintaining Your Hardwood Floors
Cleaning your floors can be tricky, but with the right techniques and products you can keep your floors looking beautiful for years to come. Learn about the do's and don'ts of cleaning your hardwood floors.
Hey there readers, Patrick here! As we step into the fresh beginnings of 2024, I thought it was the perfect time to revamp this blog post with the latest tips and tricks for maintaining those beautiful hardwood floors in your home. I get it – lackluster floors can really dampen the spirit of your space. That's why I've put together this comprehensive guide, freshly updated for the new year, to help you keep your floors looking immaculate and inviting. Not only do well-kept floors elevate the beauty of your home, but they also contribute to a healthier living environment. So, let's dive in together and embark on this journey towards achieving and maintaining impeccable floors!
Key Takeaways
Understand flooring types and maintenance needs
Choose the right vacuum cleaner, mop, and cleaning equipment
Implement daily/weekly/monthly floor maintenance routines with green solutions to protect floors from damage
Understanding the Basics of Floor Maintenance

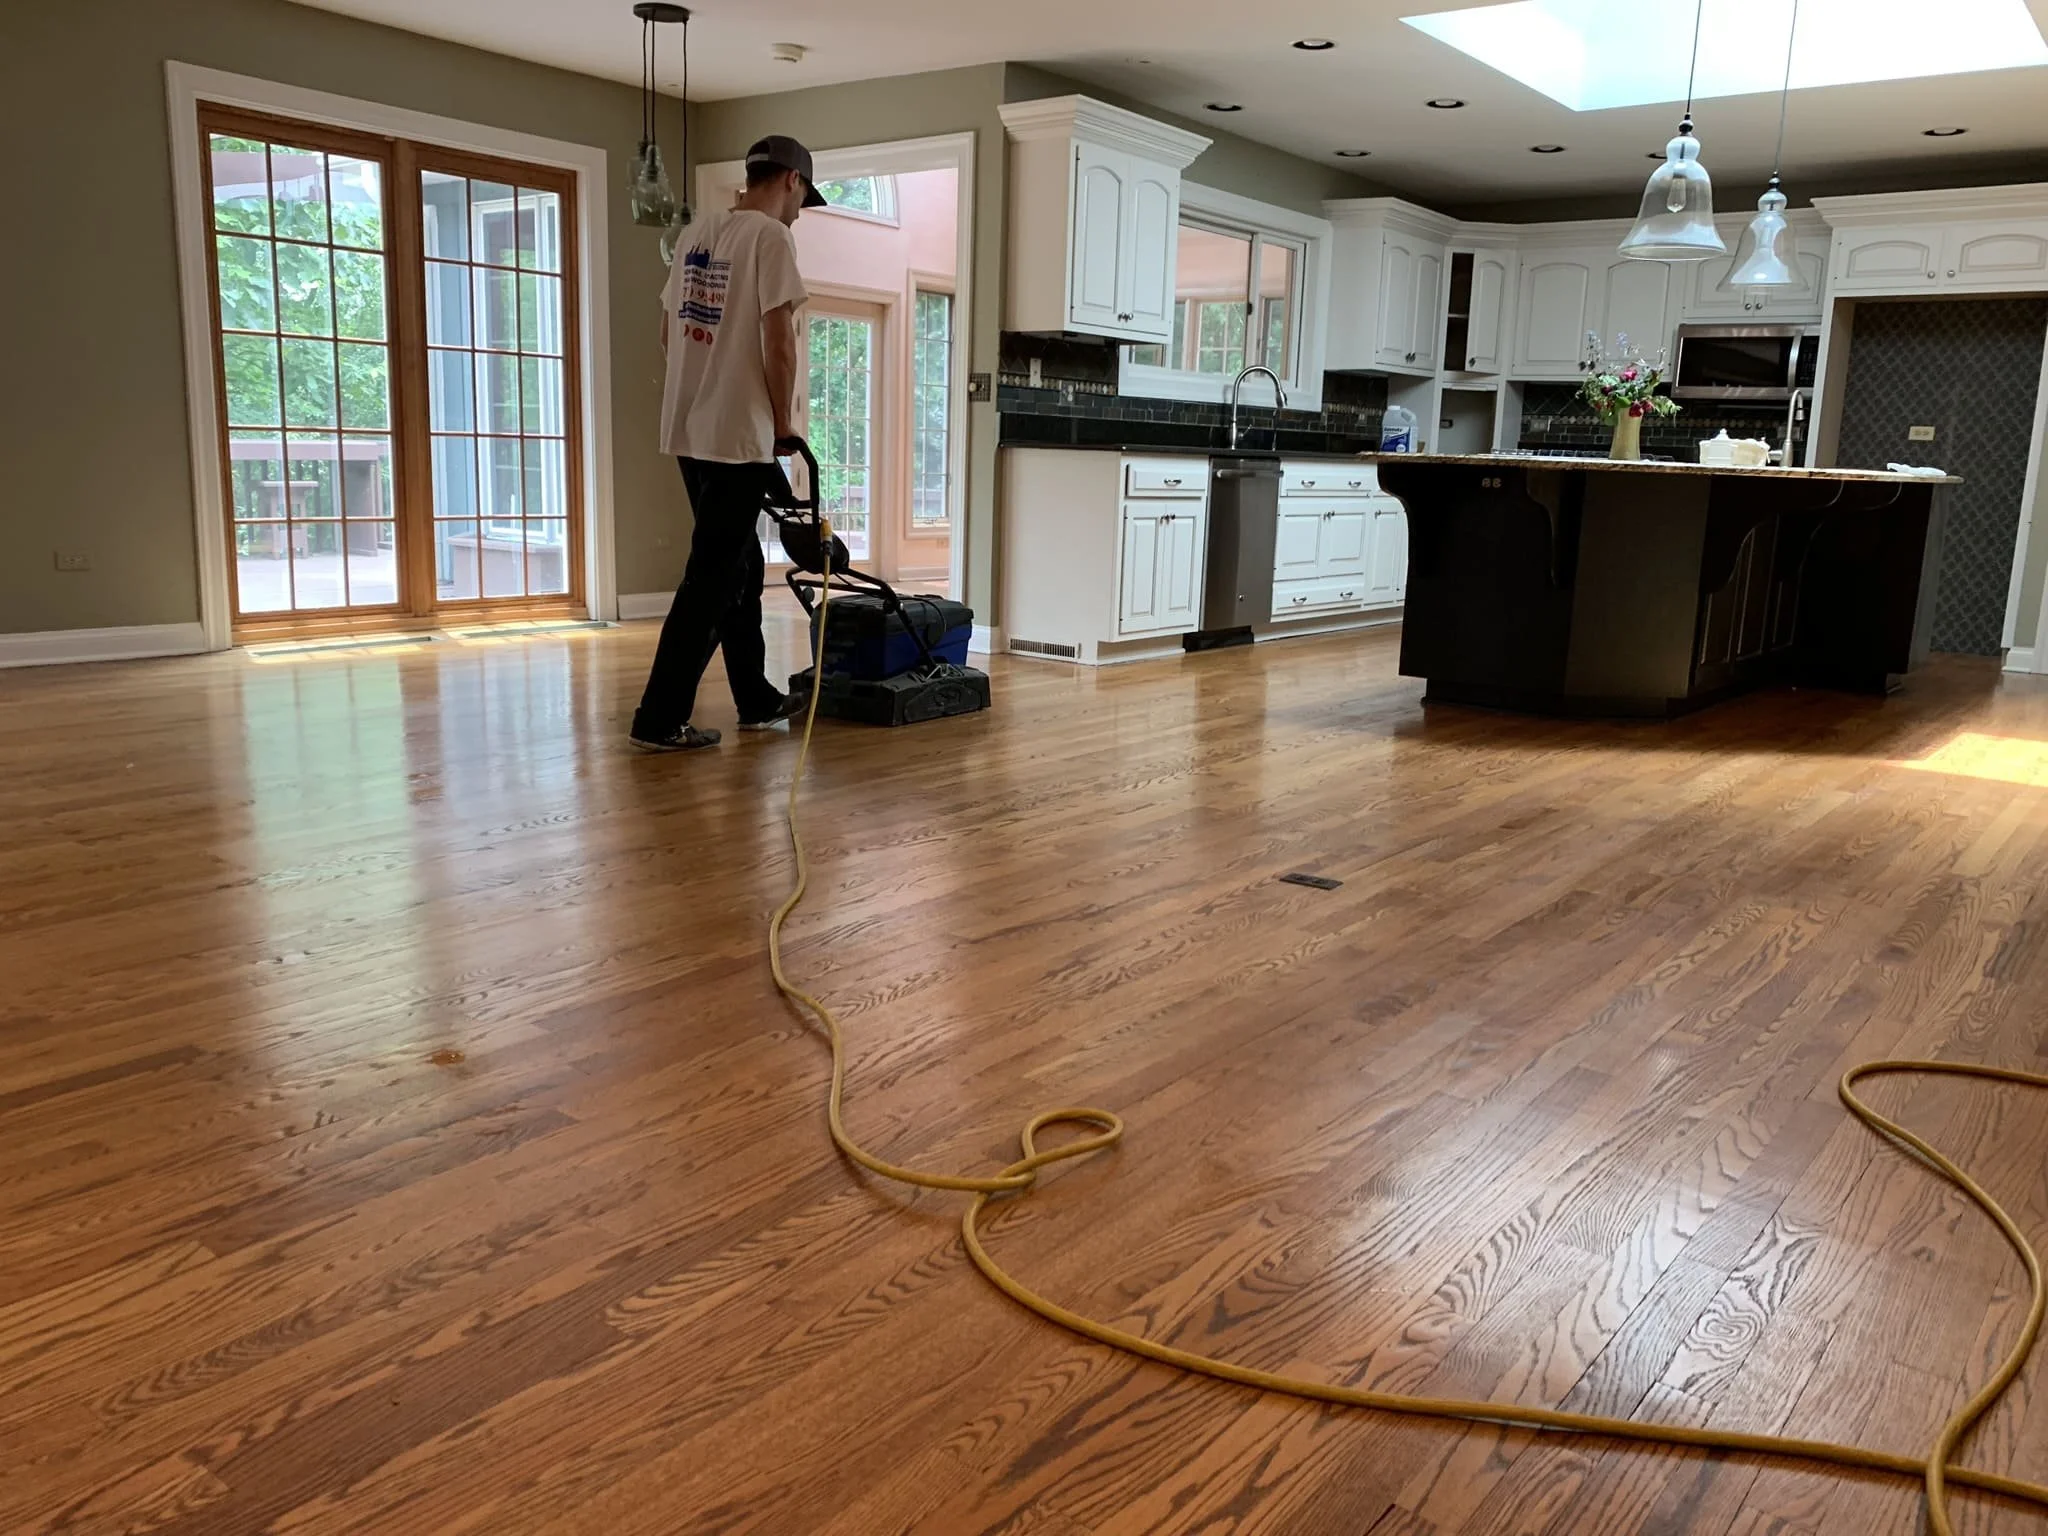
Patrick performing a deep hardwood floor cleaning for a client in Barrington, IL
Understanding the nuances of different flooring types is the cornerstone of effective floor maintenance, and believe me, as someone who's seen a myriad of floors, each one is unique. Whether it’s the natural elegance of hardwood or the practical charm of laminate, each type demands its own special care and attention. And it's not just about the flooring itself – factors like foot traffic and environmental conditions play a huge role too. In my experience, these elements greatly dictate how often and how intensely we need to roll up our sleeves for a thorough cleaning. Let’s get a handle on these different needs and challenges, ensuring your floors always get the best treatment they deserve.
Types Of Flooring
Let me break down the flooring landscape for you, based on my hands-on experience with these surfaces. The world of flooring is diverse, with each type bringing its own set of rules for care. We've got the ever-popular hardwood, practical laminate, versatile vinyl, elegant tile, and cozy carpet. Each one is unique, just like the homes they grace.
Now, let's talk about my specialty – hardwood floors. These beauties come in three main varieties: solid hardwood, engineered hardwood, and laminate that mimics wood. Each type demands its unique approach to maintenance. For instance, with hardwood, it’s all about finesse and the right products. Harsh methods? A big no-no. Sandpaper, steel wool, or abrasive chemicals can be the arch-enemies of hardwood finishes.
Instead, I always recommend using microfiber-headed mops. They're like the gentle giants of cleaning tools – tough on dirt but soft on your floors. This way, you're not just cleaning; you’re caring for your floors, ensuring they stay in top-notch condition year after year. Trust me, with the right approach, your floors can become a legacy in your home!
Factors Affecting Floor Maintenance Frequency
In my experience, keeping floors in prime condition isn't just a one-size-fits-all routine. Several key factors come into play, determining how often you need to break out the cleaning supplies.
Think about your daily life. Homes bustling with pets, kids, or just a lot of foot traffic in general, tend to collect dirt and grime a bit faster. It's like having a mini-highway at home – the more traffic, the more frequent the maintenance needed.
Understanding these dynamics is crucial. It helps you tailor a cleaning schedule that's just right for your home, ensuring your floors don't just survive but thrive. Remember, a well-maintained floor isn't just about cleanliness; it's about extending its life and preserving its beauty, something I always strive for in every home I work on."
Essential Tools and Equipment for Floor Maintenance
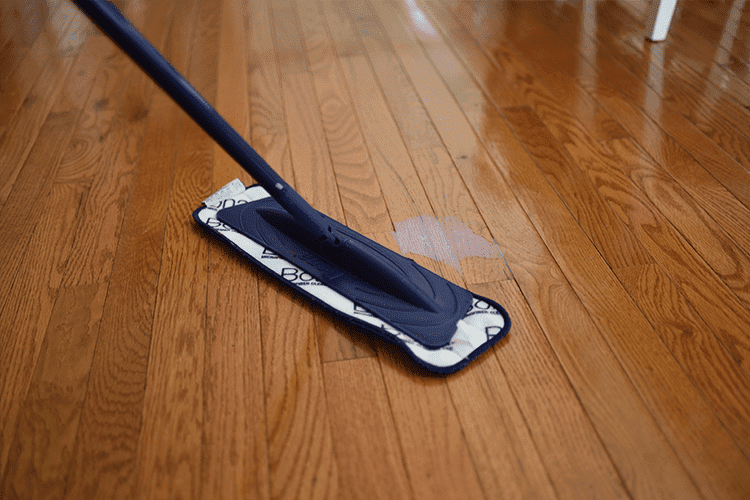
This is the Bona cleaner mop included in every Bona floor cleaning package, highly recommended
Knowing what tools to use is as crucial as understanding the maintenance itself. From my own toolkit, I can tell you that a good vacuum cleaner and a trusty mop are indispensable allies in keeping your floors spotless and in top shape.
Choosing the Right Vacuum Cleaner
The market is flooded with vacuum cleaners of all types – upright, canister, stick, handheld, and even robot vacuums. But here's the trick: it's not just about picking any vacuum. You need one that's gentle yet effective on your specific floor type. For hardwood floors, a canister vacuum usually does the job brilliantly. It's about finding that balance between gentle suction and thorough cleaning.
If you have carpeted areas, you'll want a vacuum that comes with adjustable power settings and a brush roll suitable for carpets. My advice? Dive into reviews and get recommendations tailored to your floor type. It makes all the difference in picking the perfect vacuum for your home.
Selecting The Best Mop
Now, onto mops. These are crucial for that final touch of cleanliness. When choosing a mop, consider:
The material of the mop head (microfiber is my go-to for most hard floors)
Absorbency levels (important for quick cleanups)
How easy it is to maneuver (because no one likes a clumsy mop)
Durability and compatibility with your floor type (especially important for laminate floors)
For instance, I often recommend microfiber dust mop pads for laminate floors. They're great at picking up dirt and don't leave any residue behind.
In summary, choosing the right vacuum and mop isn't just about cleaning – it's about caring for your floors in a way that ensures they stay beautiful and last longer."
Daily Floor Maintenance Tips
Keeping your floors in tip-top shape is a daily commitment, but trust me, it pays off. Here are some of my go-to tips for daily floor maintenance that have kept countless floors under my care looking great.
Preventing Dirt and Grime Buildup
A little bit of daily care goes a long way. I'm a big advocate of regular sweeping, vacuuming, and dry mopping. Why? Because it's the best way to tackle the usual suspects – dust, dirt, and debris – that love to call your floors home. By making these simple tasks part of your daily routine, you're not just cleaning; you're actively preserving the freshness and beauty of your floors.
Quick Fixes for Spills and Stains
Let's face it – spills and stains are just part of life, especially if you're like me and enjoy a bustling household. The key is quick action. Here's my quick-fix guide:
Spot a spill? Grab an absorbent cloth and blot it up ASAP.
Got a stubborn spot? A damp paper towel is often all you need for a swift cleanup. Need something a little more aggressive? Spot spraying with Bona Floor cleaner should do the trick.
Always remember to dry the area afterward to avoid any water damage.
Prompt attention to spills and stains is the secret to avoiding long-term damage and keeping your floors looking as good as new."
Weekly and Monthly Floor Maintenance Routines
Apart from daily cleaning habits, setting up a weekly and monthly floor maintenance routine guarantees your floors get the thorough cleaning and care they deserve. Routines involving deep cleaning techniques can keep your floors looking as good as new.
Deep Cleaning Techniques
Deep cleaning is the secret sauce to keeping your floors not just clean, but also preserving their appearance and durability. Here's my take on the best approaches for different types of flooring:
Hardwood floors: My go-to is a damp tack mop paired with Bona hardwood floor cleaner. No Bona on hand? A homemade mix of water and a little vinegar has served my floors well for years, despite some debates against it. Remember, steam mops are a no-go for hardwood!
Ceramic tile floors: A wet mop and a mild floor cleaner work wonders. For tougher jobs, a slightly acidic cleaner is your friend for tile.
Vinyl flooring: This one's pretty straightforward – sweep, vacuum, and mop without worry. Vinyl's durability against moisture makes it a low-maintenance dream.
Laminate or carpet: Stick to the manufacturer’s guidelines for deep cleaning. For carpets, considering a professional clean with the right equipment can really rejuvenate your floors.
Aim for a deep clean about once a month – it's like a spa day for your floors, keeping them fresh and extending their life.
Maintaining Floor Finishes
Now, about those finishes. Whether it's water-based polyurethane, oil-based polyurethane, wax, epoxy, or varnish, each finish demands its own kind of TLC. For instance, if you've got floors finished with Rubio Monocoat (a personal favorite of mine), you'll want to stick to their specific Rubio soap cleaner.
The key here is to follow the recommended practices and use the right products. It's not just cleaning; it's about preserving those finishes so they continue to protect and beautify your floors for years to come.
Protecting Your Floors From Damage

Picture of a freshly scratched hardwood floor, yikes!
Protecting your floors is just as important as cleaning them. Over the years, I've learned that the little things can make a big difference in keeping floors in top condition. Let me share some tips on how to shield your floors from the usual culprits of damage – furniture, appliances, and the ever-tricky moisture.
Furniture and Appliance Care
When it comes to furniture and appliances, it’s all about being floor-friendly. Those tiny scratches and dents? Often they come from moving furniture around or from the daily use of appliances. Here’s what I do:
Always use furniture pads – they’re like little cushions for your floor.
Move furniture with care. If you can lift it, that’s the way to go. If not, use furniture sliders.
Choose appliances with floor-friendly features. Trust me, your floor will thank you for it.
Taking these preventive steps has been a game-changer in maintaining the pristine look of my floors.
Addressing Moisture Issues
Moisture is like kryptonite for floors. It can warp, buckle, and, in worst cases, even rot your beautiful floors. Here's how I tackle moisture:
Find and fix any leaks or dampness sources. A little detective work goes a long way.
Seal any cracks or gaps. It’s like putting a protective shield over your floors.
Stay on top of plumbing issues. A small drip can lead to big problems for floors.
Get a hygrometer for your kitchen. As soon as you see your home shoot past a moisture level of 65%, you can start expecting issues with any wooden floor in your home.
Dealing with moisture issues promptly means you're not just fixing a problem; you're actively preserving the integrity and longevity of your floors.
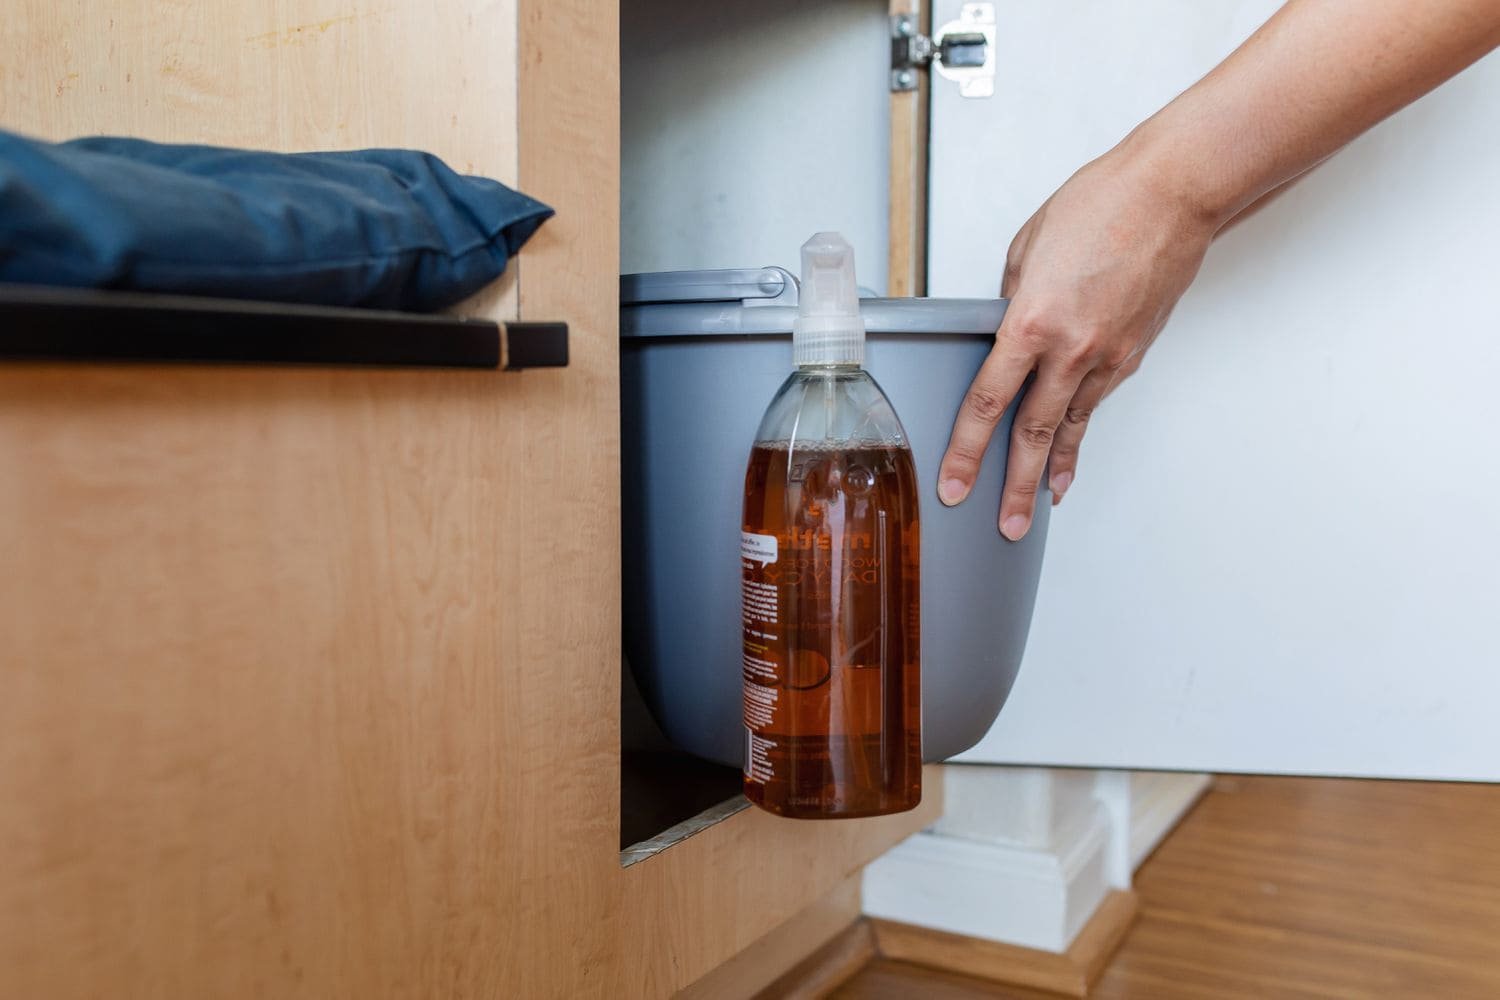
Eco-Friendly Cleaning Solutions For Floors
In today’s eco-conscious world, many people are looking for green cleaning solutions for their floors. As far as home made solutions go, I don’t think there’s much that’ll beat the combination of vinegar and water. However, here are some others I’ve also found to work well:
DIY Floor Cleaning Solutions
Creating your own DIY floor cleaners using natural ingredients can be a cost-effective and eco-friendly option for maintaining your floors. Ingredients like:
vinegar
olive oil
water
castile soap
Deciding to create your own DIY floor cleaners leads to a safer and more eco-friendly approach to floor maintenance. But honestly, it’s just great to have in case you run out of actual hardwood floor cleaner and need a quick fix to get the floors cleaned.
Environmentally Friendly Commercial Cleaners
If you prefer commercial cleaners, there are environmentally friendly options available that are safe for your floors and the planet. These green cleaning solutions are formulated with non-toxic, biodegradable ingredients and provide a sustainable alternative to conventional cleaning products.
Choosing eco-friendly commercial cleaners contributes to a healthier home and a more sustainable planet.
Conclusion
Well, folks, that's a wrap on our floor maintenance masterclass! I hope you've picked up some tricks and insights that will make keeping your floors gorgeous a breeze. Remember, it's all about getting the basics right, sticking to those daily routines (even when the couch looks way more inviting), and knowing when to call in the pros.
If you're feeling inspired, why not roll up your sleeves and start today? Your floors might just throw you a thank-you party in their own shiny, polished way. And hey, while you're here, don't forget to check out some of my other blogs – there's a treasure trove of tips, laughs, and maybe a few dad jokes waiting for you.
Thanks for sticking with me through this floor care journey. Keep smiling, keep cleaning, and remember, a happy floor means a happy home. Until next time!
Frequently Asked Questions
What is proper Floor maintenance?
It is important to dust, mop, or sweep the floor daily to clear it of dirt and grit. Good entry mats can also help reduce the amount of outside dirt and oil coming in, and all spills should be immediately cleaned up.
What is the best thing to use to clean wood floors?
For the best cleaning results, use a broom or a hardwood floor mop pre-treated with a dusting agent and vacuum your hardwood floor once a week with the "hard floor" setting. You can also use commercial wood-cleaning products or make your own cleaner by mixing vinegar and warm water.
How often should I deep clean my floors?
To keep your floors in top condition, you should deep clean them every 12-18 months, depending on the type of flooring and amount of foot traffic. Depending on your floors condition, buffing and recoating the floors with new finish might be the better option.
What are some environmentally friendly alternatives to traditional floor cleaning products?
DIY floor cleaners with natural ingredients or commercial non-toxic biodegradable cleaners are eco-friendly alternatives to traditional floor cleaning products.
How can I protect my floors from furniture and appliance damage?
Protect your floors from potential damage by using furniture pads, moving furniture correctly, and utilizing floor-friendly appliances.