CHICAGO HARDWOOD FLOORING BLOG
Tips and tricks for all your hardwood flooring needs by a local flooring company in Chicago.

When is it Time for New Hardwood?
Most hardwood can last you a very long time, but there will come a day when it will be time for fresh new hardwood. It can be a large expense depending on what needs to be done, but sometimes the longer you wait, the more expensive it can be. So, the question is, how do you know when its time for new flooring?
Most hardwood can last you a very long time, but there will come a day when it will be time for fresh new hardwood. It can be a large expense depending on what needs to be done, but sometimes the longer you wait, the more expensive it can be. So, the question is, how do you know when it's time for new flooring?


Water Damage
Water and moisture damage can be the biggest hardwood-killer. To much exposure to either one can cause extreme buckling, peeling, bending and large gaps. Depending on the severity of the damage, you may be able to take care of the issue in other ways. A lot of times, however, replacing or refinishing is your only option. Which brings us to our next topic...

Over Sanding
Many times we choose to refinish flooring. This involves a sanding process to remove an old finish, repair the floor, and refinish the flooring. This can be a wonderful thing and it can keep your floors looking new (as well as being cost effective), but it can only be done so many times.
Every time your hardwood floors are sanded they get thinner. If you sand them too many times you could even expose nails which is certainly a bad thing. How many times you are physically able to sand and refinish floors is variable depending on the type or wood, the thickness, and your floors flatness, but on average it is usually 3-5 times.


Age
The other most important factor is age. Hardwood may not have a definite expiration date, but they definitely have a lifespan that if over lived can mean a costly repair or replacement. As hardwood begins to decay, it can become soft and bouncy — which aren’t things you’re really looking for in flooring. This increases damage to the underlying sublayer of flooring which can make redoing your flooring very expensive.
So, when the time comes, it may be hard to say goodbye to your old floors. Especially if they have been in countless generations of your family. But, don’t look at it as an emotional loss, look at it as an incredible opportunity to try a new look! There are endless possibilities — new plank widths to try, new colors and new kinds of wood.
Its not an ending, its a new beginning! If that time is now you can save 5% instantly when you book your flooring project with us by liking our page and showing us the following post from our facebook page!
Cleaning and Maintaining Your Hardwood Floors
Cleaning your floors can be tricky, but with the right techniques and products you can keep your floors looking beautiful for years to come. Learn about the do's and don'ts of cleaning your hardwood floors.
Hey there readers, Patrick here! As we step into the fresh beginnings of 2024, I thought it was the perfect time to revamp this blog post with the latest tips and tricks for maintaining those beautiful hardwood floors in your home. I get it – lackluster floors can really dampen the spirit of your space. That's why I've put together this comprehensive guide, freshly updated for the new year, to help you keep your floors looking immaculate and inviting. Not only do well-kept floors elevate the beauty of your home, but they also contribute to a healthier living environment. So, let's dive in together and embark on this journey towards achieving and maintaining impeccable floors!
Key Takeaways
Understand flooring types and maintenance needs
Choose the right vacuum cleaner, mop, and cleaning equipment
Implement daily/weekly/monthly floor maintenance routines with green solutions to protect floors from damage
Understanding the Basics of Floor Maintenance

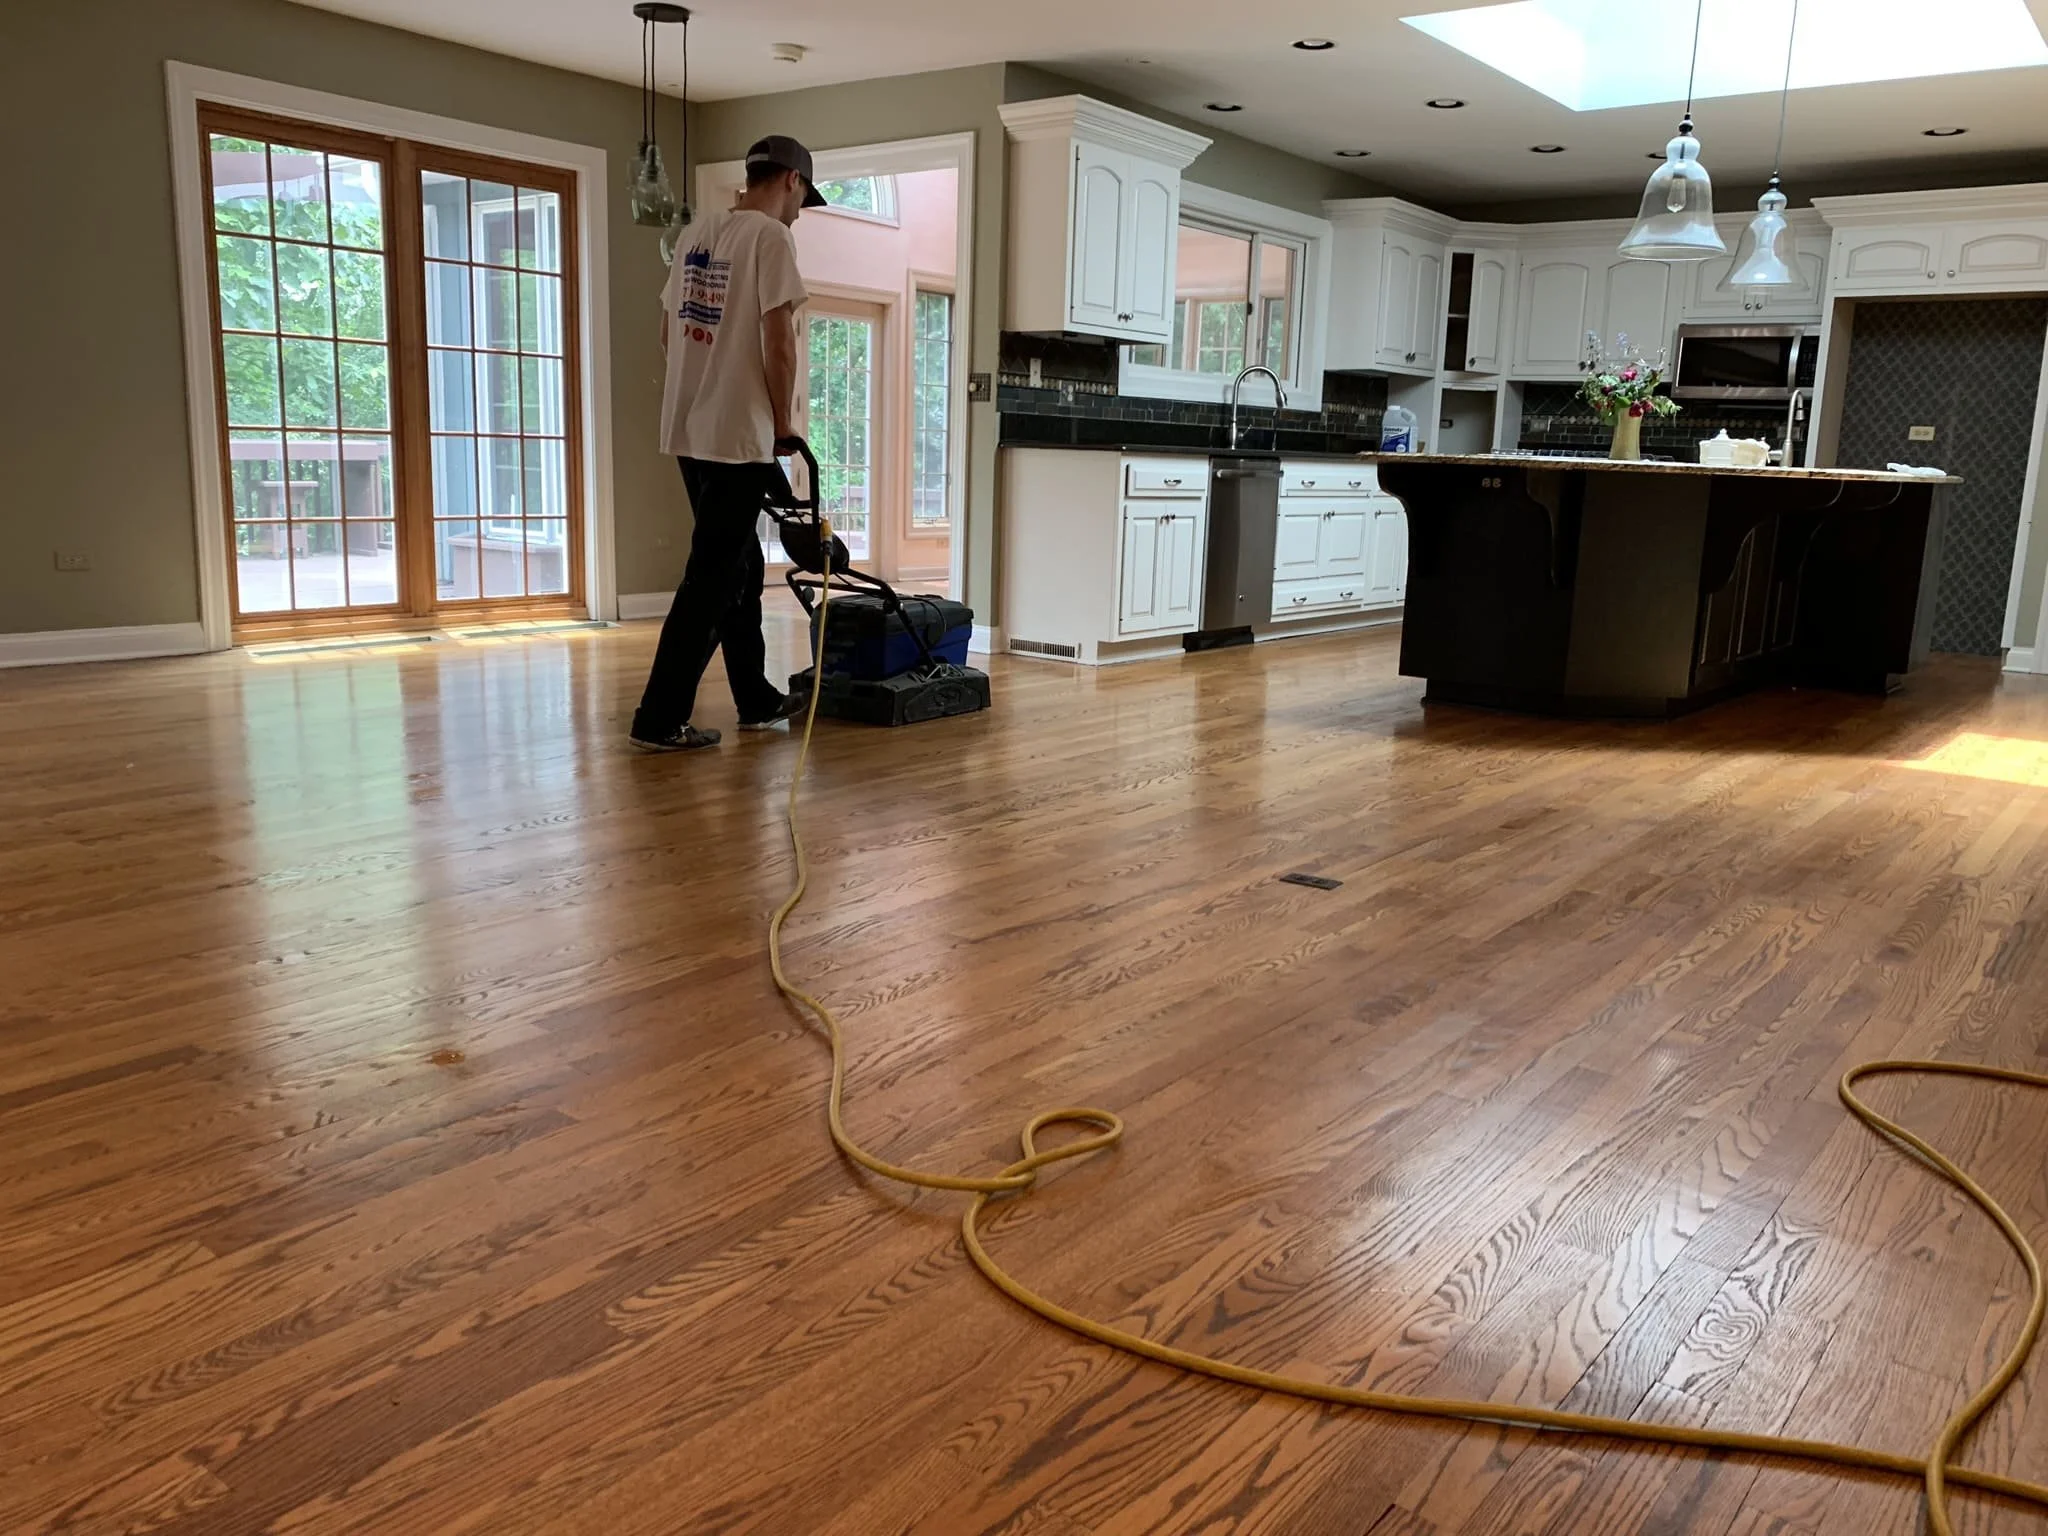
Patrick performing a deep hardwood floor cleaning for a client in Barrington, IL
Understanding the nuances of different flooring types is the cornerstone of effective floor maintenance, and believe me, as someone who's seen a myriad of floors, each one is unique. Whether it’s the natural elegance of hardwood or the practical charm of laminate, each type demands its own special care and attention. And it's not just about the flooring itself – factors like foot traffic and environmental conditions play a huge role too. In my experience, these elements greatly dictate how often and how intensely we need to roll up our sleeves for a thorough cleaning. Let’s get a handle on these different needs and challenges, ensuring your floors always get the best treatment they deserve.
Types Of Flooring
Let me break down the flooring landscape for you, based on my hands-on experience with these surfaces. The world of flooring is diverse, with each type bringing its own set of rules for care. We've got the ever-popular hardwood, practical laminate, versatile vinyl, elegant tile, and cozy carpet. Each one is unique, just like the homes they grace.
Now, let's talk about my specialty – hardwood floors. These beauties come in three main varieties: solid hardwood, engineered hardwood, and laminate that mimics wood. Each type demands its unique approach to maintenance. For instance, with hardwood, it’s all about finesse and the right products. Harsh methods? A big no-no. Sandpaper, steel wool, or abrasive chemicals can be the arch-enemies of hardwood finishes.
Instead, I always recommend using microfiber-headed mops. They're like the gentle giants of cleaning tools – tough on dirt but soft on your floors. This way, you're not just cleaning; you’re caring for your floors, ensuring they stay in top-notch condition year after year. Trust me, with the right approach, your floors can become a legacy in your home!
Factors Affecting Floor Maintenance Frequency
In my experience, keeping floors in prime condition isn't just a one-size-fits-all routine. Several key factors come into play, determining how often you need to break out the cleaning supplies.
Think about your daily life. Homes bustling with pets, kids, or just a lot of foot traffic in general, tend to collect dirt and grime a bit faster. It's like having a mini-highway at home – the more traffic, the more frequent the maintenance needed.
Understanding these dynamics is crucial. It helps you tailor a cleaning schedule that's just right for your home, ensuring your floors don't just survive but thrive. Remember, a well-maintained floor isn't just about cleanliness; it's about extending its life and preserving its beauty, something I always strive for in every home I work on."
Essential Tools and Equipment for Floor Maintenance
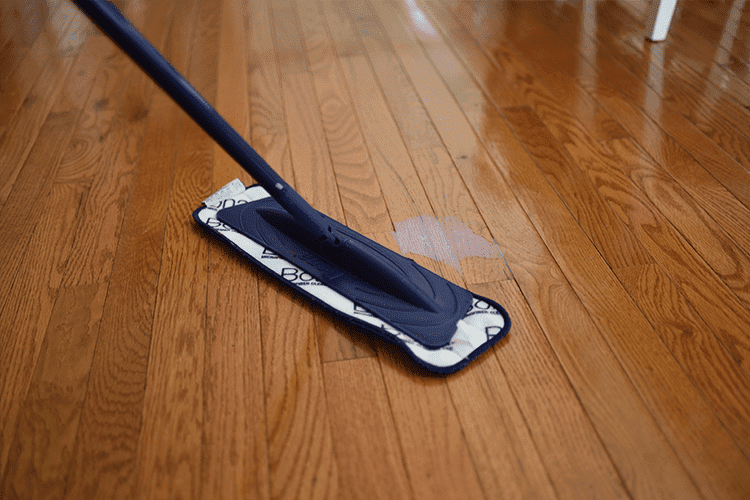
This is the Bona cleaner mop included in every Bona floor cleaning package, highly recommended
Knowing what tools to use is as crucial as understanding the maintenance itself. From my own toolkit, I can tell you that a good vacuum cleaner and a trusty mop are indispensable allies in keeping your floors spotless and in top shape.
Choosing the Right Vacuum Cleaner
The market is flooded with vacuum cleaners of all types – upright, canister, stick, handheld, and even robot vacuums. But here's the trick: it's not just about picking any vacuum. You need one that's gentle yet effective on your specific floor type. For hardwood floors, a canister vacuum usually does the job brilliantly. It's about finding that balance between gentle suction and thorough cleaning.
If you have carpeted areas, you'll want a vacuum that comes with adjustable power settings and a brush roll suitable for carpets. My advice? Dive into reviews and get recommendations tailored to your floor type. It makes all the difference in picking the perfect vacuum for your home.
Selecting The Best Mop
Now, onto mops. These are crucial for that final touch of cleanliness. When choosing a mop, consider:
The material of the mop head (microfiber is my go-to for most hard floors)
Absorbency levels (important for quick cleanups)
How easy it is to maneuver (because no one likes a clumsy mop)
Durability and compatibility with your floor type (especially important for laminate floors)
For instance, I often recommend microfiber dust mop pads for laminate floors. They're great at picking up dirt and don't leave any residue behind.
In summary, choosing the right vacuum and mop isn't just about cleaning – it's about caring for your floors in a way that ensures they stay beautiful and last longer."
Daily Floor Maintenance Tips
Keeping your floors in tip-top shape is a daily commitment, but trust me, it pays off. Here are some of my go-to tips for daily floor maintenance that have kept countless floors under my care looking great.
Preventing Dirt and Grime Buildup
A little bit of daily care goes a long way. I'm a big advocate of regular sweeping, vacuuming, and dry mopping. Why? Because it's the best way to tackle the usual suspects – dust, dirt, and debris – that love to call your floors home. By making these simple tasks part of your daily routine, you're not just cleaning; you're actively preserving the freshness and beauty of your floors.
Quick Fixes for Spills and Stains
Let's face it – spills and stains are just part of life, especially if you're like me and enjoy a bustling household. The key is quick action. Here's my quick-fix guide:
Spot a spill? Grab an absorbent cloth and blot it up ASAP.
Got a stubborn spot? A damp paper towel is often all you need for a swift cleanup. Need something a little more aggressive? Spot spraying with Bona Floor cleaner should do the trick.
Always remember to dry the area afterward to avoid any water damage.
Prompt attention to spills and stains is the secret to avoiding long-term damage and keeping your floors looking as good as new."
Weekly and Monthly Floor Maintenance Routines
Apart from daily cleaning habits, setting up a weekly and monthly floor maintenance routine guarantees your floors get the thorough cleaning and care they deserve. Routines involving deep cleaning techniques can keep your floors looking as good as new.
Deep Cleaning Techniques
Deep cleaning is the secret sauce to keeping your floors not just clean, but also preserving their appearance and durability. Here's my take on the best approaches for different types of flooring:
Hardwood floors: My go-to is a damp tack mop paired with Bona hardwood floor cleaner. No Bona on hand? A homemade mix of water and a little vinegar has served my floors well for years, despite some debates against it. Remember, steam mops are a no-go for hardwood!
Ceramic tile floors: A wet mop and a mild floor cleaner work wonders. For tougher jobs, a slightly acidic cleaner is your friend for tile.
Vinyl flooring: This one's pretty straightforward – sweep, vacuum, and mop without worry. Vinyl's durability against moisture makes it a low-maintenance dream.
Laminate or carpet: Stick to the manufacturer’s guidelines for deep cleaning. For carpets, considering a professional clean with the right equipment can really rejuvenate your floors.
Aim for a deep clean about once a month – it's like a spa day for your floors, keeping them fresh and extending their life.
Maintaining Floor Finishes
Now, about those finishes. Whether it's water-based polyurethane, oil-based polyurethane, wax, epoxy, or varnish, each finish demands its own kind of TLC. For instance, if you've got floors finished with Rubio Monocoat (a personal favorite of mine), you'll want to stick to their specific Rubio soap cleaner.
The key here is to follow the recommended practices and use the right products. It's not just cleaning; it's about preserving those finishes so they continue to protect and beautify your floors for years to come.
Protecting Your Floors From Damage

Picture of a freshly scratched hardwood floor, yikes!
Protecting your floors is just as important as cleaning them. Over the years, I've learned that the little things can make a big difference in keeping floors in top condition. Let me share some tips on how to shield your floors from the usual culprits of damage – furniture, appliances, and the ever-tricky moisture.
Furniture and Appliance Care
When it comes to furniture and appliances, it’s all about being floor-friendly. Those tiny scratches and dents? Often they come from moving furniture around or from the daily use of appliances. Here’s what I do:
Always use furniture pads – they’re like little cushions for your floor.
Move furniture with care. If you can lift it, that’s the way to go. If not, use furniture sliders.
Choose appliances with floor-friendly features. Trust me, your floor will thank you for it.
Taking these preventive steps has been a game-changer in maintaining the pristine look of my floors.
Addressing Moisture Issues
Moisture is like kryptonite for floors. It can warp, buckle, and, in worst cases, even rot your beautiful floors. Here's how I tackle moisture:
Find and fix any leaks or dampness sources. A little detective work goes a long way.
Seal any cracks or gaps. It’s like putting a protective shield over your floors.
Stay on top of plumbing issues. A small drip can lead to big problems for floors.
Get a hygrometer for your kitchen. As soon as you see your home shoot past a moisture level of 65%, you can start expecting issues with any wooden floor in your home.
Dealing with moisture issues promptly means you're not just fixing a problem; you're actively preserving the integrity and longevity of your floors.
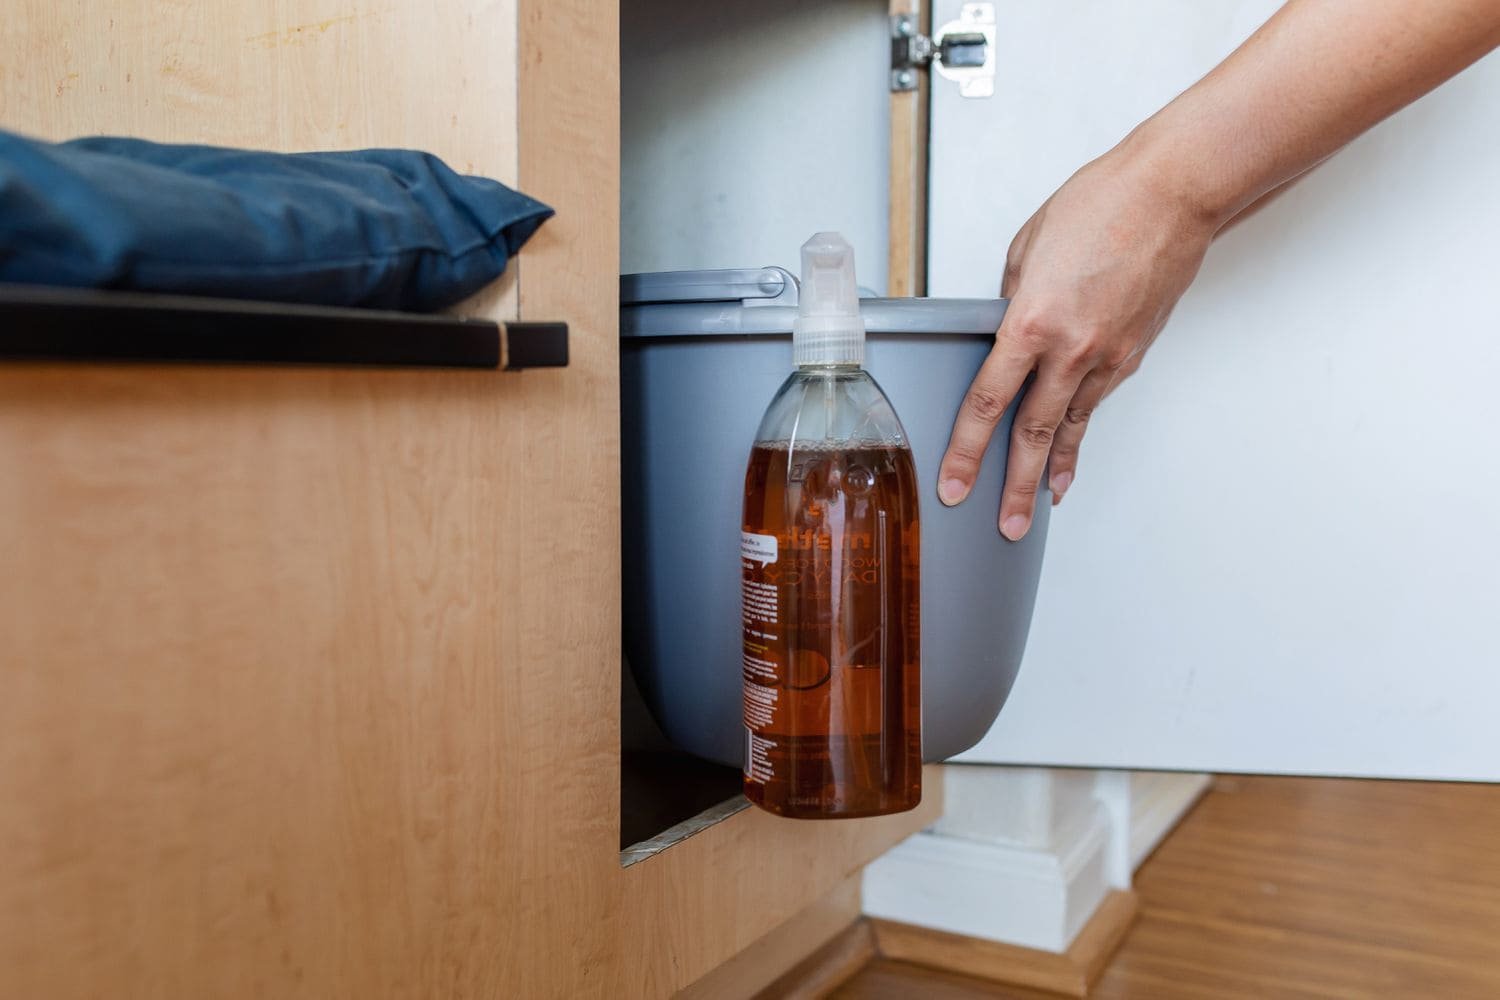
Eco-Friendly Cleaning Solutions For Floors
In today’s eco-conscious world, many people are looking for green cleaning solutions for their floors. As far as home made solutions go, I don’t think there’s much that’ll beat the combination of vinegar and water. However, here are some others I’ve also found to work well:
DIY Floor Cleaning Solutions
Creating your own DIY floor cleaners using natural ingredients can be a cost-effective and eco-friendly option for maintaining your floors. Ingredients like:
vinegar
olive oil
water
castile soap
Deciding to create your own DIY floor cleaners leads to a safer and more eco-friendly approach to floor maintenance. But honestly, it’s just great to have in case you run out of actual hardwood floor cleaner and need a quick fix to get the floors cleaned.
Environmentally Friendly Commercial Cleaners
If you prefer commercial cleaners, there are environmentally friendly options available that are safe for your floors and the planet. These green cleaning solutions are formulated with non-toxic, biodegradable ingredients and provide a sustainable alternative to conventional cleaning products.
Choosing eco-friendly commercial cleaners contributes to a healthier home and a more sustainable planet.
Conclusion
Well, folks, that's a wrap on our floor maintenance masterclass! I hope you've picked up some tricks and insights that will make keeping your floors gorgeous a breeze. Remember, it's all about getting the basics right, sticking to those daily routines (even when the couch looks way more inviting), and knowing when to call in the pros.
If you're feeling inspired, why not roll up your sleeves and start today? Your floors might just throw you a thank-you party in their own shiny, polished way. And hey, while you're here, don't forget to check out some of my other blogs – there's a treasure trove of tips, laughs, and maybe a few dad jokes waiting for you.
Thanks for sticking with me through this floor care journey. Keep smiling, keep cleaning, and remember, a happy floor means a happy home. Until next time!
Frequently Asked Questions
What is proper Floor maintenance?
It is important to dust, mop, or sweep the floor daily to clear it of dirt and grit. Good entry mats can also help reduce the amount of outside dirt and oil coming in, and all spills should be immediately cleaned up.
What is the best thing to use to clean wood floors?
For the best cleaning results, use a broom or a hardwood floor mop pre-treated with a dusting agent and vacuum your hardwood floor once a week with the "hard floor" setting. You can also use commercial wood-cleaning products or make your own cleaner by mixing vinegar and warm water.
How often should I deep clean my floors?
To keep your floors in top condition, you should deep clean them every 12-18 months, depending on the type of flooring and amount of foot traffic. Depending on your floors condition, buffing and recoating the floors with new finish might be the better option.
What are some environmentally friendly alternatives to traditional floor cleaning products?
DIY floor cleaners with natural ingredients or commercial non-toxic biodegradable cleaners are eco-friendly alternatives to traditional floor cleaning products.
How can I protect my floors from furniture and appliance damage?
Protect your floors from potential damage by using furniture pads, moving furniture correctly, and utilizing floor-friendly appliances.

3 Easy Winter Care Tips
Winter brings many things; holidays, loved ones visiting from out of town, happiness, beautiful snowy landscapes and peaceful moments, but it also bring with it the bitter cold. If you have hardwood floors this could also mean winter brings damage to your beautiful floors. Read on to find tips to make sure your floor stays in tip-top shape this winter.
Winter brings many things; holidays, loved ones visiting from out of town, happiness, beautiful snowy landscapes and peaceful moments, but it also brings with it the bitter cold. If you have hardwood floors this could also mean winter brings damage to your beautiful floors. Use the following tips to make sure your floor stays in tip-top shape this winter.

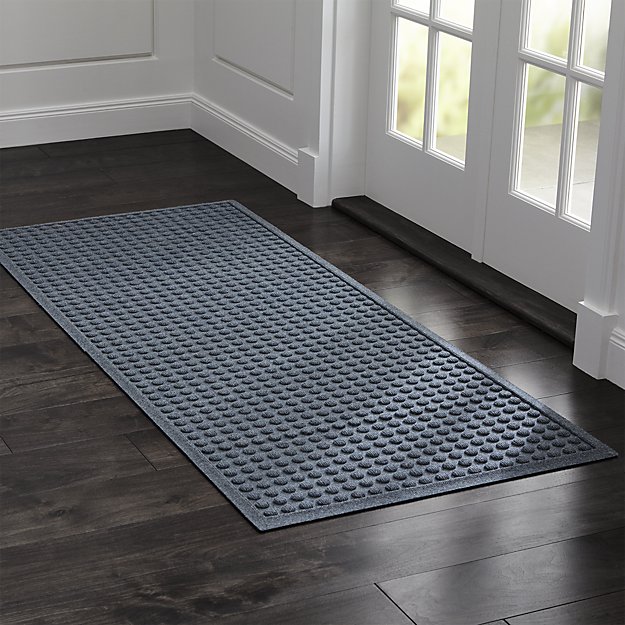
1. Use rugs to cover up entry ways and areas with high traffic.
If it snows outside and is cold enough for ice, that means its also time for many of us to throw some salt down outside. This gets dragged in with our shoes on the way into our homes and can damage the hardwood on our floors. It also leaves a powdery white residue on the floor which can cause a slipping hazard and, if left on the wood for too long, can damage the wood itself. Putting a rug down will help protect the wood from moisture, scratches and punctures, and salt residue
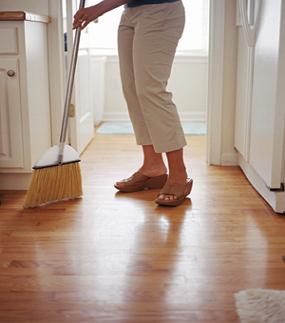
2. Sweep your floors regularly.
Frequently sweeping our floors during the winter is essential to helping protect against damage. It helps keep small debris and particles from damaging the finish of the wood on your floor. If someone comes in from outside and brings ice or snow with them make sure to wipe it up with a towel to absorb the moisture, mop the area, and dry it completely. Just remember to watch for salt in the water when wiping it up so you don’t scratch your beautiful floors. Not only does this keep your floor protected, it keeps anyone from slipping and falling on their way into your home.
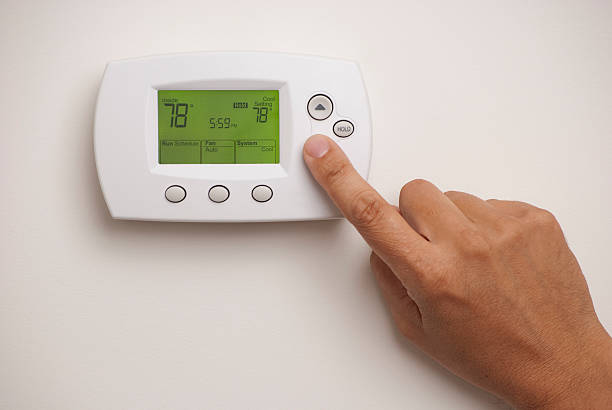
3. Keep your home at the right temperature and level of humidity.
We have all experienced our doors sticking when the temperature fluctuates outside. The same happens with our floors. As temperatures fall in the winter and the humidity in the air gets lower, wood floors shrink. Overall, most hardwood floors can withstand temperature fluctuations of between 60-80 degrees and a humidity level of between 35-55 percent. However, drastic fluctuations can cause permanent damage to the wood including cracks, gaps and splits. To best avoid shrinkage (and damage) keep the temperature in your home within a range your floors can withstand. You can even run a humidifier to make sure the humidity is within a range the floors can handle. This will help ensure the correct balance.
Using these tips this winter will keep your floors looking brand new and help protect against damage this winter. As always, if you'd like to schedule a hardwood flooring project with us, feel free to contact us via our contact page. We look forward to working with you!

Hardwood Flooring Trends 2017 - Rubio Monocoat
Rubio Monocoat is quickly turning into the premier floor choice for our customers. Rubio Monocoat is a product from Belgium that is quickly turning into a hot new trend. If you want your floors to truly be extraordinary, this hardwood flooring system will give your floors and look and feel that traditional water based and oil based finished can't touch. We have so many customers ask us about this system, so we thought it would be a great opportunity to educate the public with a little write up. Read on if you'd like to find out the benefits of this system.
Rubio Monocoat is a product from Belgium that is quickly turning into a hot new trend. If you want your floors to truly be extraordinary, this hardwood flooring system will give your floors a look and feel that traditional water based and oil based finishes can't touch. We have so many customers ask us about this system, so we thought it would be a great opportunity to educate the public with a little write up. Read on if you'd like to find out the benefits of this system.
This new hard-wax oil from Belgium doesn't leave a plastic film layer on top of the floor. Instead, the natural oils and waxes in this product bond to the wood from the inside and form a water tight coating that is very durable. The true beauty of these finishes is that they look nothing like a standard floor finish. A standard floor finish will get painted on top of the wood, and layers of film will get built up over the top of the floor. As I'm sure you can see with most floors currently, this tends to look a bit "plastic-y". With Rubio Monocoat, the oil soaks into the floor itself, creating a super "matte" and "raw" appearance which is not comparable to any standard finish offered on the market today.

Application of Rubio Monocoat.
"We've found that the scratch and wear resistance of this product is actually BETTER than a standard oil or water based finish."
The color choices are incredible as well with 40+ inter-mixable colors; there are many mixes available to make virtually any look you can dream up possible. Hardwax oils are very environmentally friendly coming in at zero VOC’s. Due to how new the product is, the true durability is still yet to be determined. We've found that the scratch and wear resistance of this product is actually BETTER than a standard oil or water based finish. However, because of this, the chemical resistance to spills and water suffers quite a bit with this product.
Overhead shot of a Rubio Monocoat project in downtown Chicago
This gorgeous floor looks great in any contemporary space.
We love incorporating new processes and technologies into the work that we do. Rubio Monocoat is simply the latest and greatest in hardwood flooring. We are excited to see the future iterations of this product because we make it a point to always offer the cutting edge in hardwood flooring to our customers. If you'd like to schedule a hardwood flooring project with us, feel free to contact us via our contact page. We look forward to working with you.
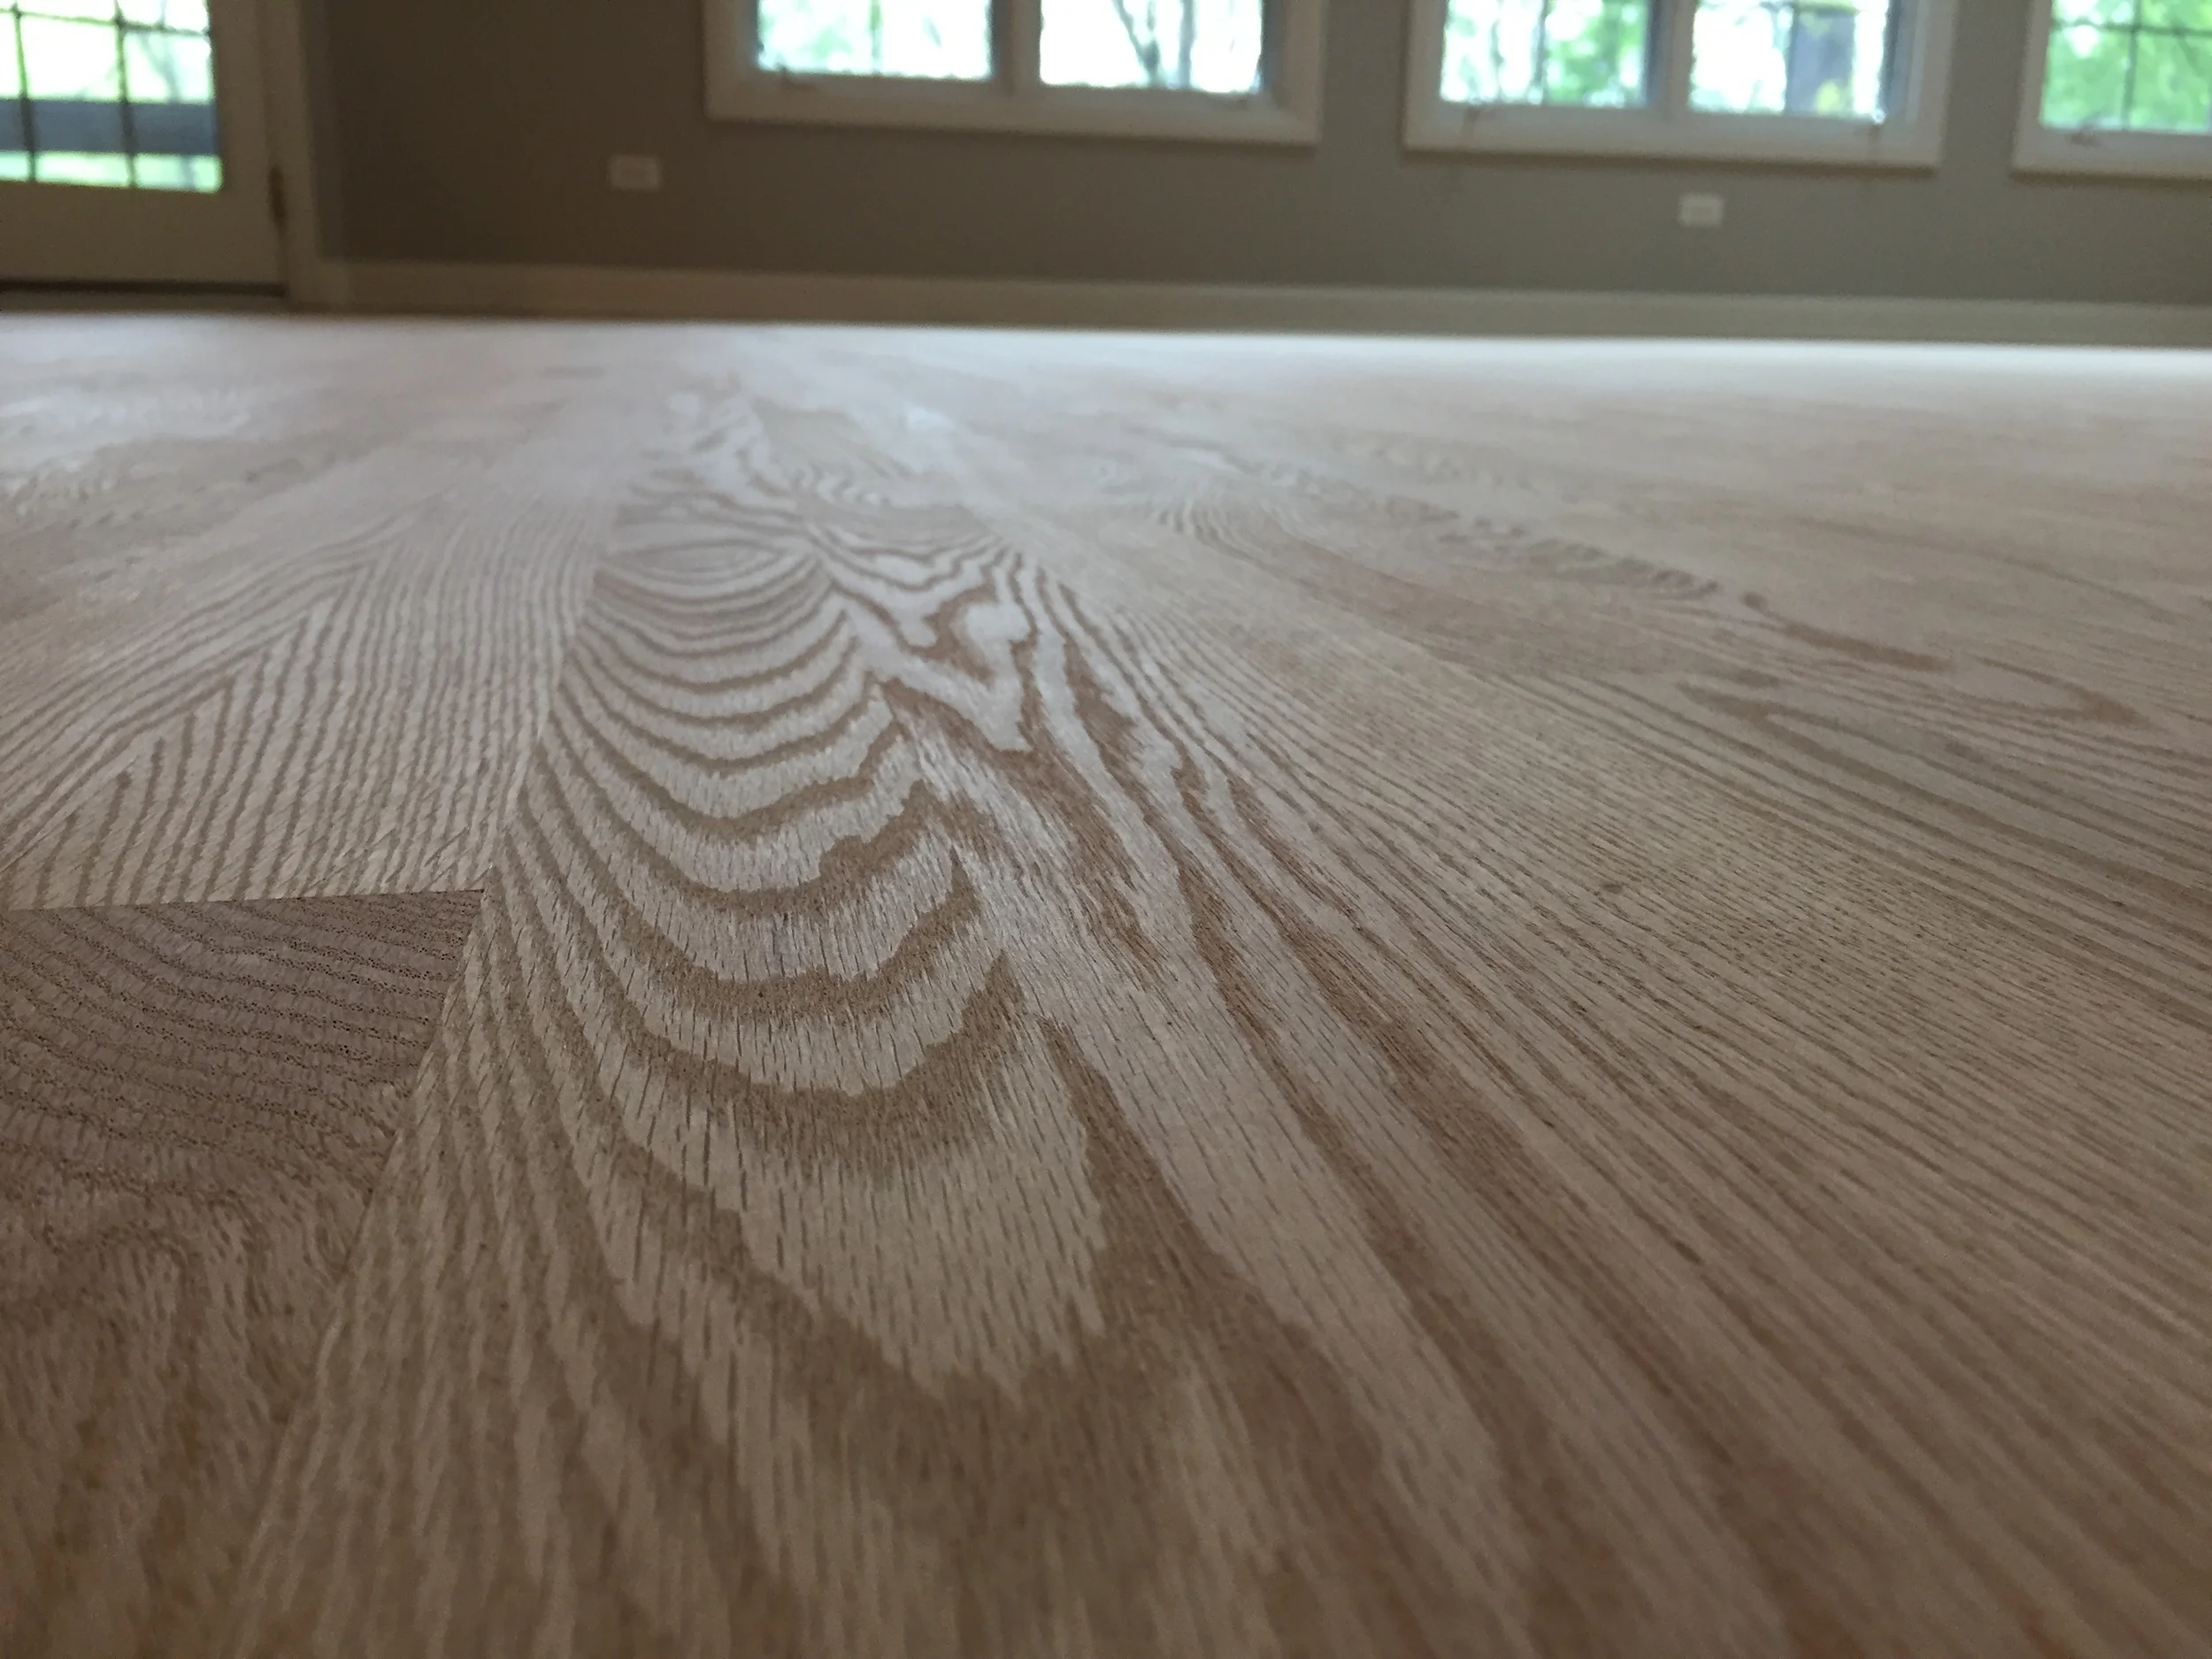
Hardwood Flooring Trends 2016 - Continued
We like to take the time to go over some style trends that we pick up on from time to time. We see certain trends throughout our industry and we like to point them out for our customers so that they can make more informed decisions. We'd like to share some photos from our recent project that just came out terrific.
We like to take the time to go over some style trends that we pick up on from time to time. We see certain trends throughout our industry and we like to point them out for our customers so that they can make more informed decisions. We'd like to share some photos from our recent project that just came out terrific.
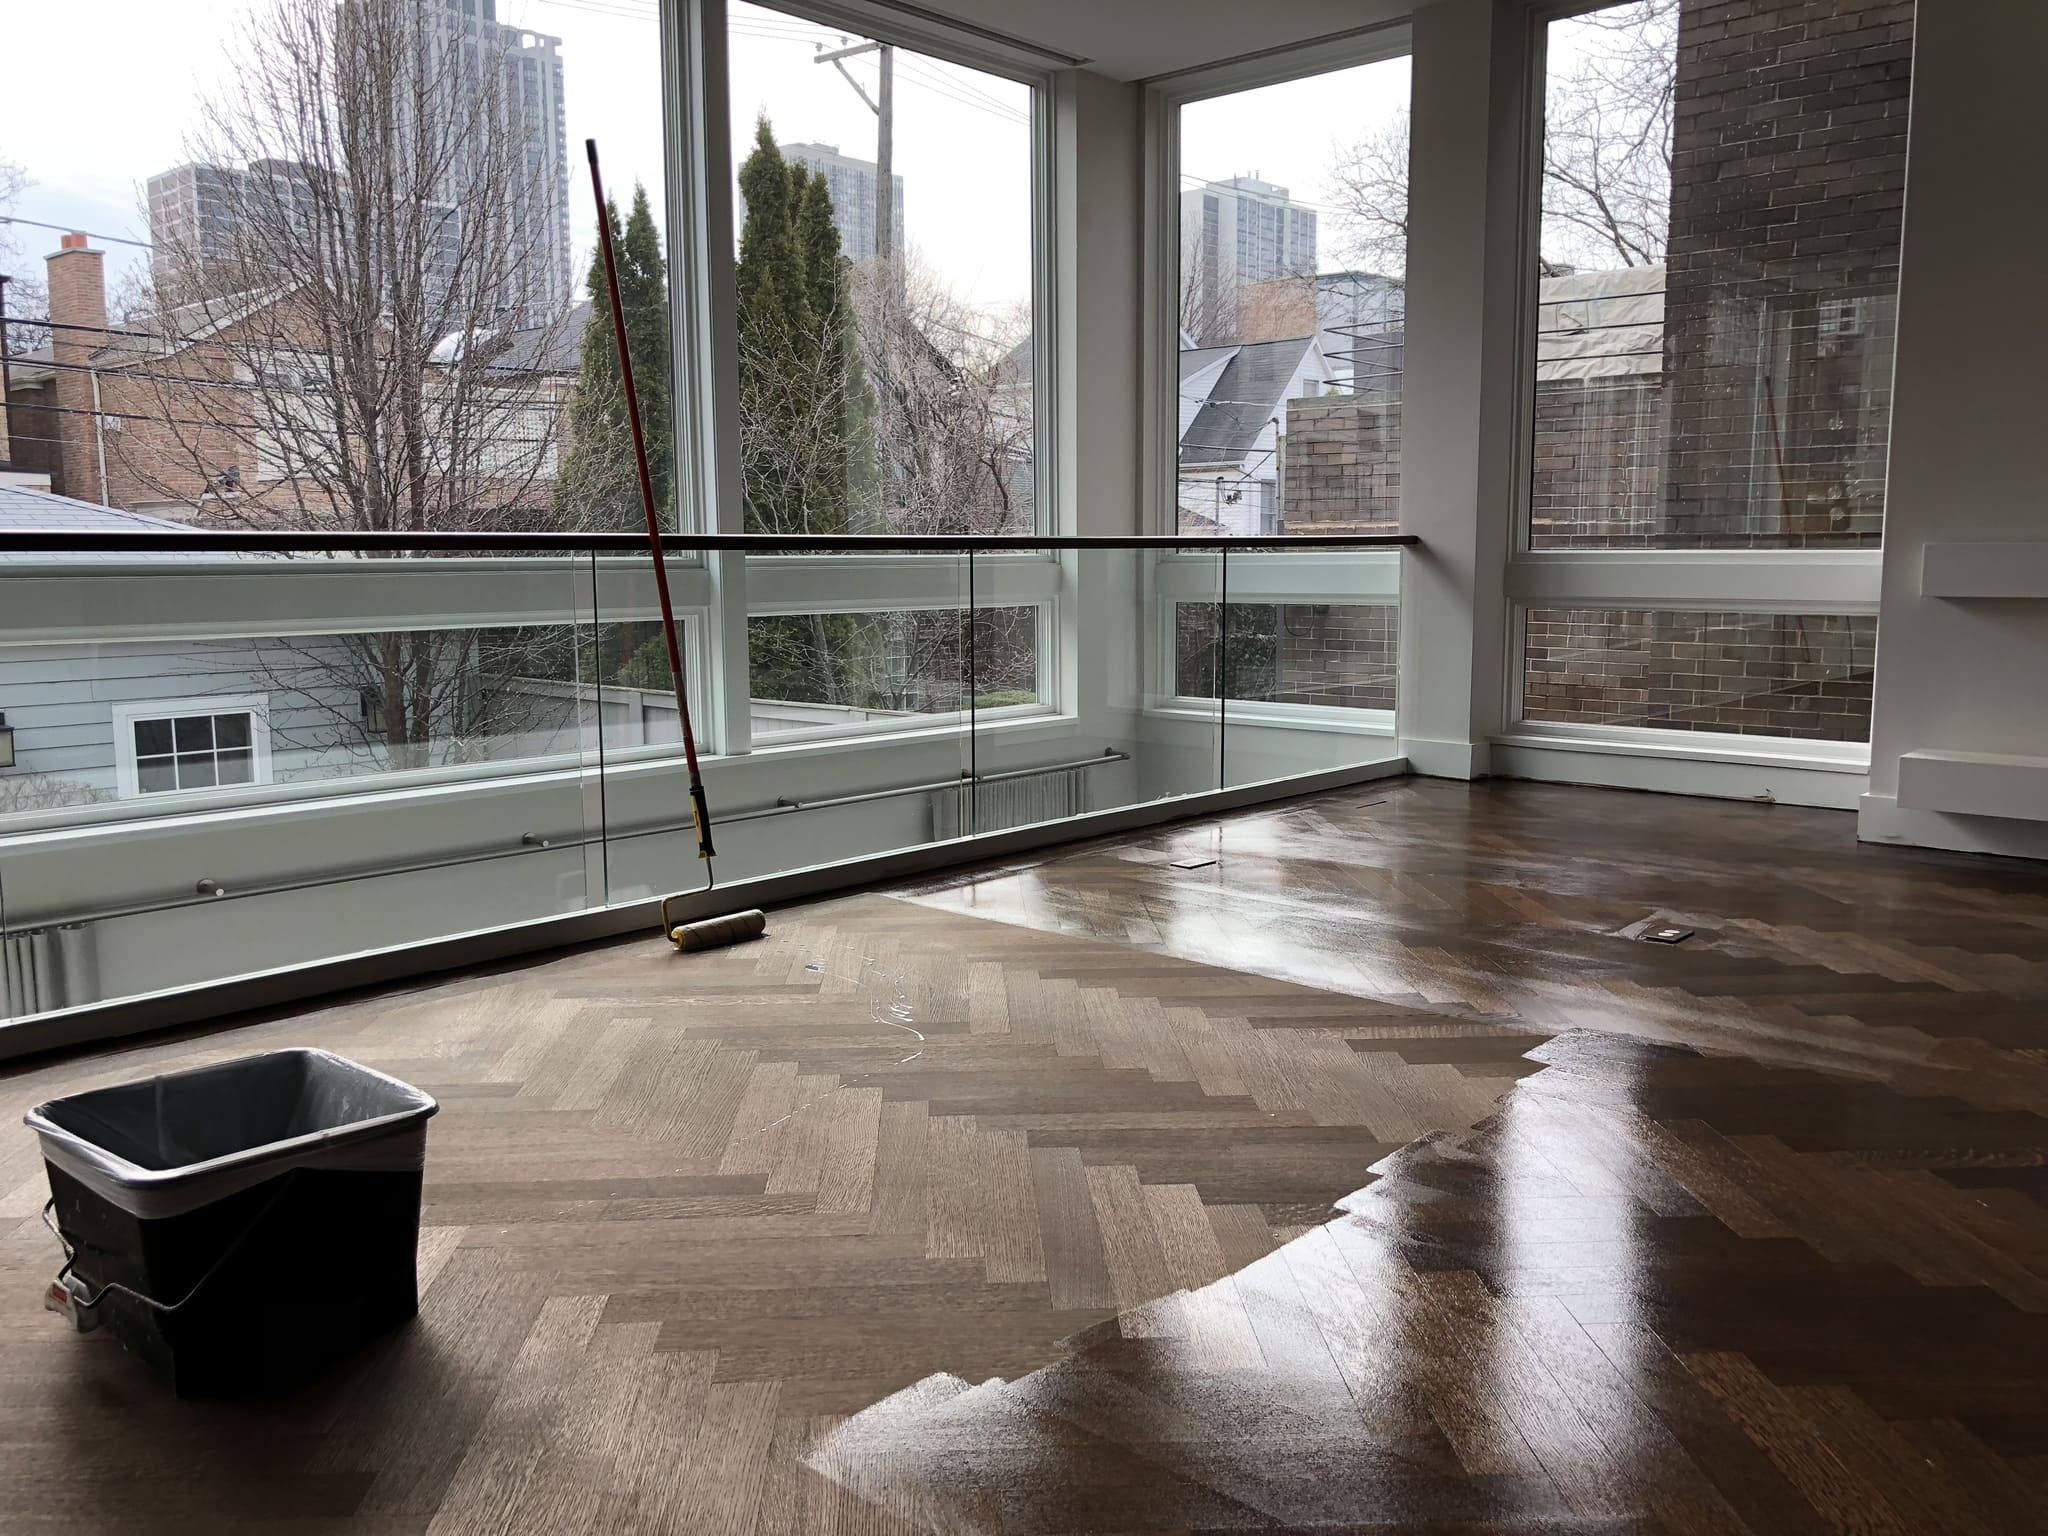
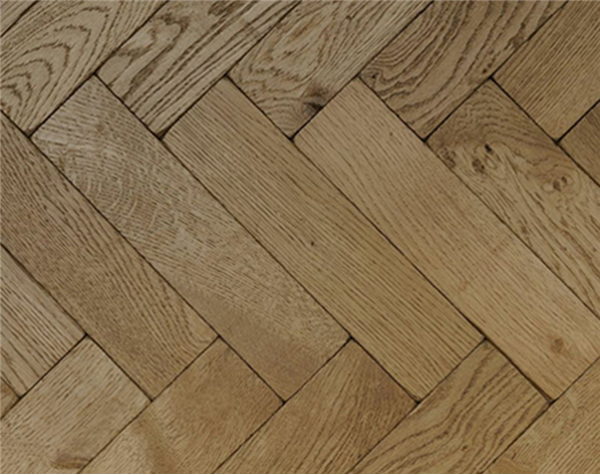
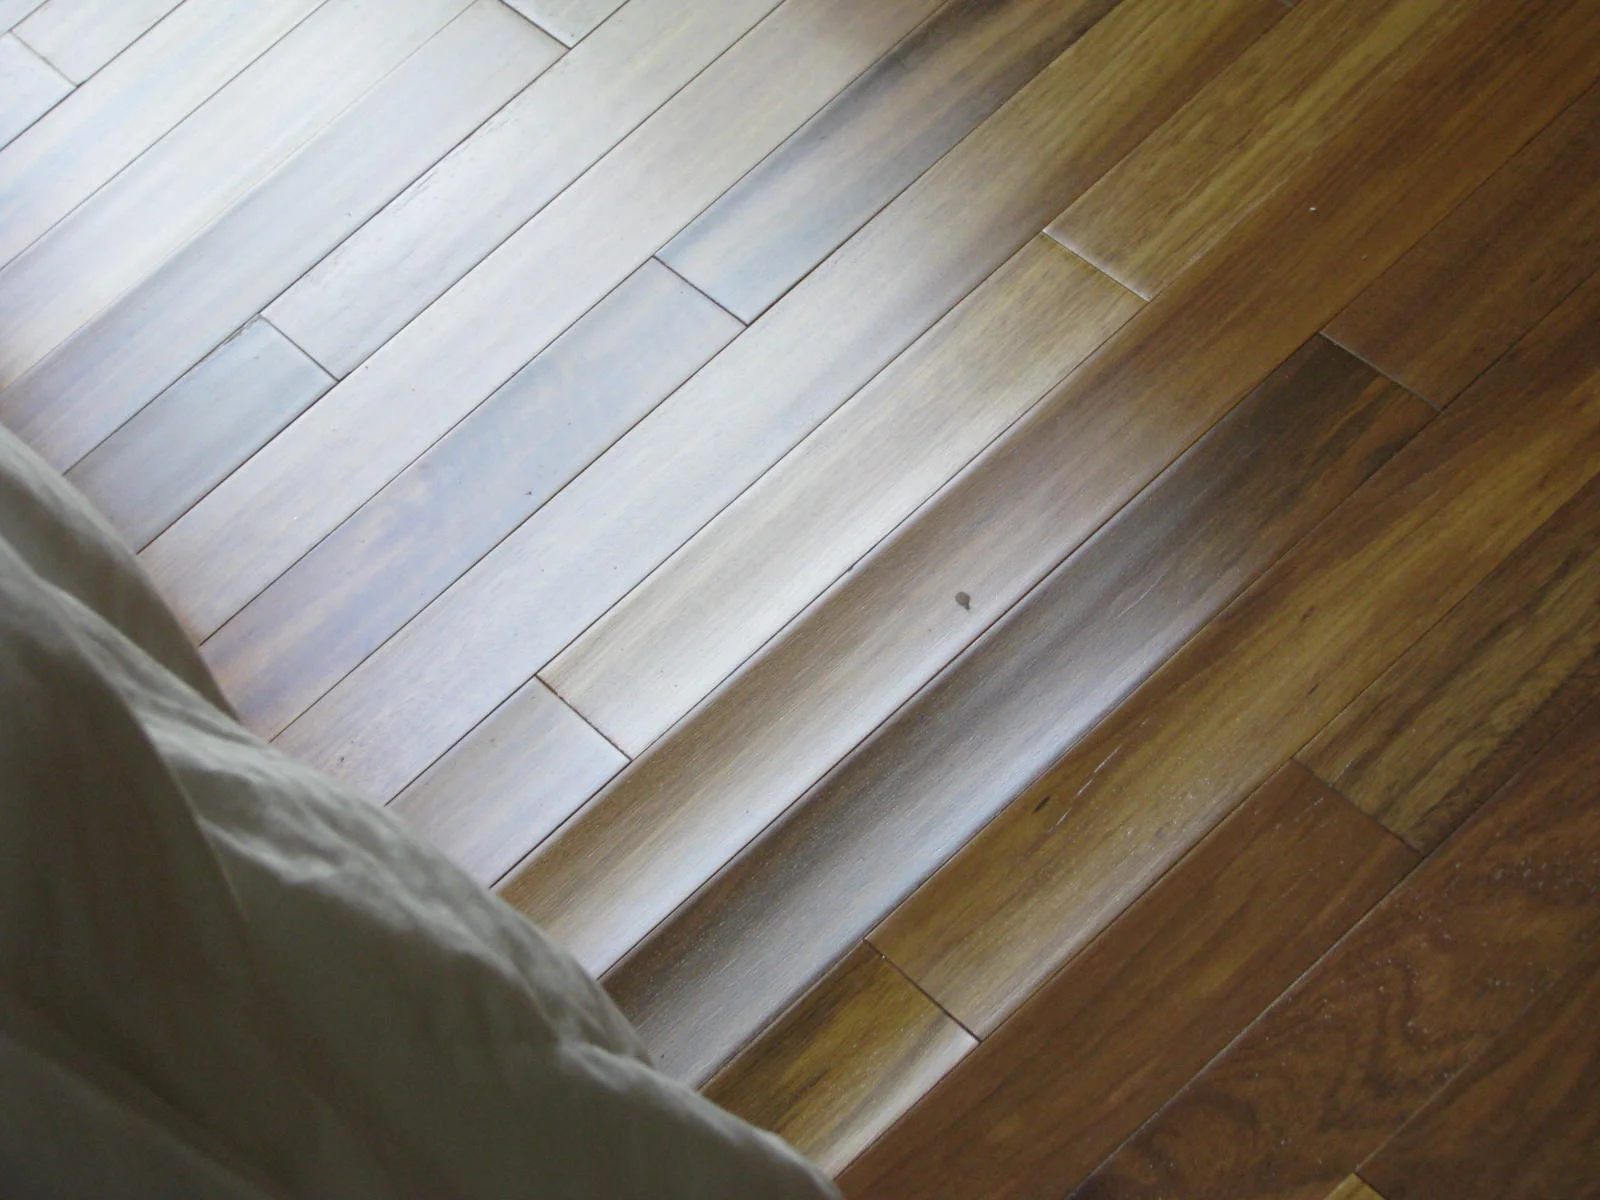
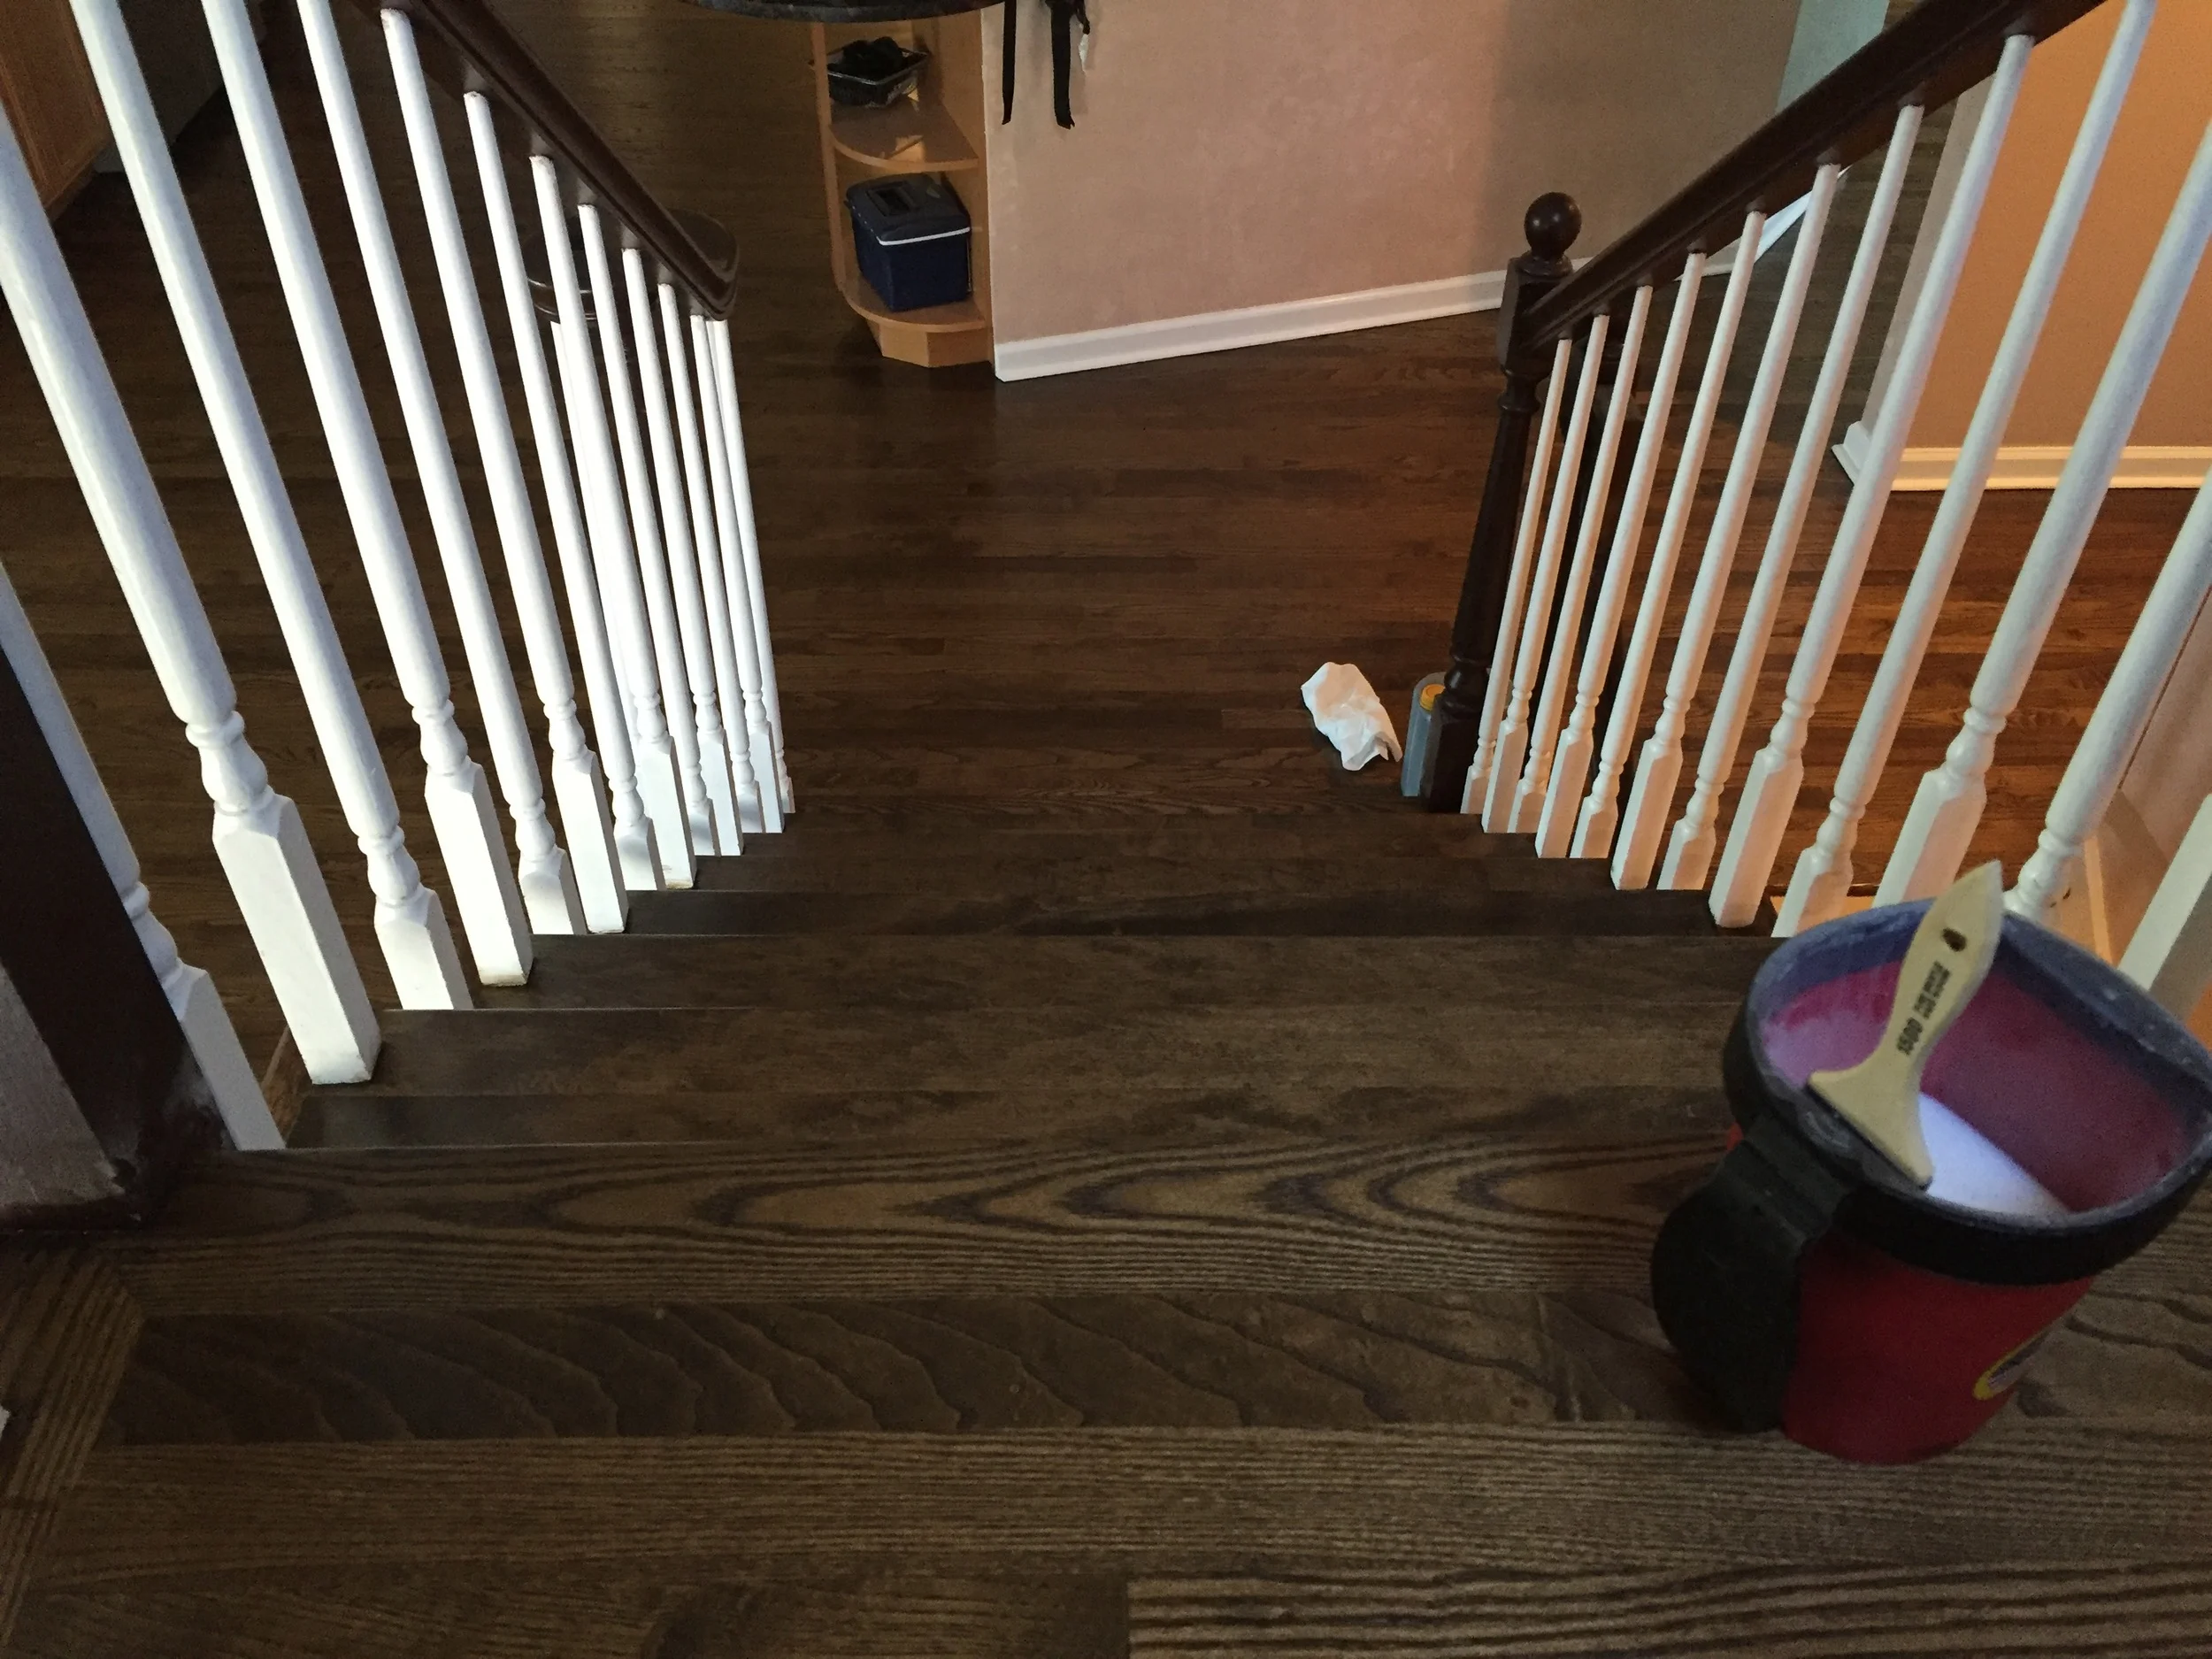
Diagonal floors are very popular with a lot of new installations these days. Diagonal floors are not something that is very common, but it can definitely add another level of wow to any room. There are all kinds of situations in which a diagonal floor can work. As you can see from the photos below, this project was a treat.


A diagonal floor is going to be very noticeable. If you want your floors to stand out, we suggest you give diagonal floors a chance. If a more muted and reserved look is what you're looking for, it's probably best to avoid doing something this drastic to your floor.
We like to bring up some of these trends from time to time because we think it gives customers more information before they have to make some tough choices. You can rest easy knowing that any hardwood floor job with Plus Hardwood Flooring is going to look great.

We're Always Happy To Help You Choose The Right Stain Color
We find that choosing the right stain color is one of the most difficult decision that our customers make. There is usually a lot of deliberation that leads to second guessing. We try to help out customers make a decision that they are going to be happy with, but our advice can only go so far. We hope that we can offer some tips in order to make your future decision easier.
We find that choosing the right stain color is one of the most difficult decision that our customers make. There is usually a lot of deliberation that leads to second guessing. We try to help out customers make a decision that they are going to be happy with, but our advice can only go so far. We hope that we can offer some tips in order to make your future decision easier.
The color of your floors is a massive decision. You're going to have to look at them every single day up until your next refinish! We hope that we can offer some advice to make the next decision easier.
Right now, dark walnut is the color that's in. Nearly every customer that we've done work for in the past year has wanted the dark walnut color or some variation of it. Dark floors are very popular these days. That's not to say that light floors can't be beautiful either.
We've done work on all kinds of floors. We've even done work with floors that they customer wanted stained white. Don't be afraid to step out of the box and experiment with all kinds of colors.
It's important to know that the type of wood you choose for your floor is going to affect the way the stain blends. Certain woods like Ash will stain differently than another wood like oak. These are things that you should discuss with your floor man before you begin your next project. Every floor company will be more than happy to lay down a few stain samples on the floor just before the sanding so that you can better judge what the floor is going to look like.
Don't forget to take natural lightning into account. Light can make a room look completely different as well as the floors in that room. Dark wood isn't going to look so dark if you have a lot of natural light coming in. This is also going to fade to floor color over time, so that's another thing to take into consideration.
We hope that some of these tips prove to be useful to you when it comes to choosing the color of your stain for your next hardwood flooring project. As always, we're here to answer any questions that you might have,
Some Hardwood Floor Trends That We've Noticed
Hardwood floors are very much affected by current trends. This year is not exception as we've seen our customers gravitating towards certain styles. We'd like to tell you about them after the break, so go ahead and click through.
Hardwood floors are very much affected by current trends. This year is not exception as we've seen our customers gravitating towards certain styles. We'd like to tell you about them after the break, so go ahead and click through.
Summer is still here but we can definitely feel the cool Fall chill at night. We'd like to take this time to look back on some of the more prominent trends in the last 12 months.
Dark Walnut
Dark Walnut is still the reigning champ with a lot of our customers. It seems like dark floors are definitely in right now and it doesn't seem like it's slowing down. We expect it to be a while before lighter floors make a comeback here in the Midwest. Maybe things will change next summer.

Dark walnut has remained very popular for a long time.
Water Based Finish
Water based finished appears that they are here to stay. Even though the water based finish is slightly more expensive, customers are falling in love with the more muted look along with the environmental benefits. Some customers still opt for the oil based look, but it's definitely taking a back seat to water based finishes.
Just because these are the current trends doesn't mean that you can't be a trend setter among your social circles. There are so many combinations of wood and stain that you can experiment with. It really is an exercise in creativity.

Humidity and Hardwood Floors
We'd like to remind our customers about how to deal with the recent humidity in the Midwest if you have hardwood floors in your home. Moisture in a home can completely ruin your floors over time. Read on if you'd like to know just what you should do in these humid Summer days.
We'd like to remind our customers about how to deal with the recent humidity in the Midwest if you have hardwood floors in your home. Moisture in a home can completely ruin your floors over time. Read on if you'd like to know just what you should do in these humid Summer days.
Humidity can ruin a hardwood floor over time. It might not be apparent to the naked eye, but it can definitely cause serious damage. Moisture harms wood over time, but there is something that any homeowner can do to avoid the problem. Air conditioning can work miracles for your personal comfort as well as your hardwood floors.
We recommend leaving the air conditioning on constantly, in order to make sure that your hardwood floors are not going to be exposed to the constant humidity that this summer has given us. You may want to check what the current humidity levels are with any weather app. It's normal for humidity to drop down at night if you prefer to sleep with the windows open.
Air conditioning does more than just cool. It removes moisture from the air. That's why it's so important in your home. It's also important that you make sure to factor in maintenance costs when it comes to your hardwood floors. Your floors are a major investment and you should treat them accordingly.
If you have any more questions, feel free to contact us via our contact page. We're always willing to help and help you start your next hardwood flooring project.

Hardwood Floor Maintenance Tips
We put together a quick list of how to take care of hardwood floors. We give customers a guide on how to maintain their hardwood floors whenever we install new floors or refinish older floors. We find that our customers love the guide we give them, so we'd like to put together a list here of what to do and what not to do.
We put together a quick list of how to take care of hardwood floors. We give customers a guide on how to maintain their hardwood floors whenever we install new floors or refinish older floors. We find that our customers love the guide we give them, so we'd like to put together a list here of what to do and what not to do.
Dust Floor With A Dry Dust Mop
This is self-explanatory. Dust on a floor over time can cause some serious damage. Microscopic particles can leave the tiniest of scratches that can cause serious damage in the long run.
Clean Spills Up
Liquids are your floor's worst enemy. Make sure to get to any spilled liquids immediately and mop them up. Don't be afraid to use a damp cloth to clean up sticky spots on your floor. Damp clothes are ok as long as you make sure to dry the area after you are done.
Rugs Are Your Friend
Rugs in high traffic areas can make all the difference. They will protect the floors underneath while still looking good as long as you can find a rug that compliments your floors nicely. Rugs in doorways are usually a great place to start.
Do Not Steam Clean Your Hardwood Floors
We've had customers in the past ask us about steam cleaning hardwood floors. This is a bad idea. That level of moisture would destroy a hardwood floor so we recommend staying away.
Do Not Oil Your Hardwood Floors
We've also had customers tell us that they heard that oiling a hardwood floor is a good idea from time to time. Oil on a hardwood floor is a death sentence. It will not prolong the life of the floors. It's just going to leave dark spots that won't come out unless you have another refinishing done.
We hope that some of these floor maintenance tips help you whether you're the proud owner of new hardwood floors or you're just looking for a quick. As always, we're here to help. Contact us with any further question you might have or schedule a quote today.

Why Reviews Matter
Hardwood flooring is a very competitive industry. There are many business out there that are trying to get your business. Some hardwood floor companies are better than others. It's difficult for the consumer to know why one company is better than another. The only metric most consumers have to gauge one business over another is price. We'd like to at least present an argument for why asking for price per square foot may not be the best way to differentiate one company from another.
Hardwood flooring is a very competitive industry. There are many business out there that are trying to get your business. Some hardwood floor companies are better than others. It's difficult for the consumer to know why one company is better than another. The only metric most consumers have to gauge one business over another is price. We'd like to at least present an argument for why asking for price per square foot may not be the best way to differentiate one company from another.
Consumers need to use some kind of metric to gauge whether or not one company is better than another. The problem is that many of our customers aren't exactly familiar with hardwood flooring techniques. That's perfectly understandable. It is our job as hardwood flooring professionals to educate our clients about what is going on with their floors. Educated consumers are always the easiest to communicate with. Good communication is necessary if we're going to do good work.
Price per square foot is what many consumers latch on to when they first start price shopping for hardwood floor installation and refinishing. It's unfortunate because at that point, it becomes very difficult to explain to a potential client why there's more to a floor than the price you pay for it. We can't even begin to tell you how many floors we have rescued over the years after a "cheaper" company came in and ruined them. That's not to say that this is always the way that it's going to be. Just because it's cheaper doesn't mean it's going to be worse, but there are some corners that need to be cut if a hardwood floor company is going to be way lower on price than another.
The truth is that most hardwood floor companies get their supplies from a lot of the same places. Reusing old supplies is one of the largest culprits when it comes to offering lower prices. Reused sandpaper is always going to be worse than fresh sandpaper. Used sandpaper is going to directly affect the quality of your floors. This is only one example of where a corner can be cut.

Reviews really do matter. So many of our customers talk about our glowing Yelp reviews. We take those reviews very seriously. A customer review is a compliment that lasts for years. It is a shining example of past work. Customers will often look at those reviews and see that real people had experiences with us and they will use that as the justification to go with a company that has made so many people happy. Price is still a factor, but we can begin to have a conversation about the quality of the work that is going to be done. This often leads to some of the best experiences for us. A customer that is willing to communicate and work with us to get the job done truly is a gift. A review on top of that healthy communication is just icing on the cake.

All about hardwood floor acclimation
If you've ever had new hardwood floors installed, you may have heard of acclimating your hardwood floors. This is an often overlooked process that it crucial when it comes to installing new hardwood floors. We won't get into the technicals too much, but we'd like to explain why this process is just so important.
If you've ever had new hardwood floors installed, you may have heard of acclimating your hardwood floors. This is an often overlooked process that it crucial when it comes to installing new hardwood floors. We won't get into the technicals too much, but we'd like to explain why this process is just so important.
Acclimating new hardwood floors to the home in which they will be installed it incredibly important. It can prevent things like "cupping" from occurring. Cupping is a process in which hardwood floors begin to "cup" and visibly bend due to moisture. This can happen for a various number of reasons, but one of the most common is going to be due to a lack of proper acclamation.
Your hardwood floor specialist will want to acclimate fresh hardwood to a specific environment so that the wood has time to match the moisture levels of the environment in which it will be placed. The best way to do this is through time. Hardwood needs plenty of time in order to acclimate to an environment. Improper acclimation can lead to things like cupping which will completely ruin the floor.
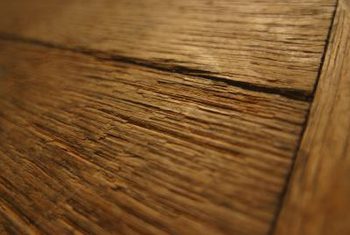
Hardwood Floor Cupping
We typically recommend at least three days of acclimation before beginning a project. This way, the wood has plenty of time to acclimate to the moisture levels in the project site. The project site should be enclosed and set to the temperature that the people living in the home will typically have it set at. This can often times seem wasteful as people do not like running things like AC when no one is at a home, but we want to point out that ruined hardwood floors in a home can set someone back tens of thousands of dollars.
We put this little write up together because we had a few customers ask us this question during the past couple weeks. We hope it clears up some basic questions that you have. As always, we're here to help. Don't hesitate to contact us with further questions or to begin your next hardwood flooring project today.

Hardwood Floors In Your Home Office
From time to time, we have a customer that works from home. A home office can often be the most important room in the house for this type of person. We were recently asked by a customer about what the best practices are when it comes to caring for a hardwood floor in a home office - specifically, caring for a floor that is going to have an office chair on it. We took some time to put together a write up for this customer and we thought that'd we share it with you.
From time to time, we have a customer that works from home. A home office can often be the most important room in the house for this type of person. We were recently asked by a customer about what the best practices are when it comes to caring for a hardwood floor in a home office - specifically, caring for a floor that is going to have an office chair on it. We took some time to put together a write up for this customer and we thought that'd we share it with you.
An office chair can do some serious damage to a hardwood floor. The wheels on rolling office chairs can often be brutal for the long term health of your floor. We have a few suggestions that you may find useful.
Mind the Wheels
Ideally, it would be great to avoid any office chairs that have hard plastic wheels. The hard plastic does not play nice with hardwood floors. We recommend using a chair with some rubber wheels so that you can glide across the floor without causing too many scratches.
Chair Mat
A chair mat can definitely help prolong the life of the hardwood floors underneath your office chair. Plastic floor mats have a slight problem however. Do not let anything get trapped underneath your mat because that can do some serious damage to the floor underneath.
Cleaning is Key
Try to keep those floors clean as often as you can. You wouldn't believe how for a good cleaning will get you. Clean floors are the key to having floors that last a very long time.
We hope that these simple tips help you if you had questions regarding hardwood floors in a home office. We know that the home office is a sacred place for people. It only makes sense to want to preserve that room so that you can have great hardwood floors in that room for years to come.

Say Hi To Our New Gallery
We think hardwood floors are beautiful (naturally). We rebuilt our gallery from the ground up to make it easier to sort our photos into project pages. We hope this is going to make it easier for people to see our work over the past couple years. Read on to see some of our favorites from our new gallery.
We think hardwood floors are beautiful (naturally). We rebuilt our gallery from the ground up to make it easier to sort our photos into project pages. We hope this is going to make it easier for people to see our work over the past couple years. Read on to see some of our favorites from our new gallery.
We recently had a rather job in Glenview that proved to be time consuming. The client wanted to update the floors in the home to a darker color because of how popular it is to go darker these days. We were more than happy to help.
The owner was ecstatic with the results. The whole home was updated and it was night and day difference.
This next set of pictures has some dramatic before and after pictures. We always find the before and after shots to be incredible to look at. We often have customers ask if we're taking pictures of the same floors. Rest assured, they are indeed the same floors and we're proud of what we were able to transform these floors into.


We're always happy to share our most recent projects. We find that it gives our customers the confidence they deserve before choosing the hardwood floor company that they end up going with. Check out our gallery to see some more photos from various projects. We plan on updating the gallery as time passes with future projects.

Protect Your Hardwood Floors From The Summer Sun
Summer is definitely here in the Midwest. We know how humid it can be but we definitely know how sunny it can be as well. Everyone knows that they need to protect their skin from the sun's rays, but did you know that you should also protect your hardwood floors from the sun? The sun can do some serious damage to your hardwood floors. Discoloration is the largest culprit, but it doesn't stop there. We'd like the give you some tips so that you know what to do in order to protect your hardwood floors.
Summer is definitely here in the Midwest. We know how humid it can be but we definitely know how sunny it can be as well. Everyone knows that they need to protect their skin from the sun's rays, but did you know that you should also protect your hardwood floors from the sun? The sun can do some serious damage to your hardwood floors. Discoloration is the largest culprit, but it doesn't stop there. We'd like the give you some tips so that you know what to do in order to protect your hardwood floors.
Don't be stingy with the AC
The summer sun can heat up a home very quickly. The Midwest can get very humid, as any native can attest to. Running the AC is going to help you reduce moisture in your home. Moisture is one of the most significant enemies that your hardwood floors have. AC will reduce moisture in your home and prevent things like cupping from taking place in your home. We have a write up on what cupping is here.
Awnings Can Help
Your floors are delicate and can react negatively to sunlight. Discoloration can happen fairly quickly. Awnings over your windows will help slow this process down. Direct sunlight on hardwood floors is just not a good thing if you want to maintain a unified color throughout your hardwood floors.
The sun can cast shadows throughout your home. These shadows can actually create outlines in your hardwood floors in time. Don't be afraid to move the furniture around if you have to. This will ensure that one particular shadow does not sit in one area of the floor for too long.
These little things can go a long way to protect your hardwood floors. We think beautiful hardwood floors are an investment. Protect that investment with these little tips and tricks so that you can prolong the life of your hardwood floors. As always, feel free to contact us if you have any questions, or pass this along to any friends of yours that have hardwood floors. They'll thank you for the tips!
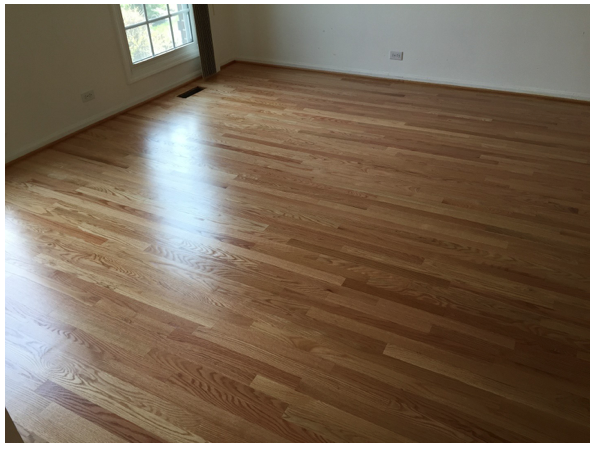
Our Latest Project - Refinishing Light Floors and Making Them Dark
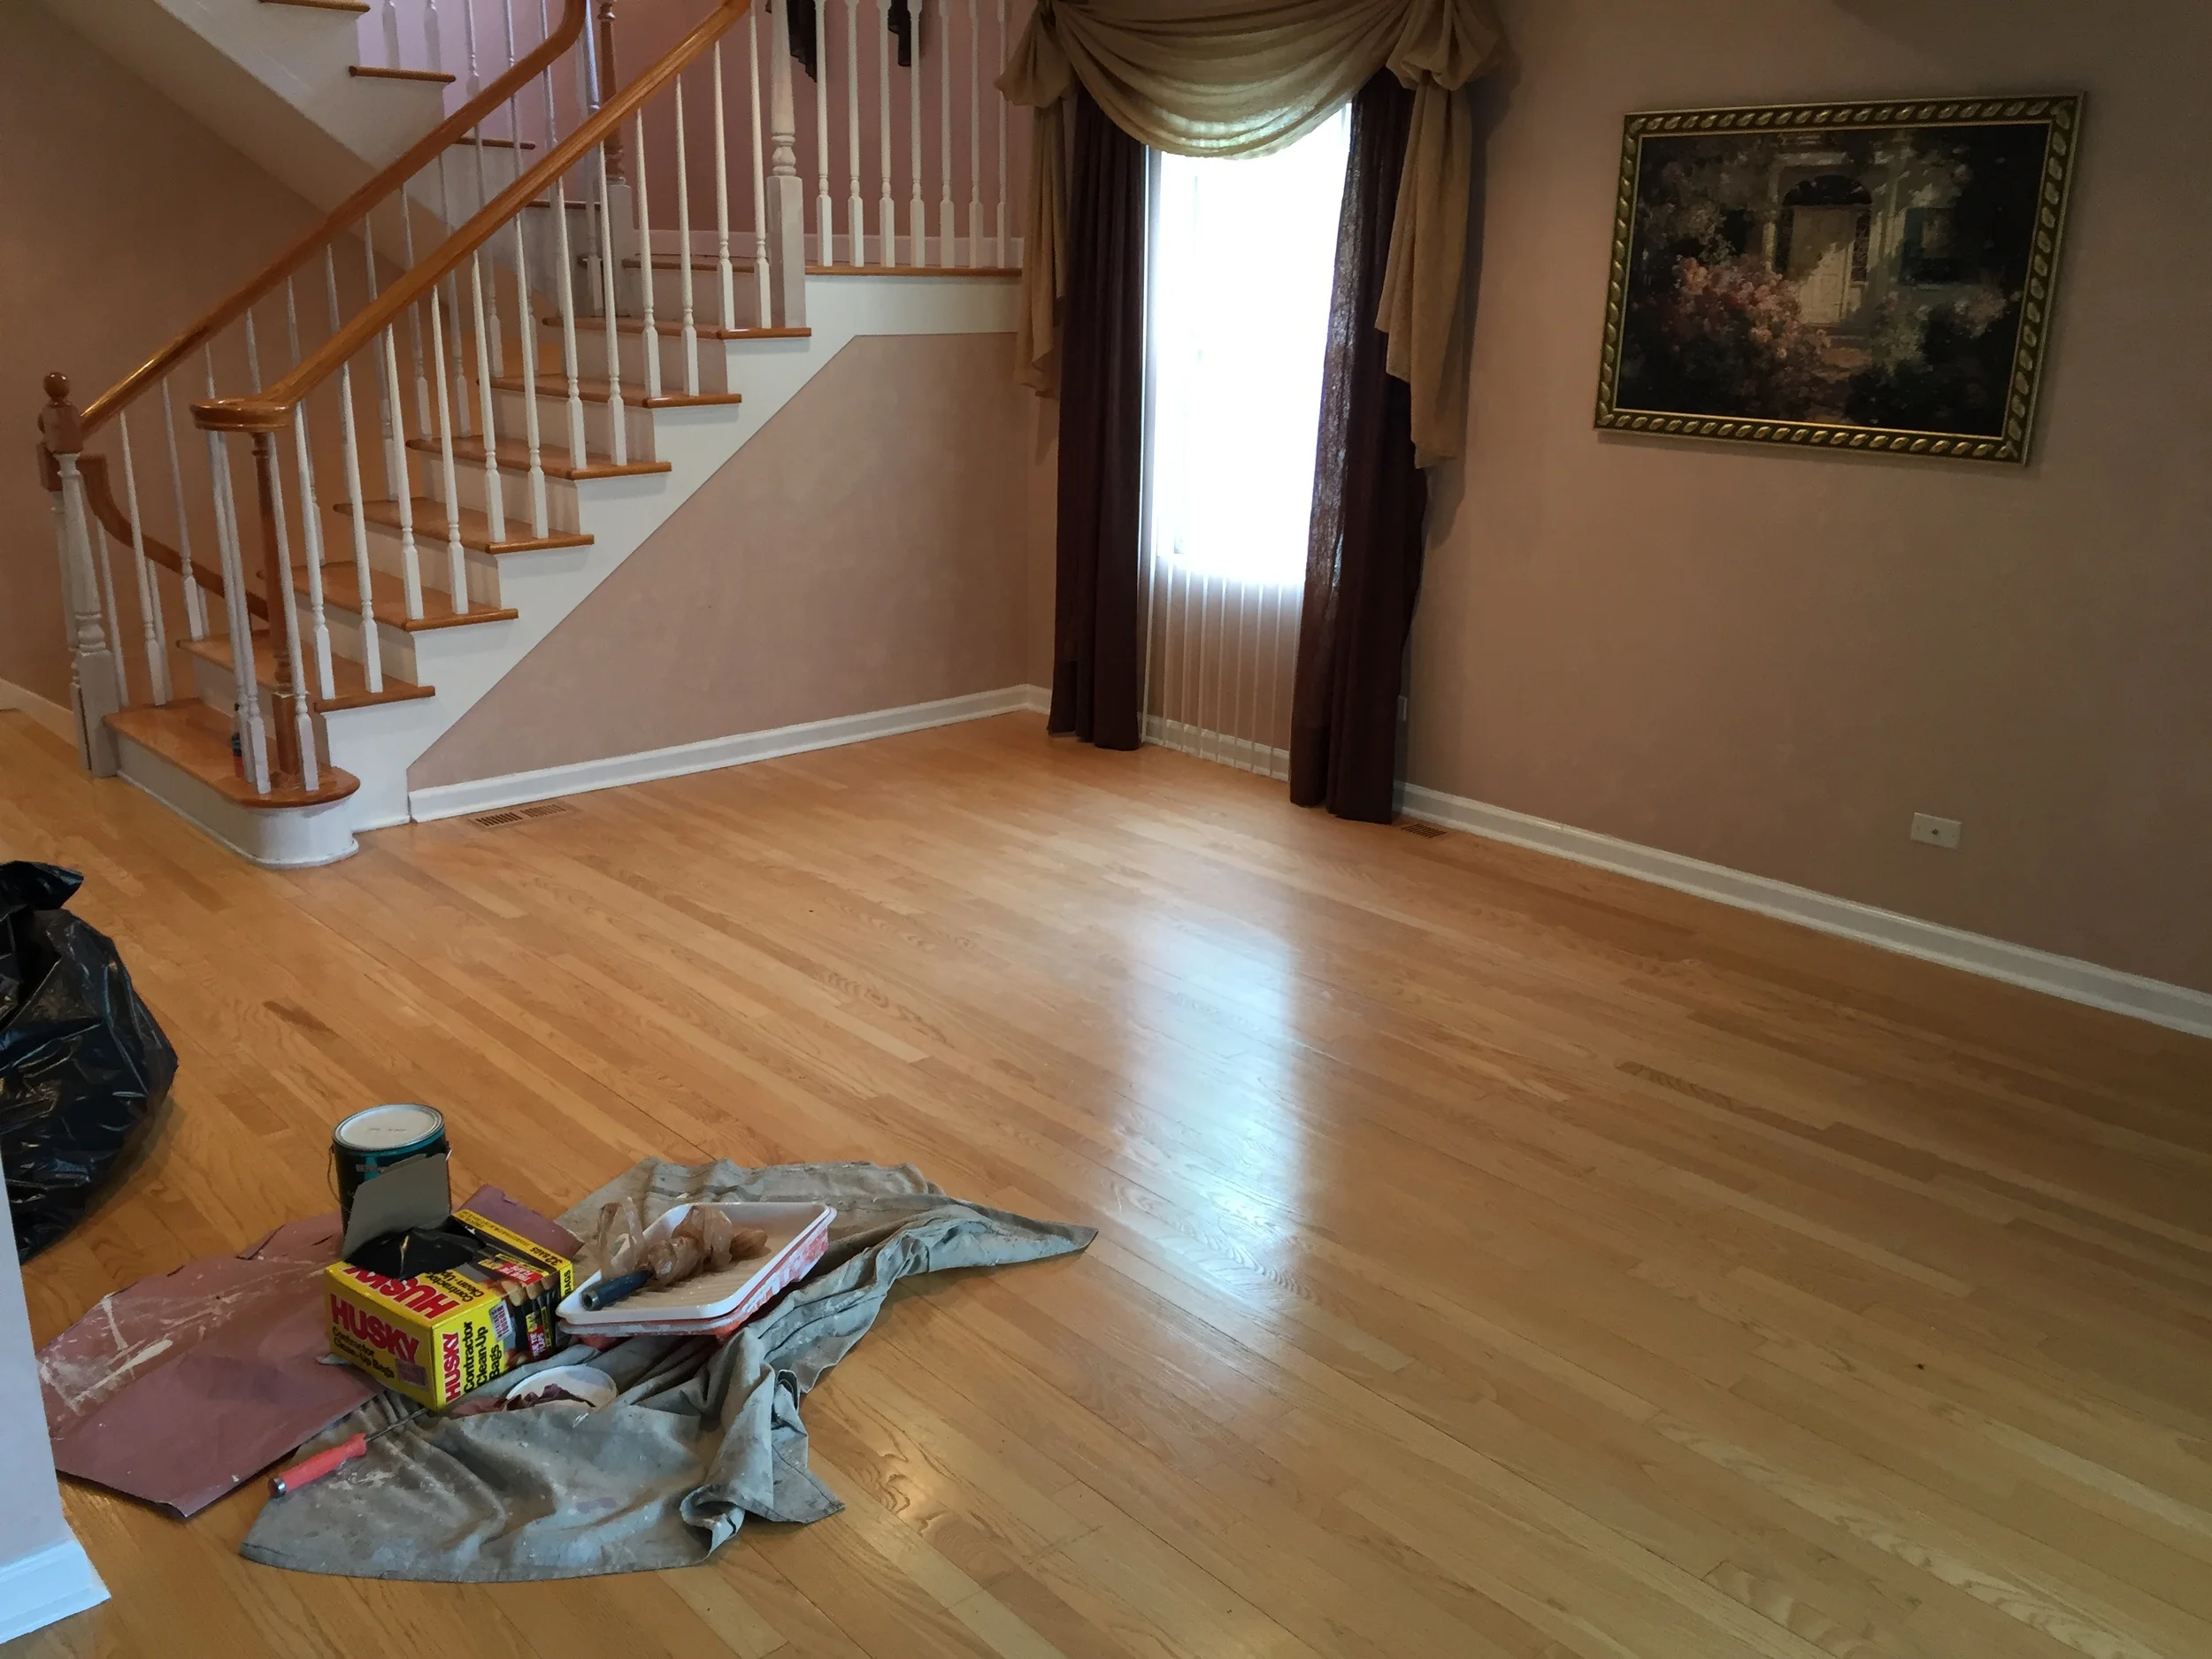
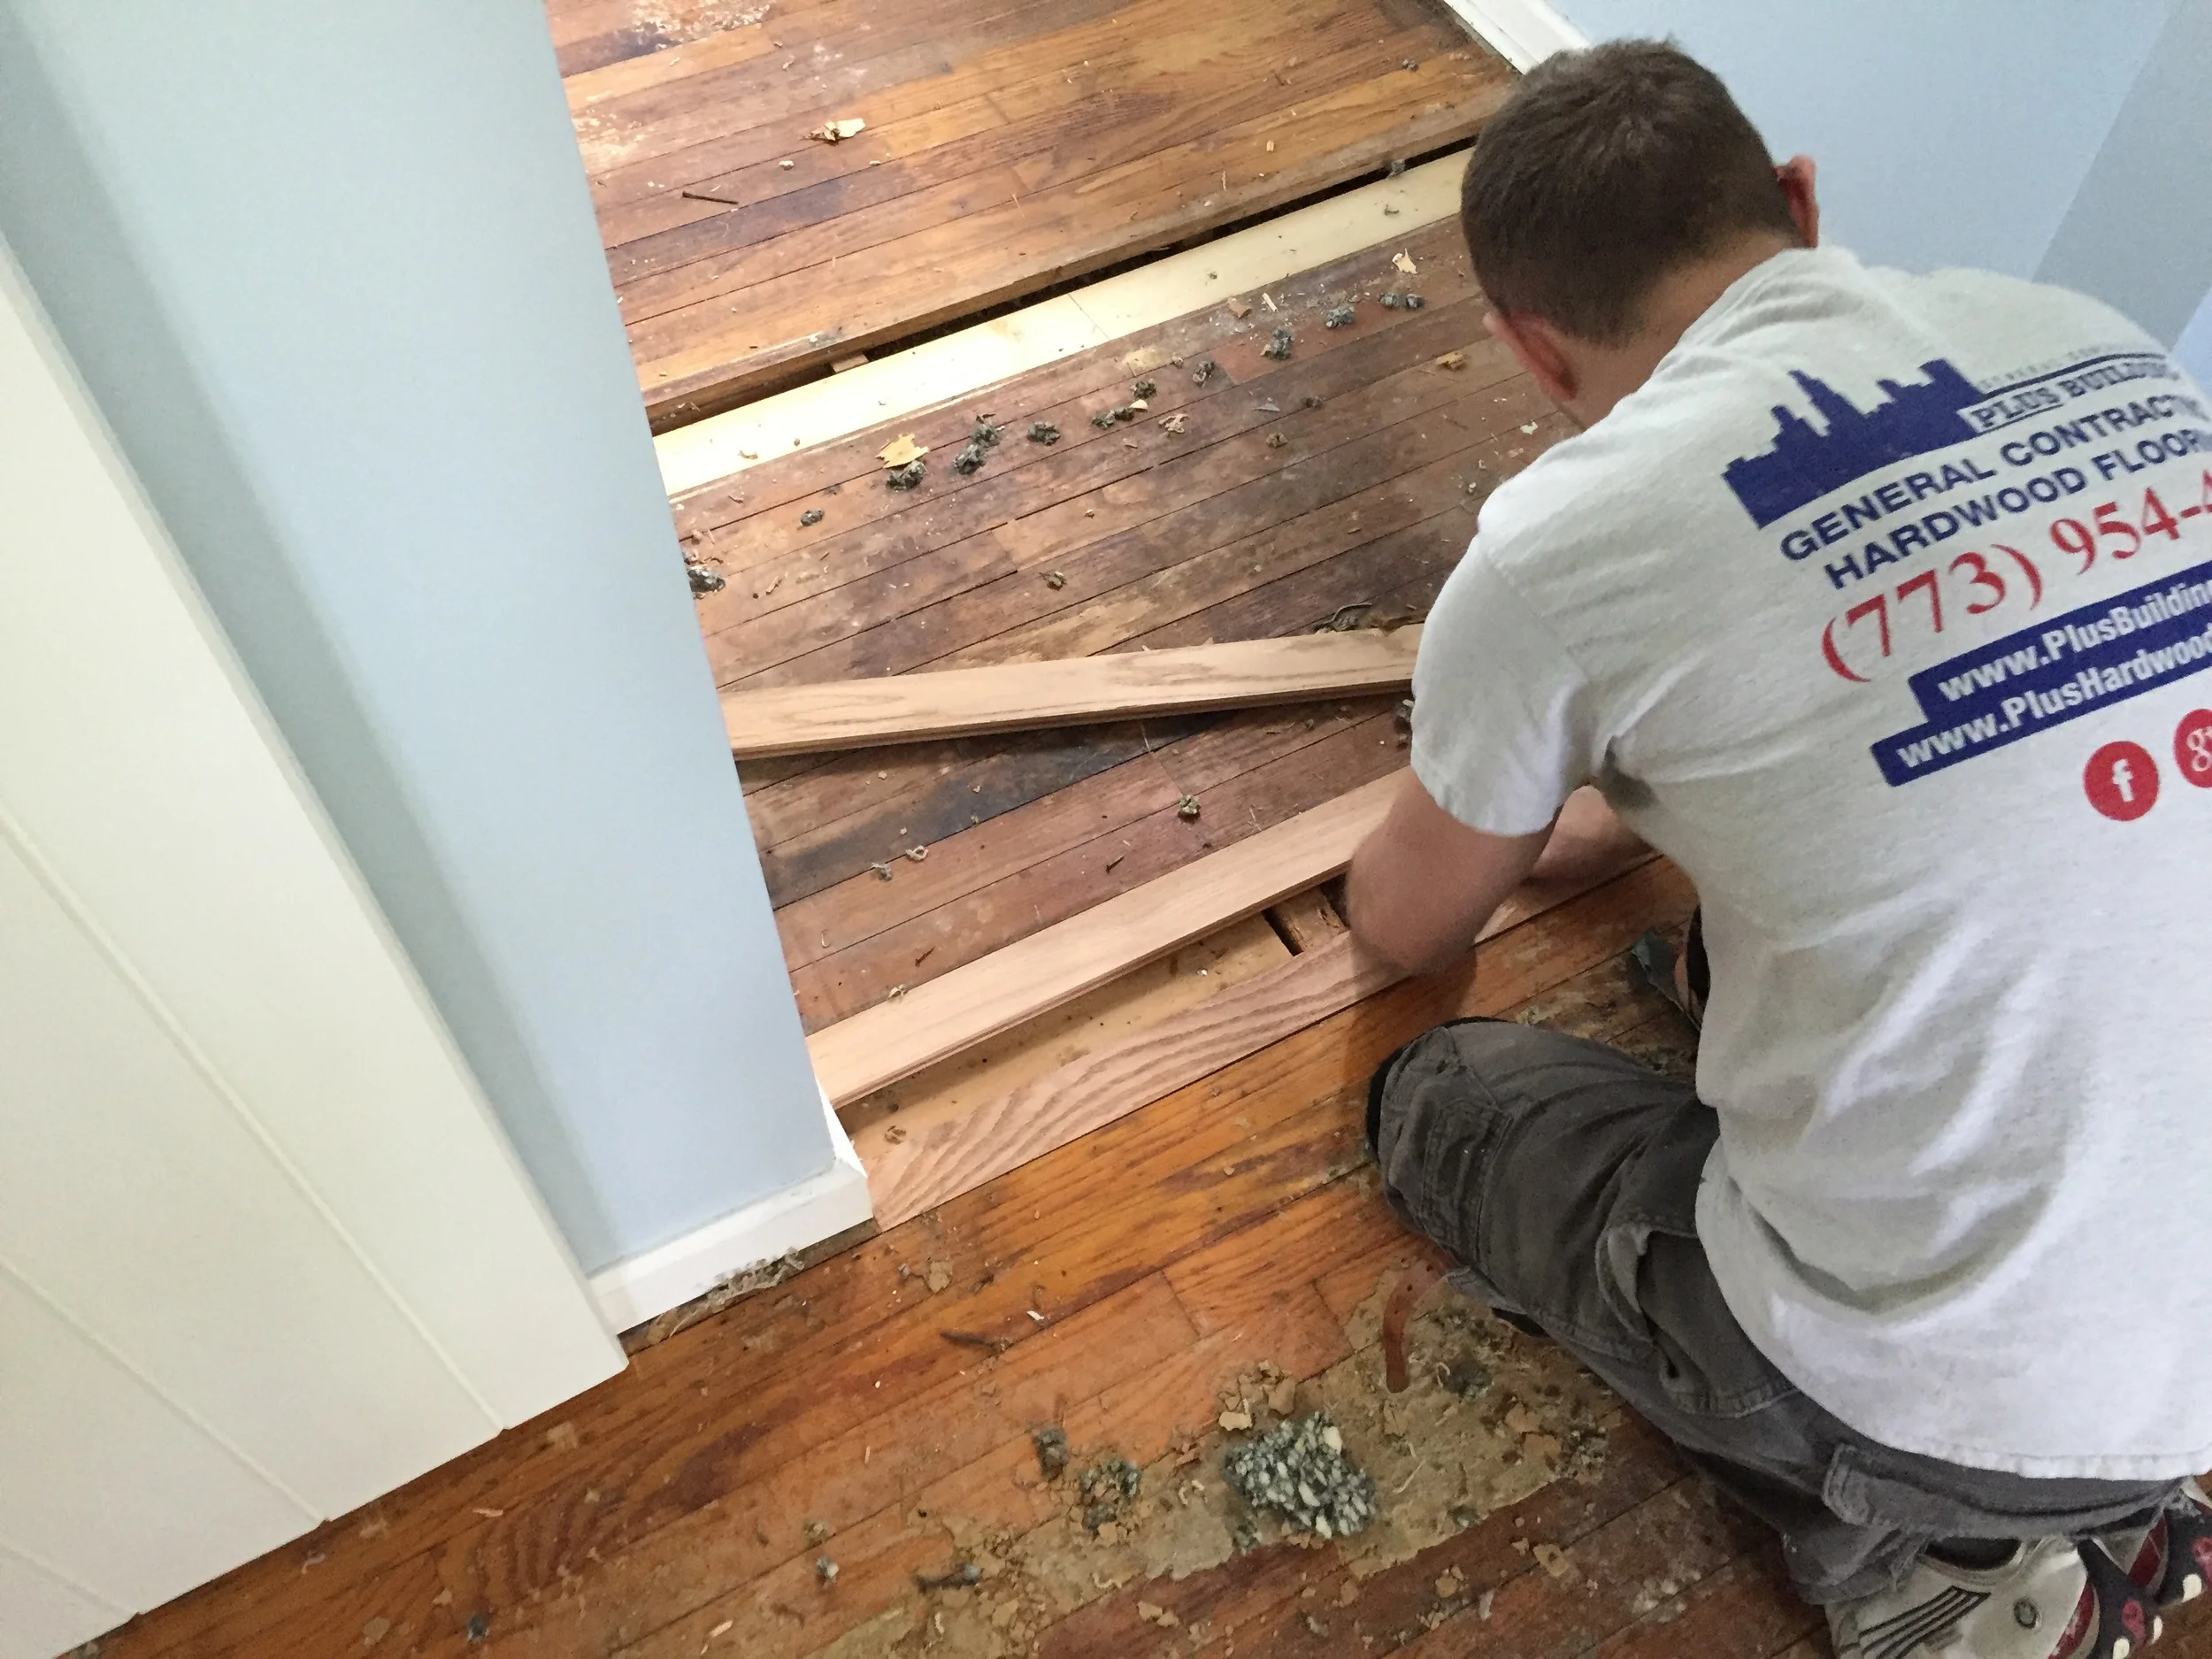
Styles come and go, and it's the same with hardwood floors. A particular color for a floor might be popular for a few years and then everyone gets sick of it and wants something different. That's been the case recently with floor colors. Customers really love darker hardwood floors. We love the way they look to. They can add elegance to any room. We recently began a project that involved resanding light ash floors and restaining them to a darker color. We'd like to share some of the results with you.
Styles come and go, and it's the same with hardwood floors. A particular color for a floor might be popular for a few years and then everyone gets sick of it and wants something different. That's been the case recently with floor colors. Customers really love darker hardwood floors. We love the way they look to. They can add elegance to any room. We recently began a project that involved resanding light ash floors and restaining them to a darker color. We'd like to share some of the results with you.
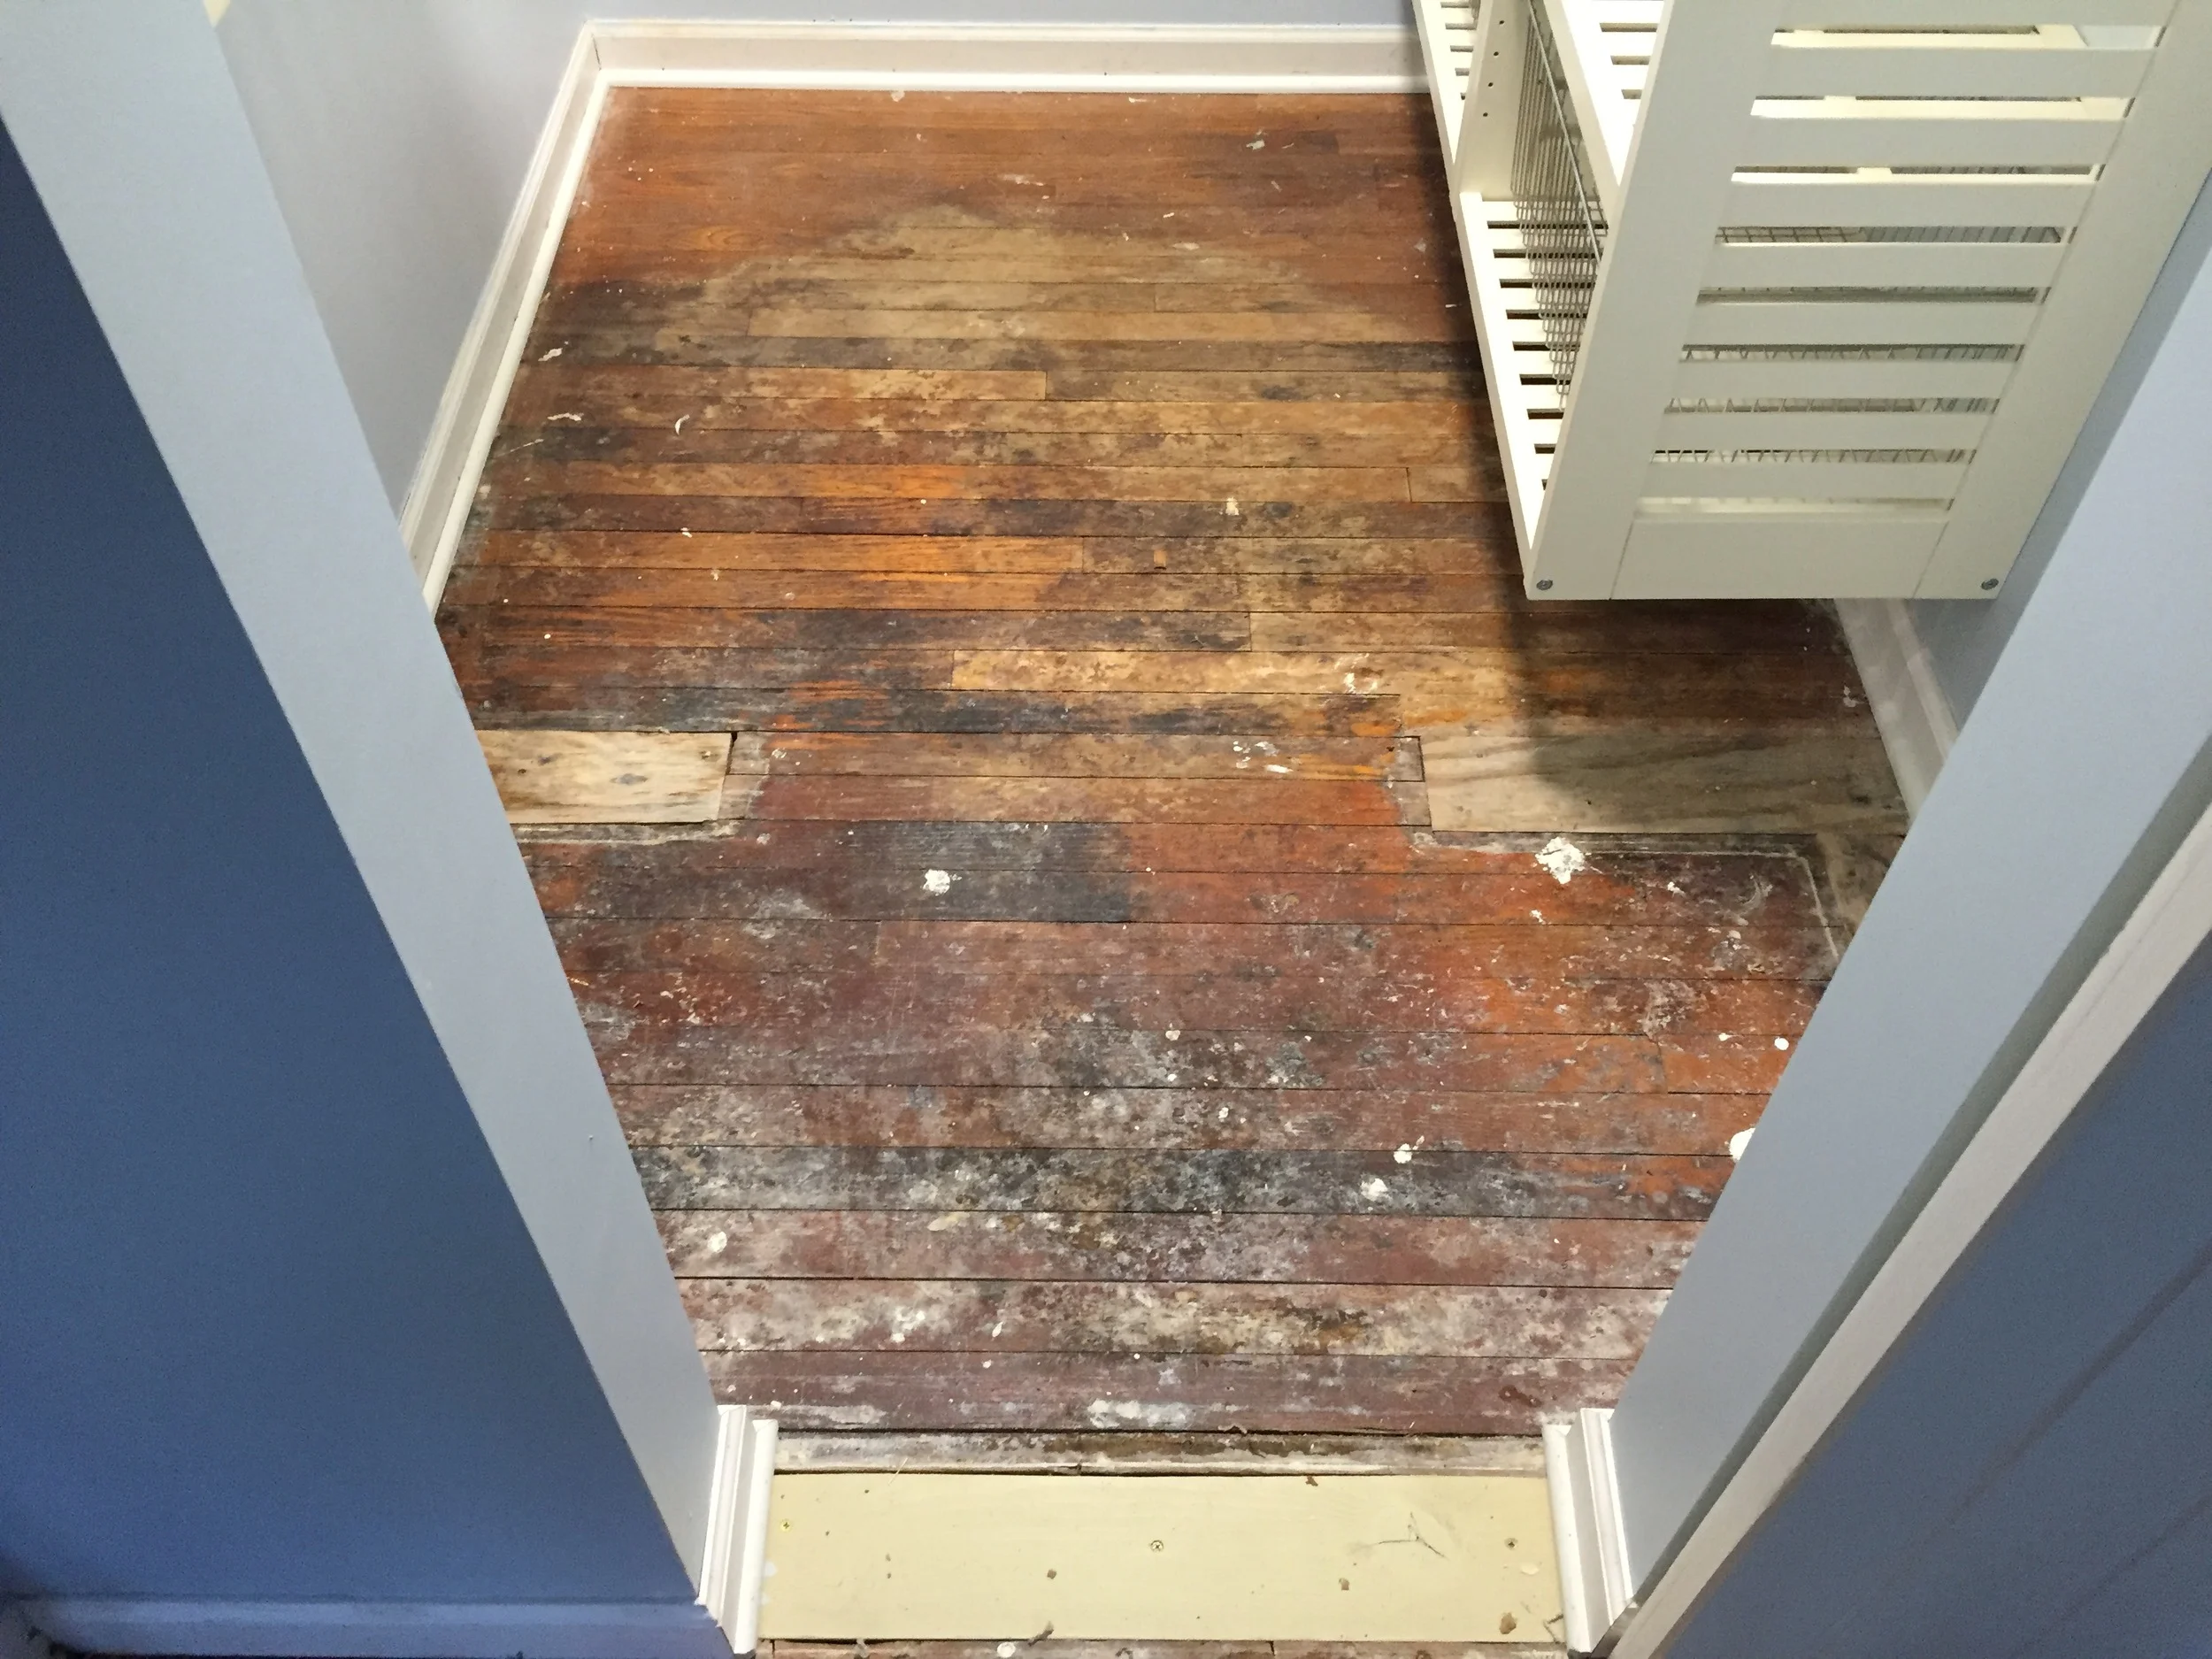
As you can see, these floors were very light. The owner had them done over 10 years ago. They held up well, but the customer wanted to have something a little darker. So we began with a resanding.


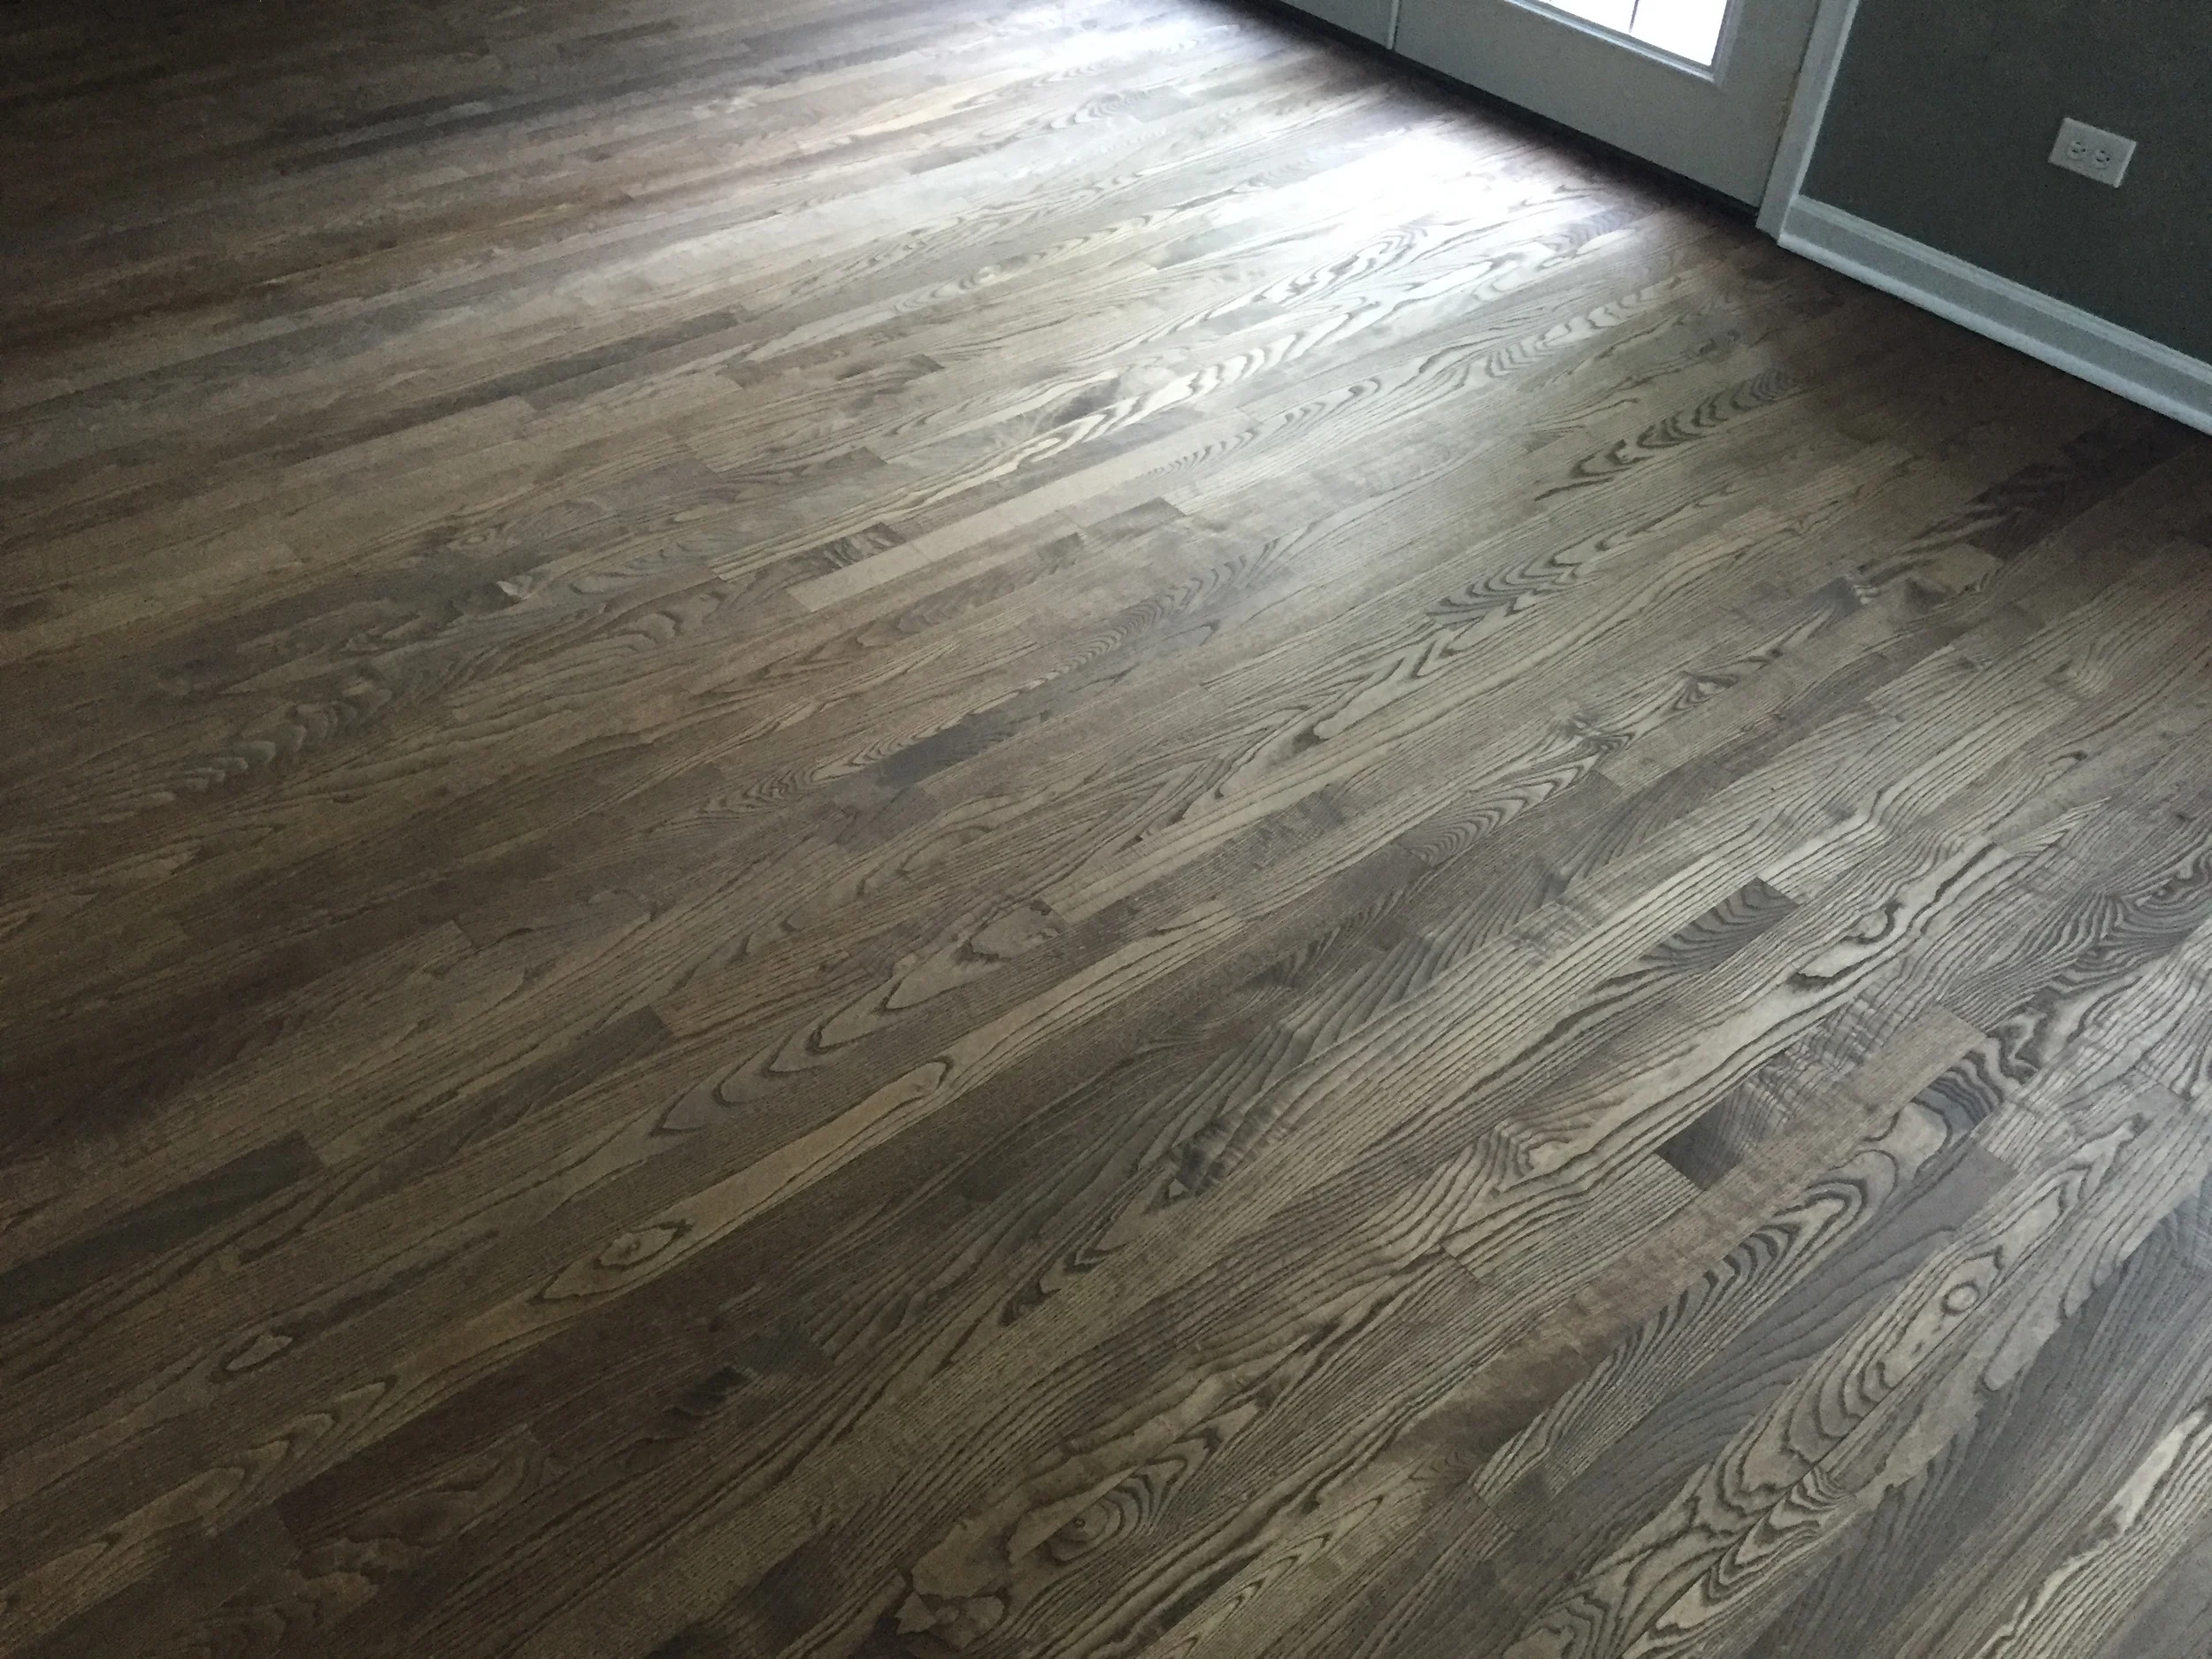
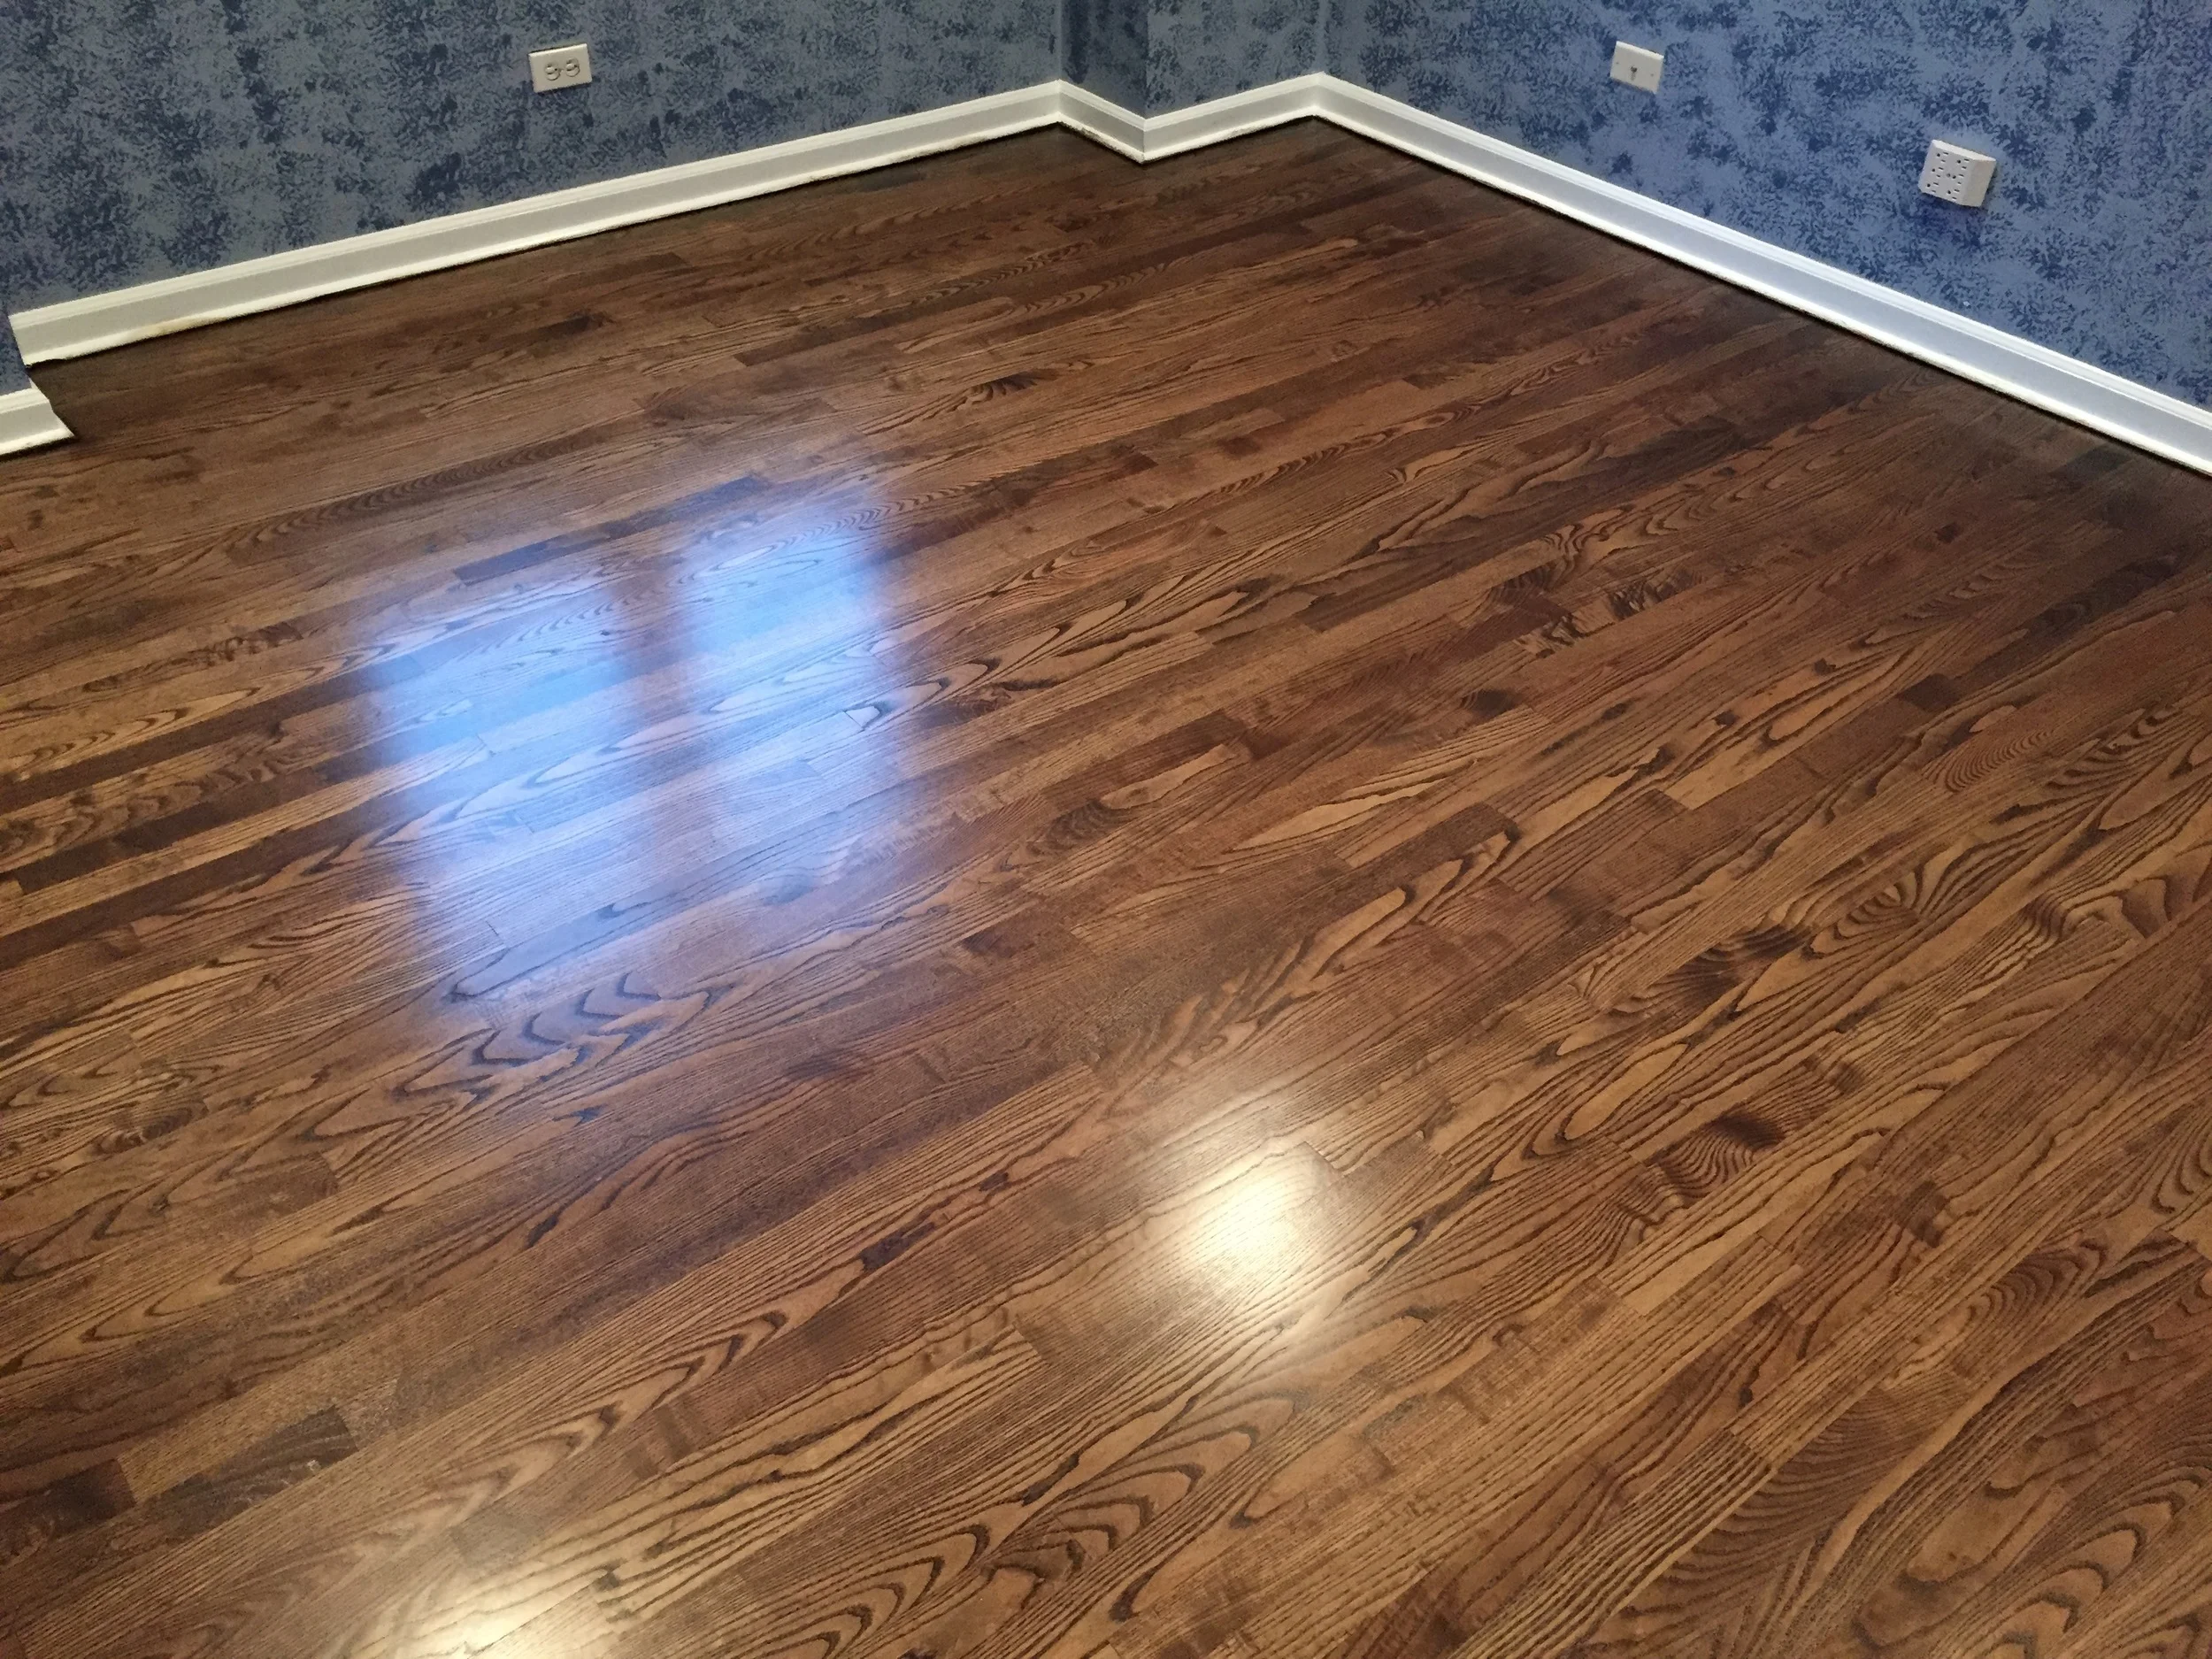
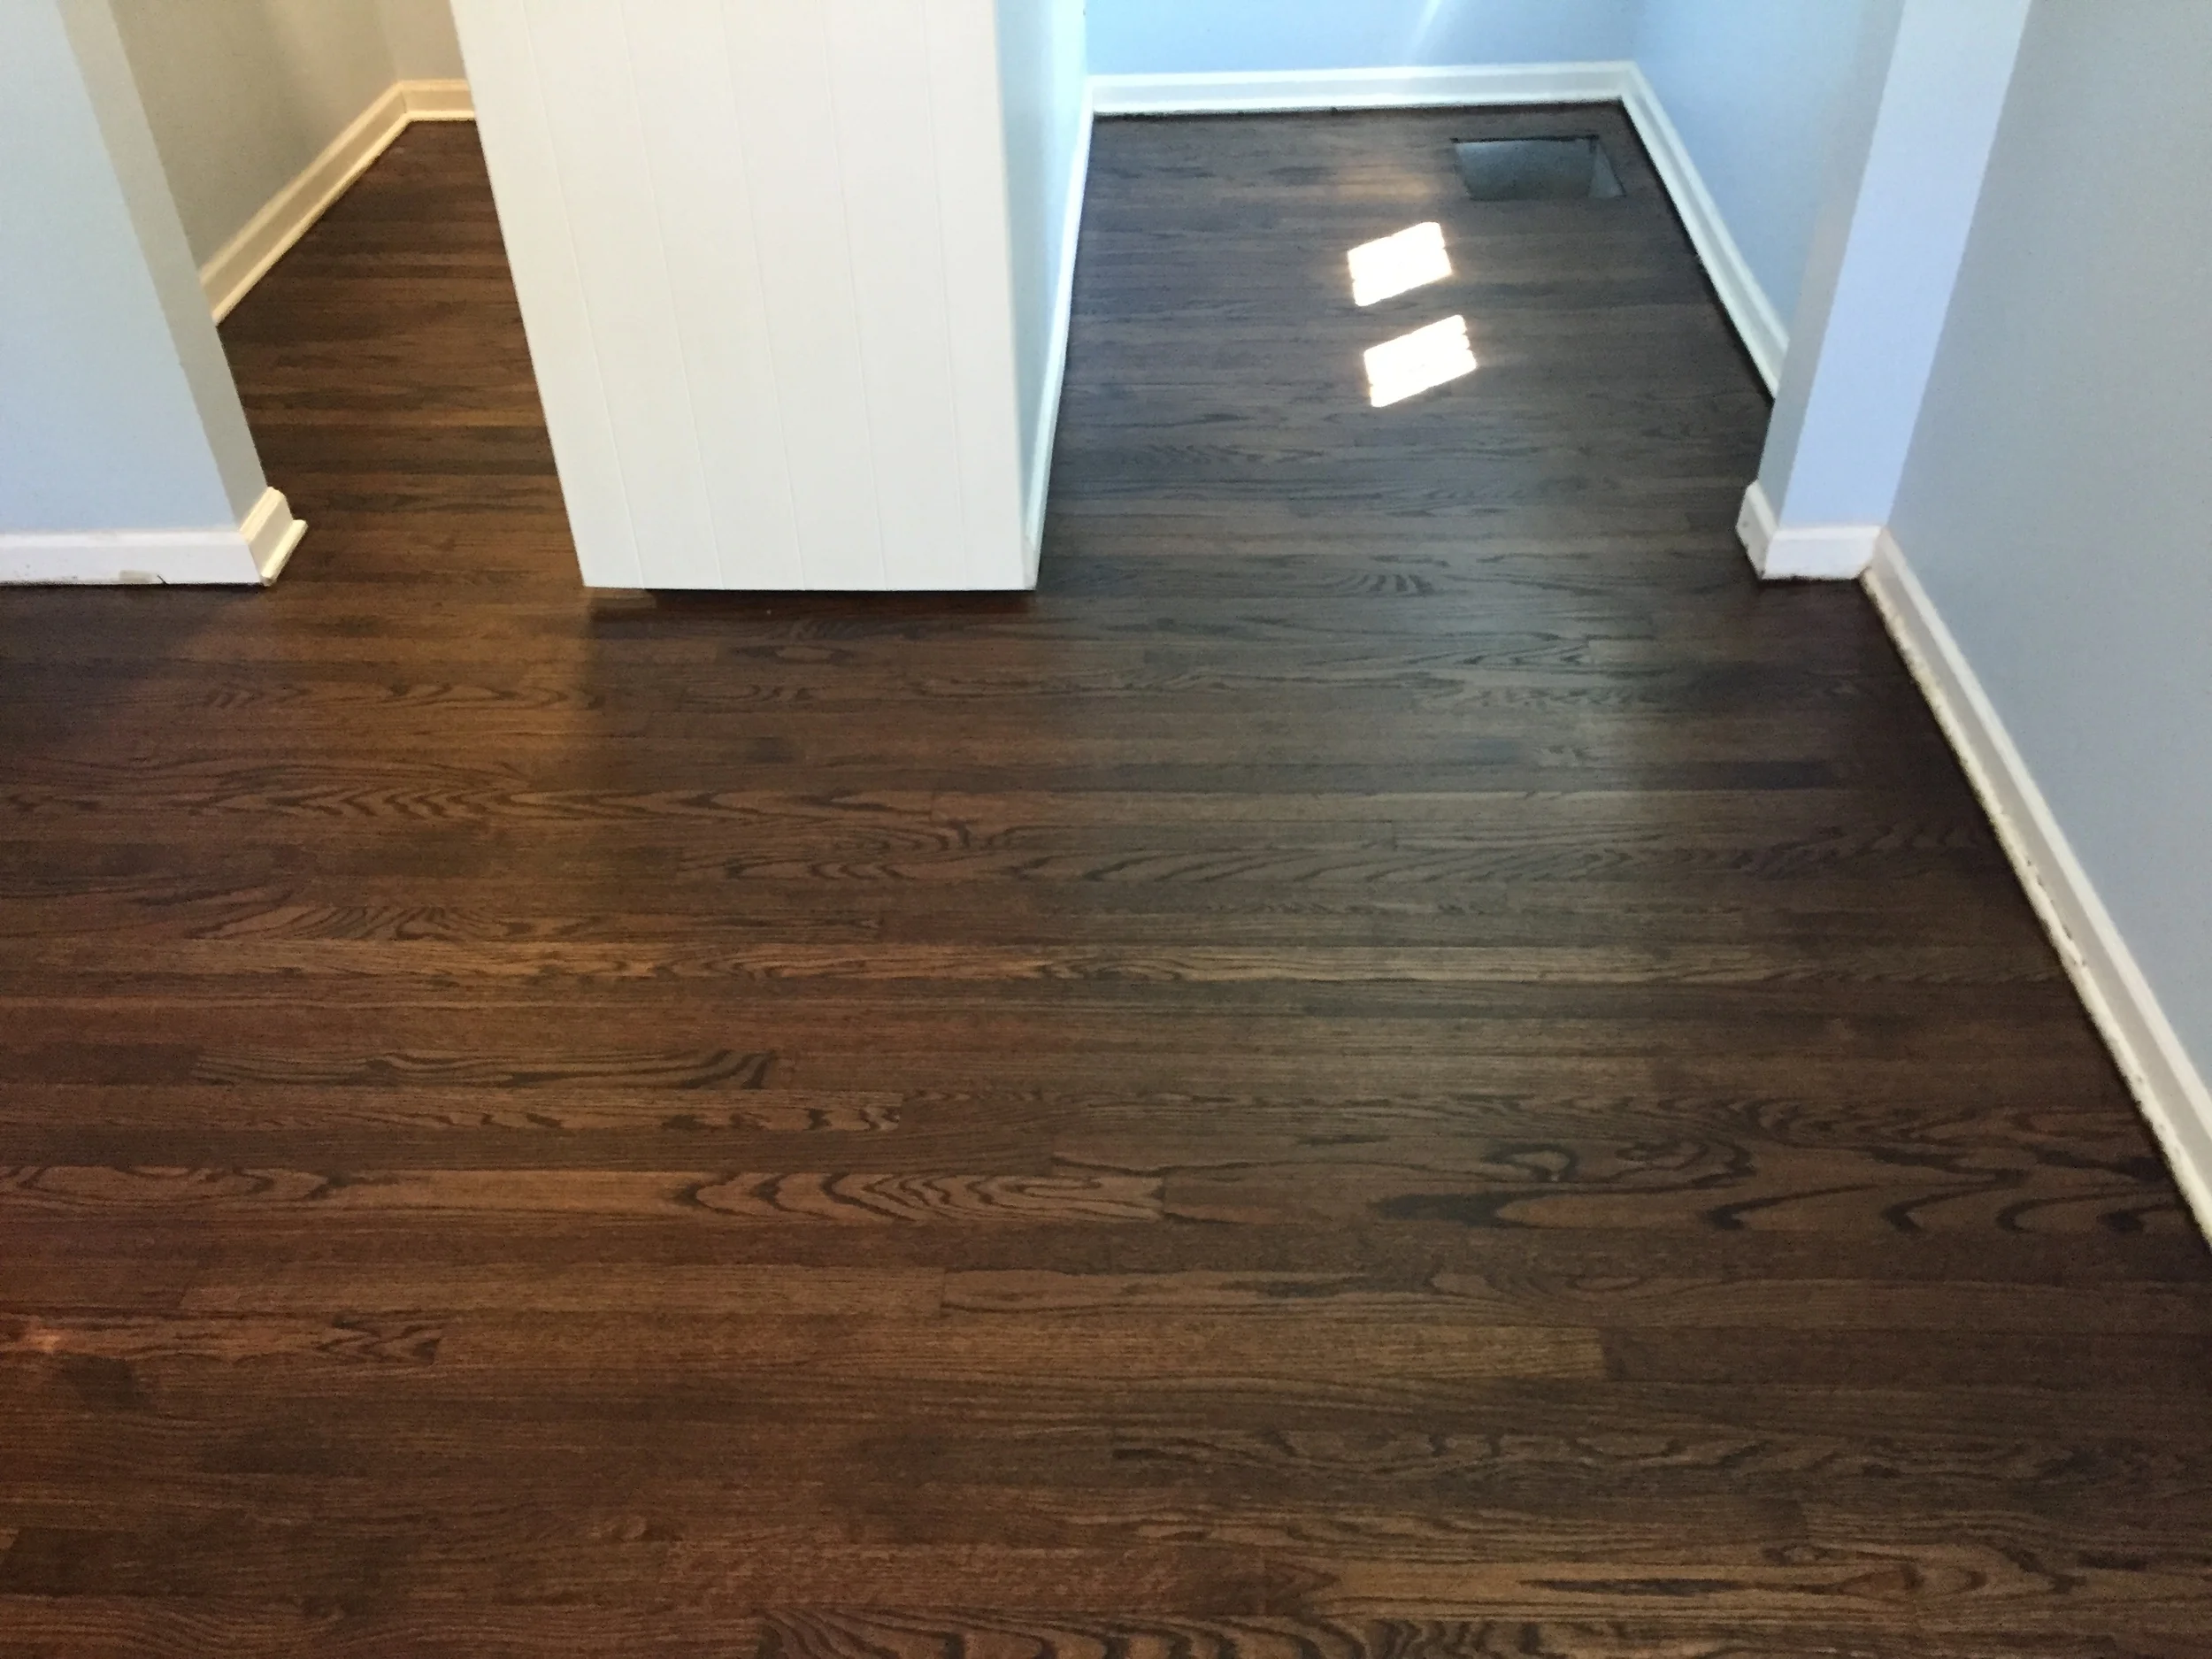
We're happy with how the floors are shaping up, and so it the customer. We wanted to share this because we thought it was great seeing just how much a color change can drastically change the atmosphere of a space. These rooms, and the greater home in general, feel completely different. Fresh hardwood floors can make your home feel like a new space and breath new life into it.
We hope this inspires you to think about your own home and possibly breathing some fresh life into your floors. If we did happen to pique your interest, we'd love to assist you with a free price estimate. Contact us here and we'll be in touch.
How To Prevent Cupping And Worse During The Summer
Summer is here and it's not a Chicago summer without some heat that comes from nowhere. To top it off, we have awful humidity that makes it hard to breathe. Humidity makes everything sticky, but it can also have some very serious repercussions on your hardwood floors. We want to give you some basic advice when it comes to hardwood flooring in the summer so you can avoid cupping in your hardwood floors. Moisture is a hardwood floor's worst nightmare, so it's important to understand how you can minimize the moisture inside of your home during these summer months in order to prolong the life of your beautiful hardwood floors.
Summer is here and it's not a Chicago summer without some heat that comes from nowhere. To top it off, we have awful humidity that makes it hard to breathe. Humidity makes everything sticky, but it can also have some very serious repercussions on your hardwood floors. We want to give you some basic advice when it comes to hardwood flooring in the summer so you can avoid cupping in your hardwood floors. Moisture is a hardwood floor's worst nightmare, so it's important to understand how you can minimize the moisture inside of your home during these summer months in order to prolong the life of your beautiful hardwood floors.
Make sure your home is properly ventilated.
Proper ventilation in a home is very important when it comes to extending the life of your hardwood floors. Moisture in the air can sit on hardwood floors if it's not properly ventilated and begin to affect the actual shape of the wood. We call this "cupping" can it can have fairly catastrophic effects. A floor that begins to cup is going to start cracking in the worst scenarios. Cupping creates waves in a floor that can be irreversible.
This is what cupping looks like.
If it's incredibly humid inside of your home and you're worried about the effect that humidity is going to have on your hardwood floors, we recommend getting a dehumidifier. They can be life savers as that they remove moisture from the air. Therefore, it's not going to end up in your floors.
There is a common mistake people make when they think about moisture levels inside of their homes. It's common sense to think that an air conditioning unit reduces the moisture inside of a home, but this is actually not the case. Moisture is only removed when the AC unit is running. So unless you plan on running that AC unit 24/7, it's not going to do enough to keep moisture levels down for long enough.
Basements and crawl spaces are some of the best places where you can run a dehumidifier. They can be very effective when it comes to keep humidity levels down. If you have hardwood floors, in a basement, you may want to seriously consider a dehumidifier. It can have very real benefits.
If you have any questions, we're always here to help. We love answering your questions.
How To Refinish Your Hardwood Floors - The Complete Guide
We've taken the time over the past few weeks to put together a guide that explains how refinishing hardwood floors works. The guide was split into parts to make it easier to consume in one sitting, but we also want somewhere that all the pieces of the process can be found at once.
We've taken the time over the past few weeks to put together a guide that explains how refinishing hardwood floors works. The guide was split into parts to make it easier to consume in one sitting, but we also want somewhere that all the pieces of the process can be found at once.
We received a lot feedback in regards to these guides. A few people out there were considering refinishing their hardwood floors and decided to call us instead because they didn't realize just how much work it was going to be. Likewise, we're sure that that a couple self sufficient individuals out there finally pulled the trigger and began their refinishing process. We hope it goes well for them.
Below are links to all of the "how to refinish your hardwood floor articles" that were posted over the past few weeks. We hope this serves as a great jumping off point that customers can use when it comes to understanding the complexities surrounding a hardwood flooring project.
How To Refinish Your Hardwood Floors
- Equipment
- Sandpaper and Wood Scrapers
- Begin Sanding With The Large Belt Sander
- Sanding The Edges With The Edger
- Sanding With The Random Orbital Sander
- Final Sanding With The Buffer
- Finishing A Hardwood Floor With Oil-Based Finish Or Water-Based Finish
As always, we hope you find this resource with all your future hardwood flooring endeavors. We're here to help. If you have questions, feel free to contact us.

How To Refinish Your Hardwood Floors: Finishing a Hardwood Floor with Oil Based or Water Based Finish
Well, we’re almost done! All that’s left is the fun, and enjoyable part of the process: vacuuming and applying finish. After your final buffing pass be sure to properly vacuum the entire floor. Do not leave any dust or debris behind. Next, it is highly recommended, all though not mandatory, to get a bona mop or something similar, attach a dry microfiber cloth or rag to the bottom, and tack the entire floor to clean up and remove any remaining dust left behind from vacuuming. This will produce the cleanest and smoothest finish and is a great habit to get into.
We conclude our series this week.We hope that you found the information as informative as usual. As always, we're here to help; we'll gladly take your questions.
Well, we’re almost done! All that’s left is the fun, and enjoyable part of the process: vacuuming and applying finish. After your final buffing pass be sure to properly vacuum the entire floor. Do not leave any dust or debris behind. Next, it is highly recommended, all though not mandatory, to get a bona mop or something similar, attach a dry microfiber cloth or rag to the bottom, and tack the entire floor to clean up and remove any remaining dust left behind from vacuuming. This will produce the cleanest and smoothest finish and is a great habit to get into.
Now, the question I always receive is, “What finish do I use Patrick!?” Well, unfortunately, that is not something I can just generically answer in this article. Every floor is different and each floor encounters different amounts of traffic and pets. The big question these days is do I use oil based finish on my floor or do I use water based finish? Water based finish, in my honest opinion is a much superior finish. However, it is MUCH more expensive than oil based finish (3 times more expensive, sometimes even 4 times more expensive PER GALLON). Water based floor finish is also much more difficult to apply. Why? Because of the drying time. Water based finish dries incredibly quickly and it is very difficult to continually stay working off of a wet edge, so the chance of lap marks and uneven spots if a novice is applying are very great. This is why for the first time user, even though I think water based finish is the superior product, I would recommend oil based finish. It dries slowly and gives you plenty of open time to smoothen and level everything out properly. Oil based finish is much cheaper and overall just much easier to work with for the first time user.
The next question is, "how do I apply it"? Well, let me tell you how not to apply it. Don’t listen to what Mr. Home Depot man tells you when he says you should buy the Minwax HD Brand polyurethane and apply it with a lamb’s wool applicator. I can 100% guarantee you that this will leave you unhappy, and in most cases actually force you to re-sand the floor. Applying with a lamb’s wool applicator is in some cases acceptable, however, it is VERY outdated and rarely ever used anymore. Although apart from the lamb’s wool applicator, the main problem lies in the finish itself. Home Depot is not a flooring company, they are a big name store simply providing people with the cheapest prices for some of the cheapest products available. In every case, the Minwax HD Brand Polyurethane is the absolute WORST choice you can make in picking a finish for your floor. This is the most important step after the sanding is completed. If you skimp out on the quality of the finish that you purchase, it will reflect poorly on your entire project and essentially turn out to be a huge waste of time.
Minwax products are not meant for hardwood floors, they are meant for cabinets and furniture. This is where I highly recommend you return to your hardwood flooring store supplier where you rented the professional grade equipment from and ask them for their recommendation on oil based polyurethane. There are many options: Duraseal, Masterline, and Poloplaz just to name a few. Any of those would be a great option.

Now the next step, how do I apply it? Well, in this case the industry itself is actually split right down the middle; many professionals apply finish with a T-bar, however, many also prefer to apply finish with a roller. I personally am a roller guy, so I will focus on that method. I have found that the perfect roller nap is 3/8 thick. That is what works for me and what has always worked for me in the past, though your preferences may be different. I’d recommend picking up the Purdy White Dove roller 3 pack that is usually on sale at the big box stores. This will be able to give you a fresh roller cover for the entire project, cleaning these is usually just a waste as it is very messy and overall just a better idea to have a clean roller cover for every coat to make sure previous debris doesn’t find its way into the next coat of finish.
You will also need a brush in order to cut in the edges of the room. The brush is 100% whatever your preference may be and any old brush should do just fine.
To begin, you must decide whether to work out of a bucket or pour straight onto the floor. For first time users I’d recommend working out of a bucket in order to not flood the floor with finish. Wet your brush in the bucket and cut in the edges of the room. Next, dip your roller into the bucket and begin rolling the entire length of the room. It is good practice to go with the grain of the wood, however, with rolling you can actually go against the grain as well and it will level out well if done properly. Be sure to work towards an exit in order to not paint yourself into a corner!
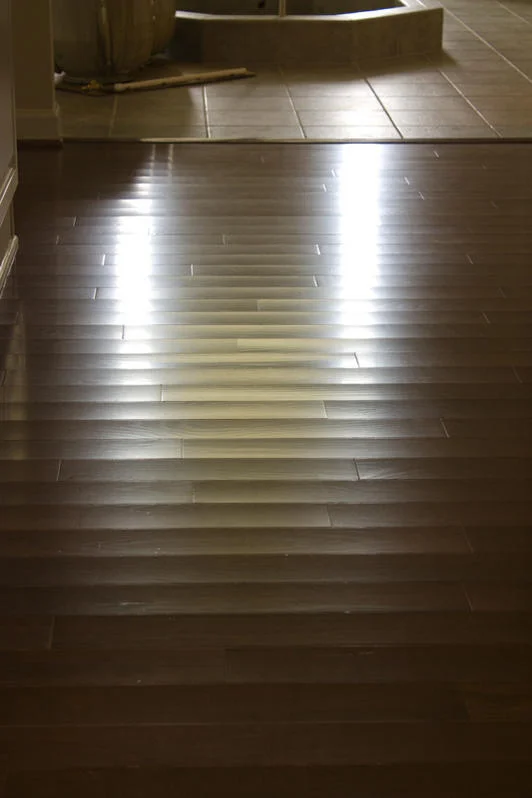
Once finished, throw away the roller cover and brush and let the floor dry overnight. When you return the next day the floor should be dry, however, you may be alarmed. The floor may not look spectacular or feel spectacular for that matter either. You might see lap lines and the floor could feel a bit sharp and have “texture” to it. Do not be alarmed. This is COMPLETELY NORMAL. You must now take a 150 grit, 180 grit, or 220 grit buffing paper and hand sand the entire floor lightly in order to not go through the finish, doing this should smoothen the floor and give off a white powdery dust. To speed up the process you can buff the floor or random orbit the floor, though doing this you run a greater risk of sanding through the coat of finish so I’d recommend just a quick hand sanding. It shouldn’t take very long. Next, vacuum the floor, tack the floor with a dry cloth again, and apply the final coat with the same technique as the first coat. Let the floor dry overnight and in the morning you should return to something as beautiful as this!
I wish you the best of luck with your next project!
- Patrick Dymora

How To Refinish Your Hardwood Floors: Final Sanding with the Buffer
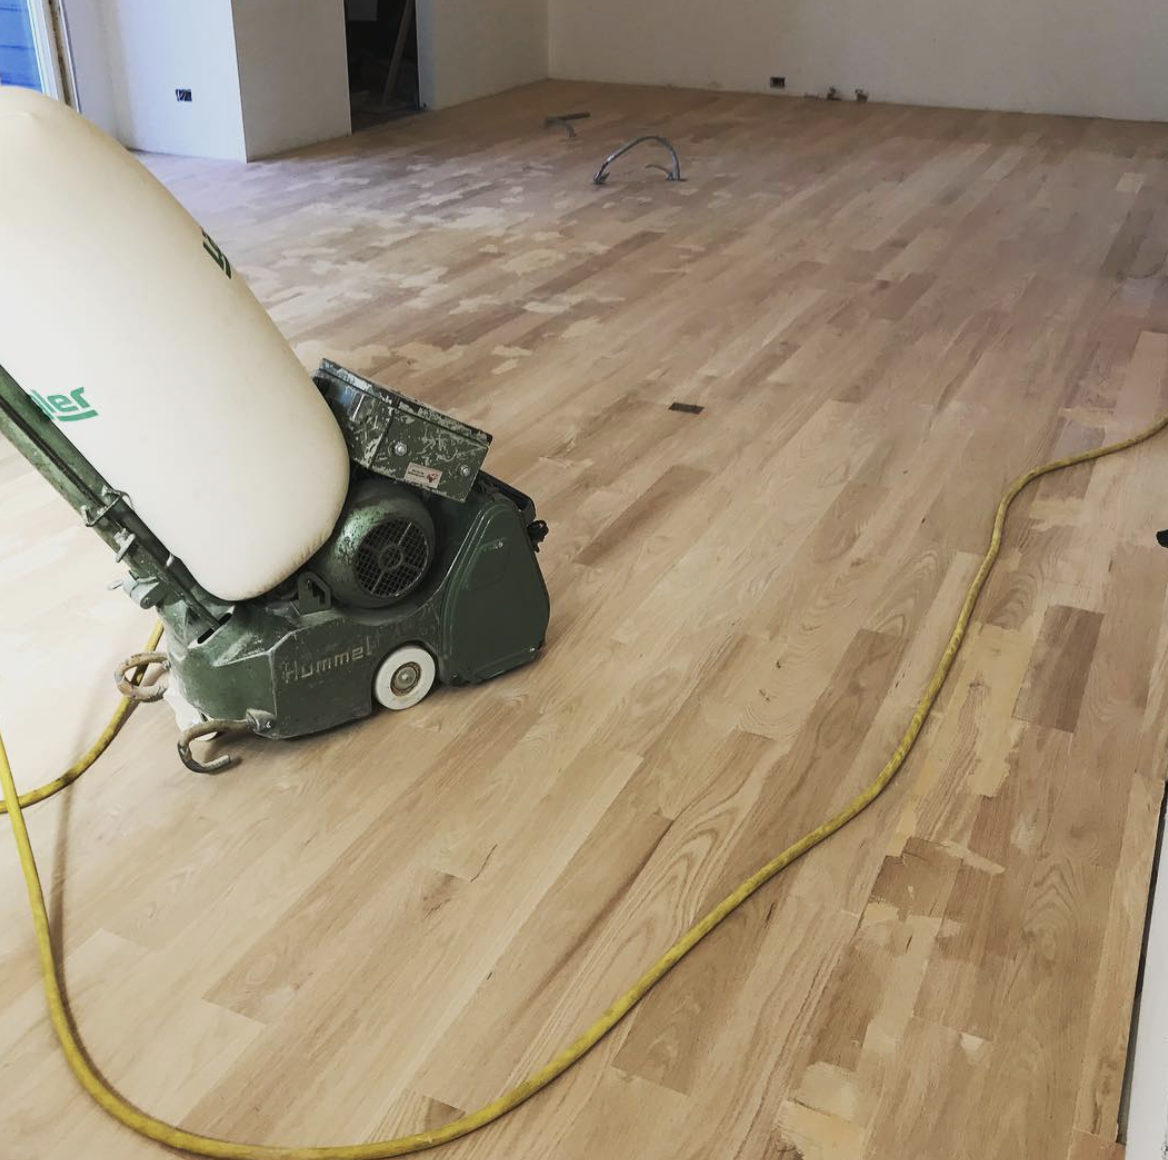
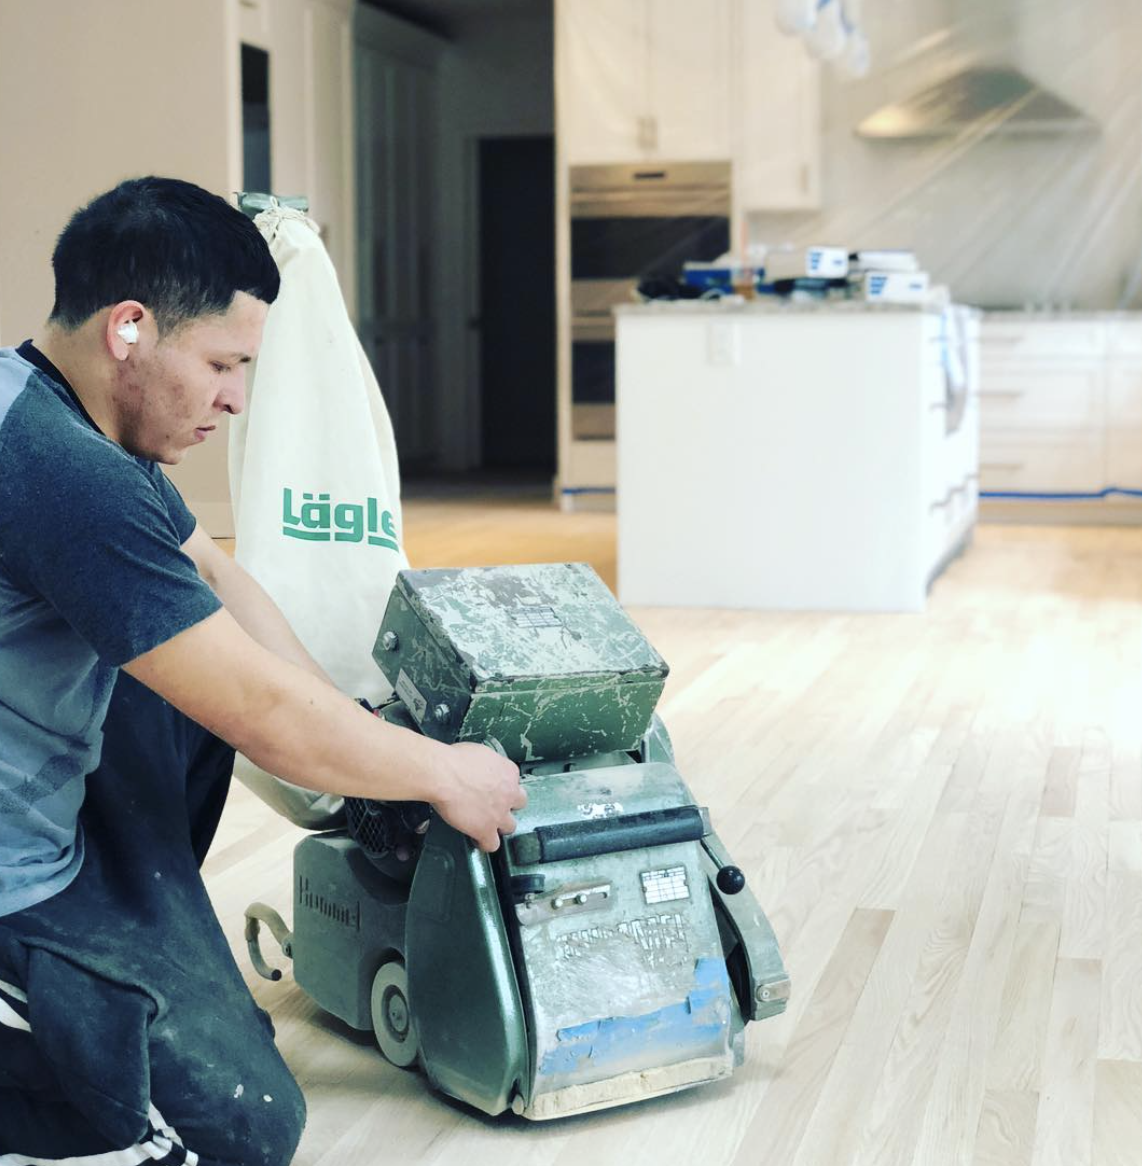
Well, this is it, we’re almost there! I’m sure you can see the finish line is close for this project, and I can too. If you’ve made it this far your floors should be looking really terrific. We have one more final step left to do, which is crucial; a final light buffing pass. We do this to blend all of the places that were edged, random orbited, and belt sanded together into one beautiful even sanding scratch pattern. This way no color differences or picture framing problems can occur. For this you will need your buffer, a driver plate, a thick white or red backing pad, and a 120 grit sanding screen. Attach it to the buffer and place the buffer on the floor as shown in the picture below.
We continue with our ongoing series. We hope that you find this useful. As always, if you have any questions, we're always happy to help and answer them.
Well, this is it, we’re almost there! I’m sure you can see the finish line is close for this project, and I can too. If you’ve made it this far your floors should be looking really terrific. We have one more final step left to do, which is crucial; a final light buffing pass. We do this to blend all of the places that were edged, random orbited, and belt sanded together into one beautiful even sanding scratch pattern. This way no color differences or picture framing problems can occur. For this you will need your buffer, a driver plate, a thick white or red backing pad, and a 120 grit sanding screen. Attach it to the buffer and place the buffer on the floor as shown in the picture below.

Before you begin actually buffing the floor, I’d like to take the time to warn you that the buffer is VERY tricky to get the hang of. Make sure you start in the middle of the room, away from any windows and walls because it is very difficult to balance the machine well if you are a first time user; this was by far the hardest piece of equipment for me to get used to when I was learning my way into the business. My best advice would be to immediately adjust your handle level if the buffer is trying to get away from you or bucking too hard. Once you start the buffer begin to move back and forth very quickly almost kind of skimming the surface with it, it is also good practice to go with the grain of the wood when buffing a floor although on a natural hardwood floor without staining it does not matter. You have taken the time to properly Randomly Orbit out edger marks and the Belt Sander lines in the floor so the main priority here is to just properly go over the entire floor with the buffer making sure everything blends evenly into one even sanding scratch pattern.

How To Refinish Your Hardwood Floors: Sanding With The Random Orbital Sander
We continue our ongoing series with some instructions pertaining to the orbital sander. As always, if you have any questions, feel free to contact us.
We continue our ongoing series with some instructions pertaining to the orbital sander. As always, if you have any questions, feel free to contact us.
I believe that this is arguably the most important part of the whole process. At this point, your floor should be completely sanded and have no finish remaining besides the small corners of the room that the edger did not reach.
Your floor should have a distinctive line where the big machine was sanded and turned around to sand the other direction, as well as the edges being distinctively different from where you had run your edger. We must take care of all these areas before we begin our final sanding with the buffer.
To do this, take your Random Orbit Sander, whichever one it may be, and attach to it a sheet of 80-grit hook and loop sanding paper. We must sand with the Random Orbit sander the last grit that we left off with on our belt sander and edge sander. Start by doing the entire perimeter of the floor. You will need to randomly orbit every single spot that you edged.
Having a nice bright halogen lamp is VERY helpful in this situation, it will highlight any edger marks and “swirls”. You must run the random orbit sander over these swirls to get rid of them around the entirety of the room. Anything you do not take out with this sanding pass WILL show up on your floor after it is completed so be sure to take extra time on this step.
Next, you will need to find your “Connecting Line” where you sanded the belt sander in one direction and then turned around to start sanding the other side of the room. This should leave a very distinctive line, take the time to also run the Random Orbital Sander over this line until it is no longer visible.
Attached are two pictures of what you should be looking for in both areas while doing this.


Once you finish with the random orbit sander, be sure to clean the machine and pack it away safety as you will no longer be needing it. Before we begin buffing the floor for our final sanding pass, you may have noticed the corners still have finish on them and they are not sanded! They should look something like this:


Hand Scrape Tool
To get these corners looking like the rest of the floor, we have two options as discussed in prior chapters.
We can either:
Scrap the corner, or
Use a multi-master Dremel tool
Scraping is an old technique that requires constant sharping of the blade and can be very dangerous so attempt it with caution. It is pretty self-explanatory, pull the scraper across the corner going WITH the grain until you have removed all of the finish. Be sure to hand sand the corner lightly with 80-grit sandpaper to blend the rest of the floor well with it.
Another option is our multi-master Dremel tool. This is also very self-explanatory and much easier on the hands. You do not run the risk of cutting a finger while using this machine! Simply stick some 80-grit sandpaper to the triangular head of the sander and sand the corner until all of the finish is removed just like the rest of the floor.

Dremel Tool